How to prepare the beds in the spring for planting. Spring preparation of beds for high yields. How to fertilize carrots in spring when planting in a garden
It is usually customary in the spring to once again dig up a vegetable garden and a garden, wrapping layers of earth. I am against this concept, so I will not talk about how to dig. A bad thing is not a tricky one. If you decide out of habit to ruin your wet nurse by digging, do it without advice.
I want to talk about how to prepare the soil for planting without using a shovel or cultivator.
How to ensure the looseness of the soil?
Of course, it is better to take care of the looseness of the soil in the fall. But if suddenly, for some reason, you only decided at the beginning of the season that you will adhere to Organic farming and, you will no longer dig, then you can catch up, albeit partially.
As soon as the snow melts, it is necessary to immediately sow the entire sown area with green manure.
Oats and rye loosen the soil well with roots to a great depth. Phacelia and white mustard, although they do not have deep roots, give an abundant green mass, which can then be used as mulch.
- For heavy soils that are silted or caked during the winter, I would recommend sowing oats or rye.
- For lighter soils, sand or sandy loam, it will be enough to sow phacelia, vetch, mustard or oil radish.

To prepare the soil for planting green manure seeds in the ground, there is no need to dig a vegetable garden. It is enough to sip it with a regular glanders or use Fokin's flat cutter... It is necessary to deepen the seeds only 0.5 - 2 cm deep into the soil.
You can sow / scatter seeds on untreated soil and only then weep the area. When glanders break the topsoil to a depth of 5 cm, some of the seeds will mix with the soil and hide under it. There is no need to try to deepen all the seeds. Then you can level the soil with a rake as needed. If the spring is dry, then after sowing the siderates, the garden must be watered.
After a week or two, friendly green shoots should appear. It will be great if they get ahead of the germination of weeds, leaving them no chance and room for development. When the green manure plants reach a height of 20 - 25 cm, they can be mowed, leaving the root system in the soil to rot.
In the beds where it is planned to plant seedlings of peppers, tomatoes, cucumbers, melons and other thermophilic vegetables, green siderates do not need to be touched until the vegetables are planted. Until the time X, when it will be necessary to plant seedlings in the ground, the greenery will develop to such an extent that it will cover the immature seedlings from the scorching sun, wind and bad weather, and also protect against sudden frosts.
It is necessary to plant seedlings in the holes dug right in the green manure; around the seedling sprout it will be necessary to free a place with a diameter of 10 - 15 cm from the green manure. You can cut or pull out the green manure plants and mulch the soil around the seedlings with them. When the sprouts cultivated plants will get stronger and develop enough, the siderates will need to be carefully trimmed with a flat cutter.
The green manure roots left in the soil will not only help to loosen the soil to a sufficient depth, saturate it with air, make it water and moisture permeable, but also rotting, saturate the soil with nutrients. So there will be no need to apply manure to the soil.
How to increase soil fertility?
In addition to sowing green manure, soil fertility can be increased in another way. Moreover, the method that I will now describe works more effectively in combination with green manure crops.
Meet - Effective Microorganisms
You probably guess that the soil is not a dead substance, that microorganisms live in it that break down organic matter, help plant roots to breathe and receive nutrients... But there are also microorganisms that harm plants. The balance of these two forces depends only on you.
Digging up your garden, preparing the soil for planting, you inevitably reduce the amount of useful flora and fauna that perishes from sunlight and air when you turn over layers of earth.

After several years of using the wrong agricultural practices, the amount of useful microflora becomes so critically small that even the introduction of tons of fertilizers and manure does not bring the desired result. And all because there is simply no one to split these fertilizers and manure into elements available to plants.
My recipe for increasing soil fertility is to replenish the population of beneficial microorganisms in the soil in time.
In shops for gardeners and truck farmers, you can find the following preparations: "Emochki", "EM-1", "Baikal-1", "Emochki-Bokashi", "Oksysin" or other analogs.
At the beginning summer season, before sowing green manure or even during sowing or immediately after, it is necessary to add effective microorganisms to the soil. For this, you can purchase drugs in liquid form. According to the instructions on the packaging, the contents must be diluted with water in a certain proportion. The resulting solution should be sprayed all over the soil or watered with a watering can. If you use a sprayer, then the consumption will be much less.
Effective microorganisms will revive, multiply, and begin to recycle all the organic matter that is in the soil. The roots of cut green manure will also be processed.
When you sow or plant the main crops, then nutrients will already be ready for them, which, moreover, will be in a form available for assimilation by plants.
How to protect yourself from diseases and pests?
Spring has just begun, and you need to take care of maintaining the health of your future harvest now. You should not wait for the appearance of pests or signs of disease on your plants, it is better to prevent all this.
Perhaps you thought that I will now tell you how to poison the bear and the larvae of the May beetle. But you are wrong. I am not a supporter of the use of chemical insecticides and other drugs that poison the soil, and with it our future harvest. Any problem can be dealt with with biologics.
Meet:
- Metarizine- an effective biological product based on a fungus that destroys the bear, May beetle larvae, wireworm and other pests living in the soil. He does this gradually, during the season, but for a long time - for several years.
Metarizine can be applied directly to the soil in early spring together with any other biological products or fertilizers. The unique composition of the drug includes sodium humate, which increases soil fertility and at the same time develops immunity from diseases in plants.
- Agrozin- the preparation improves the structure of the soil. If you treat the soil with Agrozin before or during planting, the plants will quickly grow, and then give a wonderful bountiful harvest.
You can add Metarizin and Agrozin to the soil at any time. The preparations are diluted in water, then they can be sprayed on the soil or poured from a watering can. The use of these drugs is a guarantee of your peace of mind for several years. And good harvests will not be long in coming.
In conclusion, I would like to note that all of the above measures for preparing the soil for planting seeds or seedlings work well in combination. Siderates, Effective microorganisms and biological products will provide you with a bountiful harvest of organic food, and at the same time you will not spend too much time fighting annoying pests and introducing manure into the soil or mineral fertilizers.
In order for the harvest harvested from the fields to be rich and healthy, the farmer must know the basic properties of the soil, its types and the rules for preparing before planting plants. By improving the qualitative composition of the soil and using biologically and chemically active preparations, the owner will be able to increase the yield and quality of the harvested products.
Soil is a substrate, a formation consisting of small solid particles of organic or inorganic origin with a distance between them that allows oxygen and water to penetrate into it in certain quantities. Soil is the main, most important and valuable resource in agriculture. The yield depends on the condition of the soil, its saturation with mineral elements, nutrients, water and air, and, as a result, the profitability and efficiency of any production. For a long time, the possession of fertile soil in the property was considered a sign of prosperity, and the ability to properly cultivate it a century or two ago was one of the most important skills of any average person.
Basic soil properties
As an agricultural resource, soil has the following properties:
- irreplaceable;
- limited quantity;
- inability to move;
- fertility.
These features emphasize the need for an exceptionally careful attitude to soil resources and constant care for increasing soil fertility (fertility is such a soil structure in which plants are freely provided with water and minerals).
The natural level of fertility rarely disposes to growing whimsical to conditions that require a large number nutrients of cultivated plants. In addition, it decreases over time, since the amount of nutrients is limited, and each plant planted on a given soil absorbs them. Fertilization, organic or mineral, weed control, crop planting herbaceous plants By using uncultivated and high-tech soil cultivation systems, any agricultural enterprise or farm can achieve a high level of so-called effective fertility: the condition of the soil in which it is able to supply a given amount of plants with nutrients.
Scientists argue that, in terms of texture, the best soils for growing various crops are humus-rich, loose sandy loam and loamy soils. Agriculture is carried out in areas with suitable for cultivation soils, with typical for the area and easily tolerated plants climatic conditions... Small-scale production doesn't make sense. In this regard, agro-industrial enterprises, as a rule, are based on plots with a large area, which leads to the need for mechanization of production.
Over time, any productive force wears out. The soil, on the other hand, with the rational use of its resources, regular fertilization, and restoration work does not deteriorate, but, on the contrary, it becomes better, the soil fertility increases. It performs many functions in the biosphere, the main ones are:
- is the habitat of some animals;
- is a "supplier" of plant nutrition;
- collects and accumulates an impressive amount of chemical energy;
- maintains the balance of the biosphere.
All of the above speaks about the value of the soil and its exceptional benefits with proper, rational use. To ensure optimal conditions for the germination of the crop, it is necessary to carefully prepare the soil.
First, you need to understand what type of soil should be cultivated:
- Clay soil is hard, with strong moisture, such soil becomes viscous, easily deformed, but breaks with difficulty. Some varieties of roses, irises, raspberries, figs, apple trees, cherries, hawthorns, many legumes and nightshades grow on such soils.
- Loamy soil in a dry state is ground into powder, upon detailed examination of which sand grains and dust particles are found. When wet, it becomes easily deformable. On such soils, in the conditions of the development of modern agricultural science, any crops grow, but the highest yield is given by plants of the legume, cruciferous and solanaceous families.
- Dry sandy loam soil is ground into a homogeneous powder between the fingers. On examination, you can distinguish sand. Wet is difficult to deform. Suitable for growing various root crops, legumes and crucifers.
- Sandy soil in a dry state is a coarse powder. Does not deform when moistened. Allows to grow some nightshades and root vegetables.
- Crushed or cartilaginous soil contains clay, sandy, crushed stone and cartilaginous particles. Suitable for growing conifers.
Preparing the soil before planting
There are several methods of soil cultivation, the combination of which gives a complete preparation of the soil for sowing:
- Mechanical loosening.
- Fertilization with organic and mineral substances.
- Treatment with biologically and chemically active substances.
Mechanical loosening
Mechanical loosening is done in order to saturate the soil with oxygen and minimize obstacles to the plant's root system. It can be made with your own hands or with the help of special equipment, be simple or double.
Before starting loosening, it is checked whether it should be done. If the soil crumbles easily from a depth of 8-20 centimeters, then loosening is possible, the absence of this effect indicates that loosening is early.
Before the procedure, all plants are removed from the selected area. The top layer of sod is removed by about 8-10 centimeters. Double (plantation) loosening is carried out at a depth of 45-60 cm, which improves drainage, destroying the hardened soil layers. When the sod is removed, a kind of "trench" no more than 30 cm wide is dug out in strips over the entire area, the earth dug out of one "trench" is poured into another. After the end of the plantation loosening, the soil surface rises slightly. Planting begins after leveling the soil.
The lack of organic and mineral substances is filled with fertilizers. For example, with an increase in the acid-base balance, sulfate-containing fertilizers are introduced into the soil, and with a decrease in it, limestone. The mineral balance of the soil is determined by special devices.
Any plant waste is suitable as organic fertilizers - sawdust, fallen leaves, small pieces of tree bark, dead herbaceous plants, cut grass, rotten fruits. All this is collected in one container, poured, and after two months it is ready for use.
Features of soil preparation for sowing:
- The training is carried out annually.
- It is necessary to create a fertile soil layer with a thickness of 35-40 centimeters, every year the thickness of this layer should increase by 3-5 centimeters.
- Cultivation of the soil is mandatory.
Treatment with chemically and biologically active substances
Microorganisms play an important role in creating soil fertility. Microorganisms are involved in many processes, such as organic decomposition. The microbial cenosis on plant roots is strictly specific. Microorganisms help the plant to feed, sometimes they carry out protective function... Some microorganisms are able to break down harmful substances- phosphates. The formation of humus is completely due to the activity of microorganisms.
Before sowing, the preparations "EM-1", "Oksizin", "Baikal-1", containing microorganisms that maintain soil fertility, are introduced into the soil. Phytocide preparations or pesticides are introduced to combat plant pests.
Preparing the soil in a greenhouse follows the three steps described above. Fertilizers rich in magnesium, molybdenum, manganese, nitrogen, calcium, potassium, sodium, boron are introduced. For example, siderates.
Siderata are plants that easily form a shoot, grown on arable land. These plants are subsequently "plowed" into the soil, become sources of organic matter and habitat for soil microorganisms. The most commonly used siderates:
- representatives of the legume family (clover, sweet clover, vetch and others);
- representatives of the Cruciferous family (shepherd's purse, rapeseed, and others);
- representatives of the Cereal family (Sudanese grass, granary and others).
They should be sown in spring (from March to April) and in autumn (after harvest), and plowed up 1-2 weeks before planting crops. It is also important to moisten and warm up the soil in early spring, since in greenhouses it usually dries out very much, therefore it is a good heat insulator. For this, it is recommended to warm up the ridges simultaneously from three sides after the soil has been loosened. Small grooves can be made to increase the contact area warm air with soil. After that, the soil is moistened with an EM solution and watered.
Preparing the soil for planting cucumbers
Cucumbers are quite demanding on conditions environment plants. You can grow them both on outdoors, and in the greenhouse. They need special conditions. The main ones are:
- High illumination.
- High air humidity (up to 80%).
- Medium-high temperatures (about 25 ° C).
- The pH of the soil is 6-7.5. Acidic soils must be limed before planting cucumbers.
- Irrigation with warm water (not lower than 18 C).
Tilling the soil before planting cucumbers requires a special approach, since this vegetable crop is quite capricious.
- If the soil is acidic, liming is imperative.
- Carry out mechanical loosening of the soil.
- Apply 10-15 kilograms of organic fertilizers per m2.
- Apply mineral fertilizers (about 10 grams of nitrogen, potassium, phosphorus).
- Form beds 80x60 centimeters in size with a soil layer of at least 45 centimeters in thickness.
Soil preparation: the best experience of domestic enterprises
LLC "Bogoroditsky Alliance" is recognized as a leader in the potato industry. In 2014, the organization became the "Best Machine Operator" and "The Organization that Achieved best results in the field of crop production ”in the Tula region. A high degree of mechanization, the operation of serviceless systems, the creation of an artificial irrigation system, hydraulic engineering measures, the use of modern soil-safe fertilizers allow them to keep the soil in perfect condition - and this bears fruit - huge yields. Since 2013, the company has been implementing a precision farming program.
To preserve the organic balance of the soil, the farm employees actively use green manures, plant herbaceous and earth crops. To maintain a sufficient amount of minerals, the organization uses high quality fertilizers based on nitrogen, phosphorus, calcium and magnesium.
This article discusses beds for the lazy: photos of the easiest structures to make for those who want to get a neat garden with a minimum of effort, the most common materials and technologies for creating structures based on them. The reader will learn how to combine vegetable crops on the same bed and prepare the soil for planting cucumbers. The article contains practical advice for novice summer residents.
Designing the correct beds in the garden will be the solution to many problems and will open up new opportunities for the owner of a summer cottage:
- protection against soil erosion in the garden when a large amount of precipitation falls or watering plants. The sides of the bed will keep the nutrient soil in place, preventing it from being washed out onto the paths. In addition, the very passages between the structures will remain clean, no dirty puddles and drips;

- the possibility of forming a basis for the creation of a temporary greenhouse for the spring. By installing high sides as fences, inside the structure, you can organize a multi-layer bed, which can be used as a greenhouse. To do this, it is enough to install special arcs and stretch the film. The result is a neat greenhouse house;
- improvement appearance vegetable gardens due to orderly and even plantings with a beautiful frame;
- creating boundaries that prevent the spread of weeds.

Making beds from boards and other materials with your own hands allows you to clearly limit the planting area, thanks to which weeds and harmful plants do not have the opportunity to spread widely. If the garden fence is dug to a great depth, the level of protection increases and perennial weeds that are unable to overcome this obstacle can no longer penetrate into the garden.
Note! With the help of beds with well-buried fences, the spread of plants such as reeds and creeping wheatgrass is effectively blocked. Their root system is capable of covering long distances underground if unrestricted.

Photos of interesting designs of beds, recommendations for their creation. Tips for designing an unusual landscape design on the site.
The most the best place is an area where the sun is present throughout the day. It is allowed to install beds where shadow is present in the morning or afternoon. If the proposed construction zone is darkened throughout the day, you should not use this place for arranging a vegetable garden.
How best to make beds in the garden: choosing the optimal design
The choice of the design of the beds is carried out at an early stage of planning, when a place for the garden has already been selected.
Each type of garden bed has certain advantages:
- raised or are the most efficient structures that are best suited for growing vegetables. Construction Materials for their creation are not very expensive, while the soil does not need to be dug up. The width and height of the structures determines how much effort and time it will take to build them. Most often, summer residents prefer wooden beds made of boards. On the network you can find photos of bulk beds with your own hands, such structures do not have a fence. They are also classified as raised structures;

- container beds - will be beneficial in cases where the space of the site is limited. Small, large and medium-sized pots are suitable for organizing such beds. Garlic, pepper, lettuce and herbs feel especially good in containers. Mobility is another advantage of container beds, which, if desired, can be rearranged to any place;
- open field beds are the oldest method of growing crops that are planted directly into the ground. In such conditions, it is more difficult to obtain good harvest, therefore, the technology of joint planting of vegetables in the garden is often used.

Helpful advice! If it is planned to plant crops in the open field, it is recommended to determine the quality of the soil, fertilize it and check the compatibility of vegetables in the garden according to the table.
How to make beds of boards with your own hands: useful tips
Most often, raised beds are made of wood. This material, in comparison with others, is considered the most practical and environmentally friendly. Such designs look very aesthetically pleasing in the photo. Do-it-yourself board beds have other advantages:
- simple maintenance system, assuming easy weeding, harvesting and watering of plants;
- the possibility of growing vegetables even where the soil is completely unsuitable for these purposes. A frame is made on the basis of the boards, which is subsequently filled with fertile soil purchased in the store, so there is no reference to the quality of the earth and its composition. Thanks to this, plants can be grown even in areas with a rocky surface;

- box structures allow you to keep the soil inside the garden. In addition, the presence of the sides simplifies the process of installing arcs to form a greenhouse. Fixing these elements to the fence is much easier than digging them into the soil;
- even without knowing how to properly make the beds in the garden, any summer resident will cope with the manufacture of wooden structures-boxes. The boards are easy to process, and expensive tools are not required for the construction and assembly of the frame;
- there is no likelihood that plants planted near the sides will get burned in the summer heat. Wood, unlike metal, is not prone to overheating.

Note! The environmental friendliness of the material allows you not to worry about harmful substances getting into the soil. Wood is much safer than asbestos-cement sheets (slate). An exception is planks treated with chemicals to double the life of the material.
Making practical beds from boards: how to make the right choice of material
Summer residents most often create wooden structures on the basis of blanks that are found on the farm. For the manufacture of beds can be used timber, round timber, slab, lining.
When it comes to purchasing boards in a store, you should pay special attention to the type of wood from which they are made:
- an ash or oak board will last a very long time. Although the cost of such products is quite high;
- the most favorable in terms of price and in terms of processing remains pine. But this type of wood is highly susceptible to rotting, being in the ground, therefore, its service life is short. Due to impregnations and antiseptic agents, the life of a pine tree can be extended for a couple of years;
- boards made of cedar and larch wood are considered the most suitable material for making boxes. Larch has a natural resin impregnation, due to which the product will retain its novelty for many years without the use of additional impregnations. Cedar wood is characterized by a lower resin content, but it is not inferior to larch in terms of durability and at the same time has an affordable price;

- Acacia-based boards feel good in the ground. It is worth noting that this type of wood is distinguished by its strength and solid structure, so the process of processing it will be more difficult. To work with acacia, you need a powerful electric tool.
Helpful advice! It is not recommended to save on the quality of the material. Bad wood boards are subject to rapid decay. After a few years, holes will appear on the fences of the garden bed, through which fertile soil will be washed out during rains and watering plants.

Making beds from boards with your own hands: photos, sizes of structures
The box-beds are rectangular in shape and are made of boards. The simplest design does not require special knowledge and skills, so any novice summer resident will cope with its manufacture. The main thing is to correctly calculate the dimensions of the boxes.

- height- many summer residents strive to create the highest possible bumpers. However, this approach is erroneous if the construction of a warm garden bed for cucumbers or other types of crops is not expected, where the height of fences up to 0.7 m is welcomed. The technology of manufacturing such structures requires laying a multi-layer insulation. For ordinary beds, such high fences are not required, it is enough to limit yourself to 0.15-0.2 m. The excessive height of the sides is also unprofitable in economical terms, because their construction will require a lot of boards. In addition, wood lends itself to deformation changes under the influence of moisture, so there is a risk that over time, high fences will swell and lose their attractive shape;

- width- experienced summer residents recommend choosing a width equal to half the height of a person who will take care of the beds. Most often, this parameter is in the range of 0.9-1.2 m, because in the process of work a person should be able to reach the middle of the structure from the side of the side fence;
- length- this parameter is practically unlimited. Although excessively long structures reduce the level of stiffness of the side rails, it is therefore recommended to choose a length within the range of 4-6 m.
Helpful advice! When choosing the dimensional parameters for wooden beds, it should be taken into account that between them it is necessary to organize passages with a width of 0.4-0.6 m.Only after that, the layout of structures on the site is considered.
Creating mixed plantings of vegetables in the garden: photo examples and optimal schemes
The method of combining crops is very effective in practice if the companion plants are selected successfully. Therefore, the owners of the plots calculate according to a special table of the neighborhood of vegetables in the beds before planting. Some types of vegetables depress each other, others can improve the growth and development of neighbors, provide them with protection from pests.

The correct neighborhood of vegetables in the beds: compatibility table
Many summer residents note that due to the proximity of beans as a compaction for the garden bed where potatoes are grown, the number of the Colorado potato beetle is significantly reduced. Marigolds effectively protect cabbage from white butterfly. Despite this, a certain balance should be adhered to. After all, an excessive amount of marigolds in the garden can drown out the growth of cabbage.
Table of vegetable neighbors in the garden, creating a successful tandem:
| Vegetable name | Plants for a successful combination |
| strawberry | beans, spinach, marigolds, garlic, salad |
| kohlrabi | cucumber, lettuce, onion, beet |
| peas | carrots, corn, cucumber, calendula, eggplant |
| onion | tomato, celery, beetroot, savory, carrot |
| beans | potato, cucumber, tomato, strawberry, eggplant |
| cucumber | radish, pepper, peas, cabbage, beans |
| carrot | lettuce, onion, sage, tomato, peas |
| salad | strawberry, cucumber, carrot, radish |
| pepper | salad, cucumber, beans |
| a tomato | calendula, basil, beans, nasturtium, parsley |
Poor compatibility of planting vegetables in the garden is characterized by the following pairs of plants:
- cabbage and strawberries;
- onions and beans;
- carrots and celery, dill, parsley;
- cucumbers and potatoes.

Helpful advice! In addition to the main crops, it is recommended to plant spicy and decorative herbs... Thus, the garden will not only be beautiful, but also useful.
Examples of mixed planting of vegetables in the garden: popular schemes
A good example of the compatibility of vegetables in the garden is the combination of onions and carrots. As an independent crop, onions are capable of producing about 2.5 kg of yield from 1 m² of the garden. Carrots in the same area give about 6 kg of yield. When these crops are grown together, 9 kg of vegetables can be obtained from 1 m². These plants create protective barriers for each other from pests, so the efficiency of the used area increases.

Of course, when planning a joint cultivation of crops in the garden, you need to group the plants taking into account their height so that neither of them blocks the light for the other. This is necessary because vegetables can not only have different heights, but also grow at different rates. It is desirable that the seals that are planted additionally be lower in height than the main vegetables. The principle of the multi-tiered neighborhood of vegetables in the beds allows you to create favorable conditions for the root system of crops, and also contributes to the rational use of solar energy.
High yields are harvested from the beds where beets and late cabbage are planted. To do this, on an area of 0.8x0.8 m, beets (9 plants) and cabbage (4 bushes) should be planted, not forgetting to fertilize the holes with a glass of compost and a handful of eggshells (pre-grind).

To get an excellent result when planting beans and tomatoes, it is recommended to place the plants in a row with a step of 0.3 m. Along the row with bush beans, set so that each plant is at the dropper. Tomatoes are planted in the central part of the garden. As a result, the bean and tomato bushes should be staggered.
Helpful advice! It is better to cut the stalks of tomatoes for the winter, and as low as possible. And the beans, on the contrary, are recommended to be left intact.

Table of crop rotation of vegetables in the beds by crop groups
The crop rotation of the plants can also affect the yield of the beds. If the annual change of crops grown in the same bed is carried out in the correct order, the vegetable garden will produce good yields.
Benefits of correct crop rotation:
- the likelihood of soil fatigue on the site is excluded, since the same vegetable every year picks up the same set of nutrients from the soil and does it from the same depth;
- the spread of diseases and pests that affect plants of the same family is prevented;
- it becomes possible to use fertilizers rationally.

The most primitive way of organizing crop rotation in the garden involves planting plants from different families on the same area every year. The easiest way to divide cultures into four groups is:
- Leaf crops - these include different kinds cabbage, green onions, lettuce, and spinach.
- Fruit vegetables - cucumbers, tomatoes, eggplants, peppers, pumpkin.
- Legumes - beans, chickpeas, peas.
- Root crops - potatoes, beets, radishes, carrots.
Table of the simplest crop rotation in the garden:
| The order of disembarkation by year | Recommended crops for planting | |||
| 1st bed | 2nd bed | 3rd bed | 4th bed | |
| 1 year | fruit | roots | legumes | leafy |
| 2 year | roots | legumes | leafy | fruit |
| 3 year | legumes | leafy | fruit | roots |
Arrangement of beds for cucumbers in the open field: photos and recommendations
For growing cucumbers outdoors, the beds are usually prepared in the fall. This should be done before the onset of rains and drops in temperature. The planting zone must be carefully dug up and saturated with organic fertilizers. Cucumbers like a fertile light soil that has a good level of air and water permeability. If the soil on the site is heavy, sawdust, peat or sand can be added to the soil to facilitate loosening.

Helpful advice! To get a rich harvest, it is recommended to add a tablespoon of superphosphate and a glass of ash per 1 m² of area. Dolomite flour can be used instead of ash.
The process of preparing a garden bed for cucumbers in the spring includes a soil disinfection procedure. For this, the place of the future garden is spilled with potassium permanganate. The solution must be hot and strong. In addition, soil fertility can be increased by introducing chicken manure or manure. This procedure is carried out locally, that is, the fertilizer is placed directly into a trench or hole. After that, the bed is covered with a small layer of soil, where the seeds are then planted.

How to make a garden for cucumbers: agricultural secrets
To get a rich harvest of cucumbers from the garden, you must adhere to the basic rules:
- There should be no irrigation canals, streams and flowing water bodies near the beds.
- If the planting zone does not have protection, it is better to place the garden in a quiet place where there are no drafts.
- Procedures such as watering and loosening the soil should be done on a regular basis. Otherwise, a hard crust will form on the surface, and the bed will dry out very much.
- Open field cucumbers need to be fed much more often than indoor planting.
- During harvesting, it is not recommended to change the position of the plant's lashes or turn them over.
- Weeding plants in open beds should be done more often than indoors.
- It is recommended to cover the entire surface of the bed with a black film.

Cucumbers need a rich biological composition of the soil. Therefore, it is recommended to fertilize the land with organic matter, for example, grass, humus, branches, rotted manure, food waste. In the process of their decomposition, not only does the fertility of the soil increase, but also heat is released, which warms the soil. So that the high temperature does not damage the root system of cucumbers, experienced summer residents are advised to carry out abundant watering.
Interesting fact! Sometimes the decomposition of organic fertilizers occurs so actively that the soil in the garden warms up to 80 ° C. Under the influence of such a high temperature, many pests, viruses and pathogenic fungi contained in the earth die. As a result, natural soil sterilization occurs.

There are several ways to grow cucumbers outdoors. For these purposes, you can form a long ridge-bed, hole, dig a ditch, or build a high structure.
How to make cucumber beds with a bookmark in the garden
To form a bed with a bookmark, you will need to dig a trench. The depth of the ditch should be equal to two shovels. Then branches are laid across and sawdust is poured. The next layer consists of straw and garden waste. Can add autumn leaves, cardboard or newspapers, compost. The thickness of the fertilizer layer should be within 5-7 cm. The bookmark is filled with warm water and covered with a mixture of compost and earth.
A bed with a bookmark can effectively serve for 5 years. In the second year of operation, it is not necessary to add compost to the top layer, because during the decomposition of organic components, the bed itself will develop nutrients.

Advantages of a bed for growing cucumbers with a bookmark:
- convenient watering system;
- stagnation of water is excluded;
- in the spring there is no need to dig up the soil, it is enough to loosen the soil.
Plants can be planted on such a nutrient base much earlier than it is customary to do in ordinary beds. It is not recommended to use beds with a bookmark in low-lying areas and areas where water stagnates.

Warm surface beds for cucumbers in the open field
This type of warm beds for growing cucumbers is built on the surface of the prepared soil. This technology will become the best option for territories that are located in the lowlands. In order to enhance the heating process, the bed is covered with a film. As a result, a greenhouse effect is formed, which has a positive effect on the growth of cucumbers and their yield.
Surface beds also include structures in the form of boxes made of bricks, slate or boards. The bottom of these containers is covered with sand, then wood waste. Next comes the layer of organic waste and straw. After placing each component, the contents are carefully compacted and filled with liquid manure. Finally, the bed is covered with a mixture of soil and soil.

Helpful advice! As organic waste, skins of vegetables and fruits, fallen leaves, eggshells (crushed into powder) can be used.
Planting of cucumbers is carried out in two rows. Plants are placed along the edges of the bed-box, which ensures a sufficient level of illumination. If it is planned to plant cucumbers in early spring, the structures can be converted into greenhouses. To do this, you need to install plastic arcs and stretch plastic wrap over them. Thus, heating is intensified and it becomes possible to get an early harvest. Moreover, the result is completely independent of weather conditions.

Raised beds for cucumbers in the open field
Warm beds with a raised structure are used when the site is located in a region with a cold and humid climate. Due to this, a full-fledged heating of the soil occurs, which makes it possible to achieve a harvest on early dates... If they come too close to the garden groundwater, the bed rises high, due to which the plantings do not get wet on the soil, oversaturated with moisture. Stone fruit trees are planted in a similar way, whose roots are greatly affected by groundwater.
As borders for these structures are used various materials... The most popular of these are slate and timber. In rare cases, metal is used. This type of bed can be installed even in the middle of a lawn. If you make a frame in the form of paving stones or tiles, a raised vegetable garden with cucumbers will become a worthy decoration of the suburban area.

As an alternative solution, you can build a fill mound on the territory that does not have a fence. You can take any length for such a bed, the optimal width parameter is 1 m.Do not raise the decorative garden to a height of more than 1 m. The air that remains in the voids formed between the elements of large organic matter provides good ventilation and contributes to the rapid heating of the soil.
To speed up the process of decomposition of fertilizers, the soil is spilled with a solution saturated with special bacteria. The procedure is carried out twice a year. The first time the soil is watered with bacteria in the spring. Wait at least a week before planting plants after treating the garden. The second soil spill is done in the fall after the crop has been harvested. When the soil has already been treated with the composition, it should be loosened so that the soil is saturated with oxygen, and the preparation itself is evenly distributed.
How to make beds in the garden: video review of technology
If the sleigh needs to be prepared in the summer, then the vegetable garden - better in autumn... Correct processing during this period includes soil preparation (digging up and applying various substrates to improve it physical characteristics), fertilization, and for some crops, mulching and covering of winter plantings. Such actions will significantly increase the next year's harvest. It is most correct to prepare the beds in the fall for various crops, taking into account the requirements of each of them.
How to prepare strawberry beds for winter
Strawberries, or garden strawberries, accumulate resources for future fruiting in the fall. Therefore, if you want to get a rich berry harvest, as well as protect it from frost, familiarize yourself in advance with how to prepare strawberries for winter in the garden.
Autumn is the time to prepare the garden for the new season
Autumn care for strawberry plantations
The main activities for caring for strawberries are best carried out after the end of fruiting, at the end of July, in August or at the beginning of September. What to do during this period:
- carefully, so as not to damage the growth points of young leaves, cut off the old leaves and whiskers;
- remove weeds on the site;
- loosen the soil between the bushes, while hilling the plants a little (do not cover the growing point);
- apply fertilizers and, if necessary, treat with insecticides;
- water the plantings abundantly, but do not often, soaking the soil well.

Pruning old leaves
The root system of the plant is superficial, even with proper preparation of the strawberry bed, it is injured, therefore, the sooner you process the plantings, the more the bushes will get stronger and better endure the winter. In autumn, especially before frost, do not pull up weeds on the site, leave this activity until spring.
Fertilizing strawberry plantations
After you finish fruiting the strawberries, don't forget to feed them. Before the onset of winter, you need to do this twice:
- Immediately after harvest (late July - early September) - use nitroammophoska, scattering it around the bushes (consumption 25-30 g per 1 sq. M.), Or prepare an aqueous solution (2 tbsp. L. Per 10 l of water), pouring 0.5 l for each bush. You can also use organic fertilizers such as mullein. Dilute it with water 1: 3, stand for two days, add 1 glass of ash and add 0.5 liters for each plant.
- In late autumn (from the end of October) mulch the beds under strawberries with humus or rotted compost, consumption 3-5 kg per 1 sq. m. You can also add superphosphate.

Spread fertilizer around the bushes
When fertilizing the site, avoid getting fertilizers (especially dry mineral fertilizers) on the leaves and plant growth points, this can cause burns and destroy the bushes.
Ideal shelter for the winter
Garden strawberry in the presence of abundant snow cover it tolerates frost well, however, cold winters with little snow can destroy plants. To avoid such an outcome, do not forget to insulate the strawberry beds in the fall after establishing a stable sub-zero temperature... Previously, you should not do this, small frosts will be beneficial.
The list of materials that can be used for shelter is quite extensive, but each has its own advantages and disadvantages:
- Leaves, hay, straw are the most available materials, but they are caked, in the spring it is rather difficult to separate them from the plants, the bushes under them can grow out, and mice often hibernate in the straw, damaging the strawberry plantings.
- Pine needles, fir branches - optimal choice for shelter, has good air permeability, which excludes damping out, but at the same time retains heat well.
- Agrofibre - protects crops well from freezing, but it must be pulled over pre-installed arcs (the so-called air-dry shelter) so that the material does not come into contact with the plants, otherwise they will freeze even more than in the open air.

Shelter strawberries for the winter with straw
In regions with little snowy winters, pay attention not only to the plants, but also to the aisles, mulch them with leaves, straw, grass, and so on. This will help protect the surface of the strawberry root system, because the soil will dry out less, freeze and crack.
Autumn preparation of the beds
Plots for annual garden crops are also prepared in the fall. During the winter, the soil subsides, is saturated with the introduced mineral and organic compounds, and by spring it is almost completely ready for new plantings.
Preparing a bed for onions
Preparing the beds for onions in the fall begins with choosing a place. Arrange them where cucumbers, tomatoes, cabbage, potatoes grew, these are the best predecessor plants. Avoid places where garlic, carrots and, of course, onions grew, it can be returned to its original place after 3-5 years. Observance of the seeding shift not only optimizes plant nutrition, but also protects them from pests and pathogens.
Basic requirements for the landing site:
- sunny, open area;
- no weeds;
- non-acidic loamy or sandy loam soil;
- moderate soil moisture.

Fertilizers are evenly distributed over the site
If the area that was planned to be allocated for the bow does not correspond to the ideal, it does not matter, everything can be fixed. So, acidic soil, lime two years before planting onions. In addition to slaked lime, you can use wood ash, chalk, limestone and other substances. On waterlogged soils, build high beds.
Now about how to properly prepare a bed for onions. Autumn events in this matter are quite simple:
- remove weeds;
- apply fertilizers;
- Dig the ground to the depth of the shovel.

Small seedlings for autumn planting
How to fertilize the onion garden? Before digging, apply organic fertilizers, optimally 5 kg of compost or humus and 1 kg of wood ash per 1 sq. m. You can apply chicken manure at the rate of 200 g per sq. m. m. In addition, mineral fertilizers are applied in the fall. For example, 20 g of double superphosphate and 15 g of calcium chloride per 1 sq. m of territory.
The recommended width of the onion bed is 45–90 cm, and the length is mainly determined by the size of the plot. When determining the optimal parameters for sowing, keep in mind that the width between the furrows for planting onions should be about 20 cm, and the distance between the seedlings should be about 8 cm. Do not forget to leave wide passages between the plantings, they will greatly facilitate the maintenance of crops.
Some gardeners practice autumn planting Luke. To do this, select the smallest set, less than 1 cm in diameter. Plant it in early October, about 2-3 weeks before the onset of frost. Dig the bulbs into the ground by 3 cm, and mulch on top with leaves, straw, needles or spruce branches.
Preparing a bed for carrots
Do you want to know how to prepare a garden for carrots in the fall in order to get a good harvest next year? The main activities during this period are reduced to the choice of a place, digging and fertilizing the soil. Proper preparation will allow you to grow beautiful root crops and significantly increase yields.
Choose a place in the garden, taking into account the compatibility of the culture with the predecessor plants. It is better if the bed for carrots is broken in the place where potatoes, legumes, cabbage, and tomatoes previously grew. It is advisable that the carrots are not sown here for the previous 4-5 years. The following soil parameters are optimal for the root crop:
- high level humus;
- pH (acidity coefficient) 5.6 - 7;
- light permeability (loose loam or sandy soils).

Carrots grown on unprepared soil
Note that in heavy or stony soils, the roots will grow small and twisted. A similar effect is observed when fresh manure is applied before planting.
The ideal preparation of a bed for carrots should take into account the characteristics of the soil on the site:
- peat - 1 sq. m of land, add 5 kg of river sand, 3-5 kg of humus, 6 kg of sod land;
- clay and podzolic - per 1 sq. m - 1-2 buckets of peat and sand, 1 bucket of humus, 3-5 kg of sawdust (preferably not fresh);
- light loamy - the same as for clay soils, only without sand;
- black soil - per 1 sq. m - 0.5 buckets of small stale sawdust and 1 bucket of sand.

Preparing high ridges for carrots
In addition, add superphosphate from mineral fertilizers at the rate of 20 g per 1 sq. m (some replace it with wood ash), as well as potassium salt - 10-15 g per 1 sq. m. After adding all the substances, dig up the area 1–2 bayonets of a shovel deep and level the surface.
The size of the carrot beds largely depends on the size of the plot, but experts do not recommend making them too wide. Narrow beds with a width of 45–90 cm and wide row spacings provide the plants with maximum illumination. Keep in mind that plantings should be placed at a distance of 25 cm between rows. The depth of the carrot bed must be at least 30 cm.
Preparing the garden for garlic
A bed for garlic in the fall is prepared both for planting winter varieties in the open field before the onset of frost, and for planting spring varieties in spring. Site preparation usually begins in early September, and the basics of agricultural technology are the same for all plant species. Answering the question: how to make a garden bed for garlic correctly, there are several important stages:
- choice of a place taking into account seeding and soil characteristics;
- removing weeds and digging the soil to a depth of 25–30 cm;
- fertilization.

Winter garlic, prepared for planting
Bed under winter garlic place where pumpkin seeds, legumes, early cabbage grew. It can be returned to its original planting site no earlier than three years later, but if you still have to plant plants there again, pay attention to how to process the garden bed after garlic in order to prevent diseases. To do this, pour the soil with a solution of 1 tbsp. l. copper sulfate per 10 liters of water, the consumption is approximately 1 bucket per 2 sq. m. After watering, cover the ground with plastic wrap.
Garlic prefers light, dry areas with light sandy loam soil. Other soils can be "improved" with simple additives:
- heavy clay soils - 1 bucket of peat and river sand per 1 sq. m;
- peat soils - 1 bucket of river sand and loamy soil per 1 sq. m of territory;
- sandy soils –2 buckets of clay soil and 1 bucket of peat per 1 sq. m. m plot.

Garlic plantings mulched with humus
A garlic bed in autumn needs fertilization:
- organic - compost or humus is preferable (1 bucket per 1 sq. m), but in no case fresh manure, it significantly increases the incidence of planting and the susceptibility of plants to various microorganisms;
- mineral - 2 tbsp. l. potassium sulfate, 1 tbsp. l. double superphosphate, 1 tbsp. dolomite flour and you can, but not necessarily, 2 tbsp. wood ash per 1 sq. m.
Do I need to close the beds for the winter? It all depends on the climate and the characteristics of winters in a particular region. Garlic is quite frost-hardy, but severe winters with little snow can significantly thin out the plantings, even despite mulching with peat or humus. Therefore, after the onset of frost, it is better to cover the beds with needles, leaves, sawdust, tops.
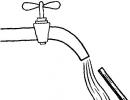
Preparing the garden for cucumbers
Cucumbers are not very demanding on the composition of the soil, but still best yields collected on sandy loam and loamy soils with neutral (or close to that) acidity. It is important that the site for this culture is not swampy. Nevertheless, proper processing will help to grow a vegetable in any territory, the main thing is to carry it out in advance.

The perfect cucumber patch
Not sure how to prepare a cucumber garden in the fall? Follow the tips:
- Determine a location, preferably taking into account the seeding schedule. Onions, legumes, cabbage, potatoes, and tomatoes are considered good predecessors of cucumbers. Do not plant them where other pumpkin seeds have previously grown.
- Prepare a trench or set up bumpers for a tall bed. Lay branches, straw, sawdust, leaves at the bottom.
- Apply fertilizers: mineral fertilizers are added during spring processing, and fresh manure is added to the beds in the fall so that it “settles” a little over the winter. Although, the opinions of experts on when to put manure on the beds are divided. Some advise doing this only in the fall, while others argue that it is possible in the spring, adding to it 100 g of nitrophoska and 3 glasses of wood ash for every square meter of land.
- Pour water over the manure and cover with fertile soil about 30 - 40 cm.

Cucumbers love manure fertilization
The use of this technology will accelerate the germination of plants, the appearance of fruits and significantly increase the yield of vegetables. However, if there is no way to create them, use another technology:
- Dig up the beds in the fall and sow with rye.
- In the spring, two weeks before planting cucumbers, distribute humus over the territory (3 buckets per 1 sq. M).
- Add soil baking powder (stale sawdust, sand, etc.) if necessary.
- Dig up the ground, embedding green manure and fertilizers in the ground.
Working in the garden requires a lot of time and effort, but it pleases with high-quality environmentally friendly products. Proper preparation of the site in the fall, taking into account the individual needs of crops, significantly increases their yield, and helps perennials survive the winter without loss.
Now is the very beginning of autumn, the whole crop has not even been harvested from the site yet. But you may not believe that in order to ensure the next season's harvest, it is time to start preparing the vacated soil for future beds. And this is not a joke at all: you need to prepare this soil not anyhow, but correctly, so as not to be disappointed in the next year's harvest. How to prepare the beds, how to properly dig up and apply fertilizers for the most common vegetable crops right now, we will tell you today.
Autumn preparation of the beds in the garden. © Charles Dowding
It is clear that the formation of the aboveground mass, the formation of a crop that we harvest, consume or store, leads to the removal of various elements from the soil. First of all, it is the well-known nitrogen, phosphorus and potassium. So, immediately after harvesting and when preparing the beds for the new season, it is advisable to make up for the deficiency of these elements in the soil, although it is not visible to the naked eye.
The autumn period is almost an ideal period for applying various kinds of fertilizers, which for winter time Will "reach" in the soil, and the plants sown or planted on the beds made by us will begin to consume them already in an accessible form, and not wait until they turn into such, wasting precious time on their development and forcing us to wait longer for the harvest.
For example, organic matter and various minerals: in fact, any vegetable crops perceive and react to them in a purely positive way. However, in order for the root system to perceive this or that element, it must already be in an accessible, dissolved form, and this takes time. This is exactly the time that winter is.
Of course, when choosing fertilizers, you need to take into account a number of factors - this is the biology of the culture, which in the future will grow in this place, and the type of soil (heavy, sandy soil, black soil, and so on) and even the weather conditions at a given time, which determine including the condition of the soil.
So, there is enough reasoning, we go directly to the rules for preparing the beds in the autumn period for the next season.
Why prepare the beds in advance?
Such a question is often asked: after all, there is spring, when you can have time to prepare the beds, and sow seeds, and plant seedlings. Yes, quite right, but, firstly, not all fertilizers will have time to go into a form that is accessible to plants, as we said above, and secondly, spring is such a fleeting period that in fact, you can simply not have time to do everything, as necessary. Remember the Russian proverb in the words of a peasant peasant: "Drop your hat in the spring - I won't lift it" (that is, so busy).
In addition, if we prepare the beds for winter in the fall, think for yourself how much we will ease the spring worries: all that needs to be done is to loosen ready-made beds, make holes for planting seedlings or furrows to sow seeds, and start carrying out the usual procedures related to shoots or seedlings, without rushing anywhere and without being late.
In what order should the beds be prepared?
The first step is to clear the places of future beds from weeds and plant debris and burn them outside the territory of the site, although if they are without signs of disease, then it is quite possible to lay them in compost heap, and then apply as fertilizer for digging the soil and, if necessary, add chalk or lime together with fertilizers to bring the pH back to normal.
You need to clear weeds as thoroughly as possible, all creeping weeds, wheatgrass with parts of its root system and dandelions just need to be excluded (uprooted) from the garden by everyone possible ways, they should not be there, no matter how much effort you spend on it.
When the soil is free of weeds and plant residues, that is, it is in its pure form, it can be enriched with the elements necessary for each plant - these are nitrogen, phosphorus and potassium. Since nothing will grow on these beds in the current season, urea (20-25 g per square meter), superphosphate (18-20 g per square meter) and potassium chloride (15-20 g per square meter) can be added. ). In this case, you should not be afraid of potassium chloride, since chlorine will be neutralized until spring and will be safe for plants. In addition, it is advisable to add well-rotted manure at 5-6 kg per square meter, or humus (3-4 kg per square meter) and wood ash (stove or soot) at 250-300 g per square meter of soil.
If the soils of your site are heavy and clayey, then it is necessary to add river sand in a bucket per square meter, preferably interspersed with compost in the same amount, this will increase the looseness of the soil and enhance its fertility.
Sandy soils do not retain moisture and nutrients well, here it is necessary to add a bucket of clay per square meter, as well as well-rotted compost (5-6 kg per square meter), leaf humus(3-4 kg per square meter) and sawdust (bucket per square meter). Be careful about sawdust - they can acidify the soil, so you need to use the most gray, that is, almost rotted sawdust.
Acid soils, where the acid-base balance (pH) is below 6.0, must be lime or chalk. If the acidity is below 4.5, then lime should be used at 200-250 g per square meter, if the acidity is from 5.5 to 4.6, then chalk: add 250-300 g of chalk per square meter.
Naturally, fertilizers, chalk, and lime - all this in the autumn, when preparing the beds, is brought in for digging, by initially spreading it over the surface and then filling it up by digging it onto a full bayonet of a shovel.
How to dig up the beds?
Usually, there are two main options for digging the soil - this is a dump-free method and a moldboard. Let's start with a dump-free method of digging. With the moldless method of digging, they try to do so that the earthen lump for the most part does not break and turn over. The purpose of such soil digging is to maximize the preservation of the beneficial microflora of both the lower and upper soil layers. Clods of earth also do not break.
With the dumping method of digging, lumps of soil turn over and break. Usually, the second option is often used when preparing the beds in the fall. Thus, we embed fertilizers deep into the soil, and with them chalk or lime, if necessary, and literally pull out the wintering stages of pests and diseases to the surface.
In this case, it is undesirable to break up clods of soil, because in this case the soil will freeze to a great depth, disinfecting as much as possible. But if you decide to prepare a full-fledged bed with clearly delineated edges and in the spring do not worry about breaking up clods, then it is better to bring the digging business to the end: break up the clods, level the bed and make, by filling layers of soil when digging on top of each other, a bed a couple of centimeters higher soil level, so that as a result, the soil on it warms up faster than on the rest of the site.
 Preparing the beds in the fall. © lasercuttingmachine
Preparing beds for certain crops
So, we talked about how to prepare the garden as a whole. There is nothing difficult in this: we free the site, apply fertilizers for digging, try to dig up the bed with an increase in the soil level, thus outlining the edges of the future bed, but this is in general. It seems to us that we also need to tell about how to properly prepare a bed for the main crops, which certainly are in every garden, beds for them can also be prepared in the fall.
Beet beds
So, in order for the dining room beets to grow well, you need to choose the most illuminated area, where the soil is light and well-drained. Ideally, of course, in the fall, the beet bed should be prepared on sandy loam and loam with neutral acidity. On heavy soils, clay, for example, beets will grow poorly even with enough food. You should also avoid places where melt, irrigation, rainwater and, of course, acidified soils.
The best predecessors for table beets are crops that leave the site early - these are cucumbers, zucchini, early potatoes, early varieties sweet pepper and eggplant and, again, early tomatoes. Do not sow table beets after spinach, rapeseed, carrots, chard and cabbage.
In the fall, when preparing the soil for beets, it is advisable to apply organic fertilizers, for example, compost or humus in the amount of half a bucket per square meter of the future garden. From mineral fertilizers, it is quite possible to add potassium chloride in an amount of 12-14 g per square meter, as well as ammonium nitrate and superphosphate at 22-25 g per square meter.
Next, we prepare a garden bed for pumpkin and zucchini
You need to know that these crops are generally unpretentious and just remarkably react to various fertilizers contained in the soil. Under them, you can apply manure, but well rotted and in the amount of 3 - 4 kg per square meter of the garden, no more, of course - for digging.
As for the choice of location, the soils must be neutral, therefore, if acid prevails, then chalk or lime must also be added for digging.
The best predecessors for pumpkin and zucchini are considered: potatoes, onions, cabbage, root vegetables and legumes, but the worst are considered to be cucumbers, zucchini and squash.
Pay special attention to the soil, so if the soil is clay, then, as in the general preparation of the garden, half a bucket of humus and a bucket of river sand per square meter should be added under the pumpkin and zucchini for digging. As for mineral fertilizers, 10-15 g of superphosphate, 250 g of ash and 15 g of potassium sulfate is enough.
On sandy soils on which you decide to grow squash and pumpkin, add a bucket of clay and half a bucket of humus per square meter.
Dill and other greens
To get a good harvest of dill and other greens, you first need to deal with the predecessors. Good predecessors for green crops are: cabbage, tomatoes and onions, and bad ones are parsnips, celery and carrots.
Next, try to choose the most well-lit garden bed in the fall, and, therefore, the most heated one. Ideally, the soil should be made as fertile as possible and try to keep snow on it by throwing it with spruce branches. Do not forget to pay attention to the acidity of the future bed, green crops grow poorly on acidic soil, therefore lime and the introduction of chalk for digging, subject to high acidity, are necessary.
For green crops, preparation of the garden in the fall is not difficult, the digging depth should not be very large, only 22-23 cm. Be sure to add 2-3 kg of well-rotted manure per square meter and 15-20 g of ammonium nitrate, 8-10 g of potassium sulfate and 10-12 g of superphosphate for the same area. In the spring, all that remains is to loosen the finished bed, make grooves for sowing, be sure to water them (2-3 liters of water per meter) and compact them slightly before sowing in order to prevent the seeds from sinking (a couple of centimeters of depth is enough).
Preparing tomato beds
Tomatoes - their best predecessors are: beets, cucumbers, onions, beans, carrots, various greens, peas, corn and zucchini, and the bad ones are potatoes, late cabbage, peppers and eggplants.
We figured it out, now let's pick up a plot for tomatoes before it gets colder. The best will be fertile soil, it is enough to dig it up, and if it is acidic, then lime it (150-200 g per square meter), but with fertilizers, in particular superphosphate, which tomatoes adore, you can take your time and just scatter it over the surface of the soil without digging. By the way, tomatoes react very jealously to the level of acidity and the dose that we indicated may not affect different types soil. For example, if you have sandstone or loam on your site, then it is better to add 250 g of lime for digging, and if medium and heavy loams, then 350 g of lime and also for digging.
Do not make beds too high for tomatoes, do not forget that they are tall plants themselves, so 22-23 cm is quite enough and about a meter wide, no more is needed either.
 Autumn preparation of the soil in the garden. © Vesna Maric
 Cucumber beds
Well, cucumbers, because you are unlikely to find a site where cucumbers do not grow, but only tomatoes or cabbage. The best predecessors for cucumbers are: tomatoes, eggplants, potatoes, onions, legumes, spinach, rhubarb, early and cauliflower, beets, carrots and greens, but the worst are: cucumbers, zucchini, pumpkin, squash, melon and watermelon.
Ideally, in the fall, the garden bed should be made so that it is light, preferably loamy or sandy loam. If only clay and heavy soil is available, then add a bucket of river sand per square meter for digging. By the way, cucumbers grow well on slightly acidic soil, so if this is the case with you, then you should not worry.
The beds for cucumbers must be dug up onto a full bayonet of a shovel with the introduction of 5-6 kg of well-rotted manure.
The subtleties of feeding warm beds in the autumn
In the autumn, you can build a warm bed, first you need to knock down a box from the boards, usually a meter wide and two meters long, put a layer of drainage in the base, it can be, in fact, any large debris, for example, various branches, pieces of boards, stumps , tops of plants. You can sprinkle all this with river sand, sawdust, chips, weeds, peelings of potatoes and other vegetables, you need to put leaf litter, humus on top and sprinkle wood ash. Of course, the layer should be such that fertile garden soil (20-30 cm) fits on top, in which vegetable crops will grow in the next season.
A few words about mulching
Questions arise whether it is necessary to mulch the beds prepared in the fall, the answer will be yes. In principle, mulch, if it is made from natural components (the same leaf litter pressed by spruce branches), then it will not in any way affect the vital processes of beneficial microorganisms in the garden bed you have built. Therefore, in the spring, after removing the mulch, the bed will look even fresher. The main thing is to remove the mulch early so that the soil warms up faster.