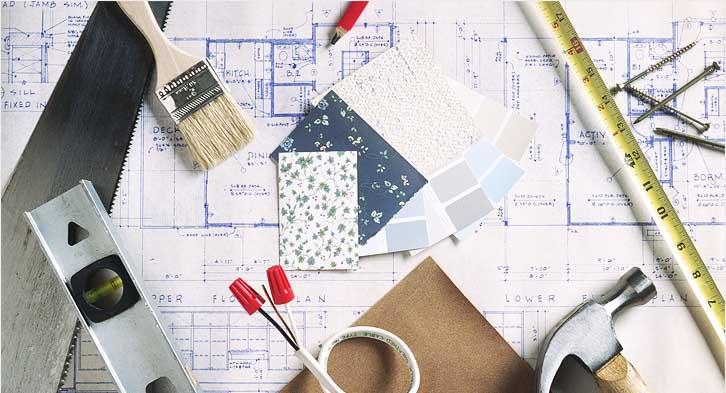
Do-it-yourself quick repairs in the kitchen. Inexpensive kitchen renovation: how to do everything at the highest level. Ceiling lathing, sheathing and wiring underneath
How to make repairs in the kitchen with your own hands, if you don't even know where to start? It's pretty frequent question, because nowadays the materials themselves are not cheap, therefore not everyone can afford to pay extra for the services of the craftsmen.
And why, because you can make a good repair yourself, without resorting to the services of specialists. To do this, you need to clearly know what kind of cuisine you want to get in the end and move towards your goal according to a previously drawn up plan.
Repair stages
So, let's look at how to make repairs in the kitchen with our own efforts. Divide your actions into several stages for the convenience of work. Any repair requires this.
Renovation idea
Before starting any repair, you should understand what exactly you want to achieve:
- modernity,
- comfort,
- comfort,
- functionality,
- or all together.
To do this, make a list of items that are missing in the kitchen commensurate with the dimensions of the room. If the kitchen area is small, then the surest step is to make custom-made furniture. This way you can "squeeze" whatever you want into a tight space.
But since a complete change of the kitchen set will cost a pretty penny, not everyone decides to change something from the furniture during the repair. Therefore, if you decide to deal only with the premises, then immediately proceed to the next stage.
Color spectrum

Several aesthetic points
Since renovating the kitchen is a rather expensive undertaking, we settled on one of the most inexpensive options... At the same time, it is quite possible to achieve the feeling of an updated kitchen without making a radical change in furniture and equipment.
Finally, I would like to give some tips that will help bring a touch of freshness to the kitchen interior:
- Change the chandelier. It will cost you inexpensively, but will significantly update the interior of the room.
- In this case, purchasing a comfortable dining table will also be useful. If there is not enough space in the kitchen, then consider installing a bar counter.
- Match curtains and tulle to match the tone of the walls and don't forget about a new cornice for them.
- If on new furniture there is no money, then the old headset can be painted or pasted over with self-adhesive film. Decorative designs can be applied to the furniture.
Conclusion
Naturally, it's up to you to decide what kind of renovation to make in the kitchen. Modern materials allow you to embody any design ideas. We have considered the simplest and not expensive option renovation, through which you can get a stylish and modern kitchen.
You can, for example, install a multi-tiered plasterboard ceiling structure with built-in lamps in your kitchen, or give preference to stretch ceilings.
The kitchen, being an integral part of the home, has always been of great importance in human life.This is the place where the whole family gathers in the evening. Where, at a beautifully set table, they talk about the past day, filled with a wide variety of impressions, share invaluable life experience. Consulting or simply indulging in nostalgic memories.
Repair that will not be ruinous is the dream of every owner. And so it turns out that very often after a lengthy and costly renovation, there is practically no money left to transform the kitchen. We have to look for a budget option.
The kitchen is not only the process of cooking, the ethnicity of a certain set of dishes, but, first of all, it is the place of the hearth.
But do not forget that the kitchen is, first of all, a room that is more susceptible to natural aging, pollution than others, no matter how hard we try to keep it clean and tidy. Natural deterioration of flooring, ceilings, doors and windows is the norm in the “life cycle of one repair”.
So, once again, looking around that part of the house where we truly spend most of our time, we come to the conclusion that something needs to be changed. Somewhere rearrange furniture, somewhere to update something, add work surfaces, and just change the interior.
All this can be safely called a cosmetic renovation of the kitchen.

Cosmetic repair is usually called the repair that does not affect important communications in the room, and does not change its configuration, in Russia - the BTI standards are called upon to monitor this.
Works that are permissible and often carried out when performing a redecoration of the kitchen:
- Thermal insulation and leveling of the floor, installation of the floor heating system.
- Leveling the floor with a smooth screed, changing the floor covering.
- Also, quite often the premises are "zoned" into the working and normal zones. The working area located near the plate is subject to the greatest wear. It is often finished with ceramic tiles or granite slabs.
- Ceiling update. Painting and changing its configuration.
Quite often, an ordinary ceiling is replaced with a suspended one, and a perimeter backlight is built into it. This makes the overhead light softer and relieves eye strain.
- Wall alignment and painting. One of the most important components of cosmetic repairs in the kitchen is wall renovation.
- You can simply paint the walls, glue textured wallpaper for painting, decorate them with artificial or natural stone or wood.

Works related to overhaul:
- Changing the electrical wiring configuration.
- Modification and relocation of the main structures of water supply and heating.
- Change in the gas supply system.
You can see an example of cosmetic repairs in this video:
Pros and cons of cosmetic repair
Benefits of cosmetic repairs
Disadvantages of cosmetic repairs
The disadvantages of cosmetic repairs can only be attributed to the fact that we are limited in changing the main design details of the room. The impossibility of transferring an inconveniently located pipe, adding a couple of extra sockets, so necessary in the opposite corner from the main outlet. Adding or removing an interfering part of the wall - this nuance is very important when designing a studio room, where the kitchen and living area are often combined into one room
Redecorating start: planning
Before starting work, you need to decide on a budget. As everyone knows, without a correct budget calculation, money will start to “fly away” at the speed of light, and instead of bringing pleasure from the process and its final result, it can negatively affect the mood.
As we said above, when performing a redecoration of the kitchen, you can trust a professional team of builders and invite a professional interior designer.
But you can do everything with your own hands.
Usually, you first have to draw up a plan that will determine how cheap a DIY repair will cost. It is not difficult to make such a plan, it usually includes:
- Dismantling. The old wallpaper is removed, paint and flooring.
- Installation of windows.
- Ceiling. Painting or using complex designs, or better - wallpaper.
- Walls. If the wallpaper is moisture resistant, but tile or paint is most often used.
- Sewerage wiring, water supply. If the kitchen has a dishwasher and a washing machine, this step cannot be bypassed.
- Replacement of heating radiators.
- Flooring. The budget scheme assumes linoleum - and this is a good option.
- Replacement of entrance doors. Sometimes, during repairs, they are completely abandoned, decorating the entrance opening.
- Furniture installation.
Some stages can be added to this plan, others can be deleted, but this option can be taken as the backbone.
In any case, whether you use the services of a professional designer, or decide to carry out all the work from "a" to "z", a clear vision of the final result is of great importance. This means you need to decide on the design of the future kitchen right away.


Currently, there are rather three main popular directions:
- Ageless classic interior ... Where the basis is taken, often, a wooden set, or a wood-like set. A dining area with a small table, the role of which is sometimes played by a cozy "corner". A minimum of plastic and modern accessories in decorative elements.
- Modern... The basis of the Art Nouveau style is modern materials... These are plastic, chrome-plated accessories, handles and surfaces, glossy bright colors. Household appliances made in modern colors and shapes. Wooden sconces and carpets on the floor in this style are completely inappropriate. The Art Nouveau style is also often characterized as the laconic masculine style, or the style of a modern young family that uses the kitchen solely for its intended purpose - only for cooking.
- Country style... The motives of this style in some way intersect with the classics, with the only difference that they are much more abundant in small accessories of a cozy country house. The presence of semi-antique household appliances and a certain very warm soulful atmosphere combined with soft warm color solutions, "Warm" lighting system.
Sequence of work

So, we have decided on the budget, have chosen the design style of the future renovated kitchen that is close to us in spirit. The next crucial moment has come. As with budget planning, you should take it as carefully as possible and try to take into account all the little things. It is about the order of the sequence of work.
Work to be performed as part of the redecoration of the kitchen:
- Free up space for future renovations. This means that you carefully turn off all operating electrical appliances, close the gas and water valves. Dismantle and remove furniture.
- Plan and start purchasing everything you need to carry out the renovation.
- Start redecorating.
- And finally, to carry out a final general cleaning, to arrange all small household appliances in their places according to the plan that we came up with. Add small touches in the form of favorite accessories, old and beloved ones, and new ones, designed to bring our kitchen to the final “renewed look.
Ceiling
To put the ceiling in order with your own hands and complete the economy task, there are three simple options to consider:
- Ceiling wallpaper
- Ceiling panels
- Ceiling painting


It is easy to renovate the ceiling with paintable wallpaper. It is both beautiful and inexpensive, and over time, the wallpaper that has lost its original color can be changed by simply painting it over. Usually, white textured wallpaper is taken, which after a while will be painted over with white paint.
Ceiling panels are used less and less - but this is also an economy class and an opportunity to make the space different.
Inexpensive kitchen renovation also involves the usual painting of the ceiling. Consult in hardware stores about paint, today its choice is so great that the ceiling can be not just white, but with mother-of-pearl or metallic.
And an ordinary chandelier can brighten up the general impression of the economy approach. More precisely, not ordinary, but originally decorated. For example, with a lampshade in the color of the kitchen curtains, or an interesting shape.
Walls
Most cheap way change the walls - glue them with moisture-resistant wallpaper. You do not need to take luxury wallpaper, this option is good for other rooms, and it will definitely not fit into the budget.

Good ones combinations of wallpaper for the kitchen in an economy style:
- Light green monophonic + white with a large pattern;
- Solid blue + white with large print;
- White with a small pattern at the top + gray-blue for finishing imaginary panels;
- Gray + white + light green;
- Wallpaper imitating vegetable print + light monophonic.
Redecorating the kitchen may involve painting the walls. But the space will be interesting if you also combine it with colors. It is not easy to make complex transitions with your own hands, but paint, for example, the central wall with a rich peach, and others with a soft run even for a beginner.
Floor
Inexpensive kitchen renovation also implies cheap flooring. AND better than linoleum do not come up with. This option is good because modern linoleum manufacturers manage to do not only high quality good material, but also practically imitate the flooring of the elite class. And at first glance it will be difficult to distinguish between them.
In addition, laying linoleum is quick, simple and certainly everything is done by hand without the involvement of masters.


There is, of course, another option - laminate flooring. Today in stores you can see sales of this coating, at very low prices you can buy leftover material, and then creatively combine it in the kitchen. For example, in the dining area - one type of laminate, in the cooking area - another. Again, it's not difficult to do this with your own hands.
But the laminate must be durable and moisture-resistant, otherwise, soon, you will again need to redecorate the kitchen. Laminate is not an economy class in the kitchen and is completely useless.
Furniture selection
It is not necessary to install a full-fledged kitchen set especially if the space is tight. You can do it differently: build a wooden rack with your own hands, a kind of Provence style (French class thing, by the way). There you can arrange different containers with bulk, or store dishes and other kitchen utensils.

Another solution is decoupage of an old headset. However, this procedure cannot be done quickly, and beginners are unlikely to master it. But after practicing on other furniture, you can unusually transform kitchen cabinets with your own hands. And you won't have to deviate from the economic plan.
Budget renovation of a small kitchen (video)
Conclusion
Of course, when carrying out cosmetic repairs, as it is implemented, many nuances will arise. At some point it may seem that “everything is lost” because one or the other was not taken into account, missed or forgotten. This is a normal creative process and you should never panic.
Even the most detailed plan sometimes fails, shows those nuances that were never even thought of before.
So, to summarize:
Full-fledged or redecorating a kitchen can be less costly with alternative measures:
- Do not tile the walls, but paint with a combination of colors;
- Do not spend money on expensive flooring, but choose linoleum that is interesting in terms of factor and print;
- Do not make a false ceiling, but use textured wallpaper for painting;
- Part kitchen furniture, simple enough, to build yourself, inspired by pictures of Provencal interiors.
And then the economy plan will be executed in in full, and the kitchen will not lose its attractive appearance.
You should always remember that any renovation, even cosmetic, is more a creative process than a tough business plan, a departure from which is unacceptable.
Show a flight of imagination, find solutions to problems, and the result will not keep you waiting - you will enjoy the sight of your new, updated kitchen!
For every woman, the kitchen is the main place in the house, therefore, its arrangement is very important for her, because the kitchen is a place not only for preparing food, but also for accepting it. The kitchen is a place where the whole family gathers for breakfast, lunch and dinner, so it is in the kitchen that everyone should be cozy and comfortable.
This is a very versatile place in the house. As usual, the kitchen area is small, so it is very important:
- Arrange all household appliances and furniture is the most convenient and rational.
- You also need to take into account that when cooking in the kitchen it is always humid, grease and steam are sprayed out, choosing a successful color of furniture.
- All dirt is better washed off from moisture-resistant surfaces, therefore materials and furniture for this room should be moisture-resistant and easy to clean.
Of course, it's not even easy to cope without professionals. So where do you start renovating your kitchen?
- First you need to draw up a drawing or drawing of your future kitchen. So you will quickly understand where and how to place the furniture, in which colors will be your kitchen and what accessories will be needed for its interior.
- After a sketch or project, it is necessary to calculate the materials needed for the repair. It is better to contact specialists here. They will help you make a calculation, think over the placement of water supply, sewerage, replacement of sockets and electrical wiring.
- Then the dismantling of floors, ceilings, old communications begins.
- Replace if necessary.
- Then they carry out all communications, erect new partitions, level the walls, ceiling and floor.
- When finishing the ceiling, you can use various panels or slabs, as well as stretch ceiling... But the easiest is a water-based water-repellent paint. Here you can choose what is better and cheaper for you.
- For flooring, you need to use only waterproof materials - natural stone,.
- The walls in the kitchen must also be resistant to moisture, so either washable wallpaper or tiles are used, but for the work surface better tile... Although, for an apron, you can use and.
- Installation of household appliances and furniture is carried out after all coatings are fixed and dry well.
- A very important point in the renovation of this room is correct. To make it more convenient for the hostess to work on the work surface, you need to install fluorescent lamps located on hanging cabinets, and above dining table hang a lamp. But if you have a high ceiling in your kitchen, then multi-level lighting will look very impressive.
- Then follows the stage of installing various accessories that will make your kitchen the most comfortable, cozy and so unique.
When planning any kitchen, you need to remember that the basis of the room is a working triangle:
- plate;
- fridge;
- washing.
These three items should be at the closest distance to each other. Therefore, it is imperative to take this moment into account. Now the work plan has become more or less clear and you know where to start renovating the kitchen. And the rest depends only on your imagination and the size of your wallet.
Read more in the section on the design and repair of all parts of the room on the website with your own hands.
Now let's talk about common mistakes.
 Arrange furniture according to the working triangle, depending on the type of kitchen layout
The 20 Most Common Kitchen Renovation Mistakes
Even the slightest mistake made when planning a kitchen can bring many inconveniences later. So what shortcomings should be eliminated at the earliest stage of repair or redevelopment, where to start?
- Excessively long work surface - typical mistake owners of large kitchens who try to place all the furniture along one wall. This arrangement will make the cooking process inconvenient because you will have to run from one end of the kitchen to the other. If the layout and size of the room allows, then it is better to build a U-shaped structure or "island". total area the working surface will not change, but you will no longer have to run all over the kitchen. The vertices of such a "working triangle" (refrigerator, stove and sink) should be located as close to each other as possible.
- Protruding handles - reduce the angle of opening of the door located in the corner of the cabinet. At the same time, the drawer stops sliding.
- Narrow "labyrinths" make it difficult to move freely around the kitchen. There must be a distance of at least 120 cm between the facades of a kitchen with an "island" or a U-shaped kitchen. Only under this condition will the drawers be fully extended and the owners will have enough space for passage.
- Natural marble floors and work surfaces are difficult to maintain. Marble has a porous structure, which allows dirt to penetrate quite deeply and makes it impossible to remove it. Therefore, it is better to choose a granite countertop or artificial stone- they are easier to clean.
- "Invincible" Corian - many people mistakenly consider this material to be the most durable and durable. Over time, even a stone countertop is also covered with scratches or stains. The only advantage of this material is that it can be easily restored. But this procedure can only be trusted by specialists.
- Facing kitchen facades with mosaics - such a finish should not be used for drawers and doors, as it will heavily weight the structure, and the plasterboard base will “eat up” the usable area.
- Massive air ducts - such designs are not at all necessary, even if the stove and the ventilation hole are located far from each other. It is better to purchase a cooker hood with a charcoal filter. It does not require an air duct, you just need to periodically change the filter.
- Glossy facades - they look impressive, but they quickly get dirty with fingerprints. These surfaces must be wiped down every day.
- Wooden floors are an extremely unfortunate option for a kitchen. They quickly become dirty and lose their "presentation".
- Out of 20 mistakes in kitchen renovation, we are already close to half. Glass tabletops for dining tables have gained a lot of popularity due to the fact that they do not make the space visually cluttered. But for the kitchen, such models are absolutely not suitable. Even the toughest glass will scratch over time. At such a table, you will not be able to have breakfast without waking up the peacefully sleeping household members. No matter how you try to carefully put the cup or plate on the table, you will still hear a rather loud knock.
- Excessively wide drawers - more spacious does not mean better. Furniture stores are happy to offer us drawers up to 120 cm wide, which are easy to slide out and supposedly convenient to use. But you should read the fact that in the store they are virgin empty and, accordingly, very light. If you fill such a box tightly, for example, with jars of pickles or dishes, then you will have to make a lot of effort to pull it out.
- A shelf instead of a drawer is a fairly common mistake. The advantage of the box is that its contents are easy to glance at and the desired item is found very quickly. In the case of shelves, you have to remove some of the content to find something or just "get to the destination."
- A lot of seams are a bad decision. If you decide to paste over the entire kitchen "apron" with wallpaper, then do not forget to protect them with glass. For this purpose, it is better to use one large glass sheet rather than several small ones connected end-to-end.
- A sink with an "irregular" shape is a kitchen detail that can not only please the eye, but also annoy its owner for years. Therefore, do not experiment with unusual shapes. It is best to stick to the classic familiar forms. Here's where to start, because a lot of time is also spent behind the sink.
- There is no place for all kinds of small household appliances. In the kitchen, you can't do with built-in appliances alone. Therefore, you need to immediately provide for a place and sockets for free-standing household appliances.
- Heavy cabinets hung on light walls. The storage system can only be hung on a solid wall. A plasterboard partition may not support this weight. In this case, a special support must be fixed on the wall, on which the upper cabinets are attached.
- Incorrectly hung technique. Built-in ovens, coffee machines and steamers must not be placed either too low or too high. The perfect solution here the location is considered to be at the level of the belt.
- Few . The kitchen requires several levels of illumination: a lamp located above the dining table; lamps built in under the upper cupboards and illuminating the working area, overhead light. It is also necessary to correctly place the switches.
- Lack of free areas on the countertop. Between such elements as a stove, a sink and a refrigerator, there must be areas of the work surface on which, for example, food removed from the refrigerator can be placed.
- Too high base - the standard height is 10 - 15 cm, but today most built-in household appliances for some reason are designed for a base no higher than 10 cm.
So we looked at 20 mistakes when repairing a kitchen with our own hands or with the help of professionals. Now you know where to start better and what nuances need to be taken into account. There are even more tips on how to design a kitchen on the site.
Also watch videos on this topic:
Kitchen renovation is not necessarily a costly undertaking. Everything can be done quickly and inexpensively with conventional materials. If you use exactly what is suitable for difficult room conditions, the finish will not lose its attractive appearance for a dozen or more years. Along the way, issues with windows, doors, communications are being resolved. Outdated designs are replaced with new ones.
The whole process is carried out in stages so as not to miss anything and not spoil what has already been done. Difficulties are caused by the arrangement of furniture and equipment in the Khrushchev, where there is very little space. Correct selection modern products will solve this problem.
Project work
Most kitchens, especially small ones, require redevelopment in order to place furniture and equipment conveniently. Start with a careful measurement of the room - the accuracy is not less than 5 mm. In a small area, inaccuracy leads to the accumulation of errors, and as a result, it turns out that somewhere there is not enough space, something interferes. All data is recorded in order to then draw up a plan on its basis. Determine not only the dimensions, but also the position of each object relative to the walls, floor, ceiling. They take indicators from the following elements:
- the whole room - length, width, height;
- door and window openings;
- mezzanine;
- sockets, switches, lamps;
- pipes - gas riser, sewerage, water supply;
- ventilation grill;
- finishes - cornices, stucco moldings, various ledges.
All data is transferred to a sheet of paper, and as a result, a plan comes out. Now you need to decide on the location of furniture and household appliances. If they are not updated, they remain the same, then the dimensions are removed. But you will probably want to update everything. It makes no sense to buy in advance - you will have to place it somewhere, in a small apartment the equipment will only interfere. It remains to choose the products you like in the store, find out the dimensions from the catalog provided by the seller.
It is difficult and time-consuming for a layman to draw their placement by hand or use computer programs. They do it easier - they take a sheet of cardboard and prepare a large-scale copy of a kitchen with walls, only without a ceiling, cut out windows and doors. Reduced by 5-10 times depending on the size of the room. Models of cabinets, stoves, sinks and everything else are made from dense foam, they are signed with a marker. Then they begin to play with cubes, moving them around the space until they find the optimal arrangement. They are glued to the walls with pieces of plasticine.

If there is no desire to work with the project on a computer or the proposed method seems difficult, use another. It will take quite a lot of cardboard, on which the length and width of each piece of furniture that will stand on the floor are applied in full size. They are moved around the kitchen space in search of an acceptable solution. It is not superfluous to make models of the rear walls in order to estimate the height position. The disadvantage of this method is that it is impossible to pre-plan, perhaps when all the furniture and household appliances have been taken out.
General and specific features of the repair
A kitchen is a room with operating conditions that are fundamentally different from living rooms and even utility rooms. People spend a lot of time here, and cooking takes place, which greatly affects the furniture and Decoration Materials... It must meet increased sanitary and hygienic and operational requirements. When starting a repair, the following factors are taken into account:
- temperature drops constantly occur - from normal to high and vice versa;
- the presence of vapors leading to excess moisture;
- installed gas and electrical equipment requires special safety measures;
- aggressive fat particles, soot settling on the surface - should be easy to wash;
- intensive use of furniture and equipment can only withstand wear-resistant coatings.
These features must be taken into account when repairing, otherwise the money will be wasted. In addition to taking care of beauty, measures should be taken to preserve it in adverse conditions. This is facilitated by good ventilation. Before repairing it, they check it: remove the grating and see where the canal leads. If it is good to the vertical shaft, it may be necessary to put a small exhaust fan... When the direction is horizontal, it is worse, but it can be corrected.
How to cover the floor, walls, ceiling?
The choice of finishing materials plays a significant role in the durability of the kitchen. The main thing is high functionality in the special conditions of the kitchen. In terms of design, even the most traditional types can beautify a room if chosen with taste and skillfully used.

Ceramic tiles are often used for flooring - they are impervious to moisture, physical exertion, and pollution. The colors are so diverse that they imitate wood, parquet, marble and much more. A significant drawback is poor thermal insulation. A common budget material is linoleum. Easy to fit with your own hands, not afraid of moisture - advantages, because of which it is popular. You can buy with varying degrees of thermal conductivity, with or without lining. Long-lasting, but should be protected from punctures and cuts.
Some beautiful and trendy materials should not be used on kitchen floors. This primarily applies to laminate flooring. It is easy to lay, durable, but afraid of moisture, which is abundant in the kitchen. Getting between the joints, it gradually destroys the coating, which swells. The second unwanted material is parquet. Constant temperature fluctuations, high humidity are destructive.
In the kitchen, the walls are more dirty than in other rooms. It is advisable to use coatings that are easy to clean. Washable wallpaper or painted non-woven wallpaper is suitable for this occasion. With their help, the room acquires the desired shade, all defects disappear under them. Among the disadvantages is poor resistance to damage.
Semi-gloss paint is cheap but impractical. The surface is washed, quickly becomes dirty, flaws stand out, but if necessary, it is updated without problems. Will hide everything decorative plaster that is easy to clean. It looks great in any interior, but it is not easy to remove in case of subsequent renovation. Only the apron is usually trimmed with ceramic tiles.

Sheathing with waterproof plasterboard is fast, inexpensive, and the walls are perfectly aligned. It is not necessary to correct surface imperfections - they will hide under the sheets. In a kitchen with a small area, the method is not very desirable - so the limited space will be further reduced.

Well hides the flaws of the suspended ceiling from plastic panels, which is not afraid of steam, fat, requires minimal maintenance. Next in terms of functionality is the laminate, the seamy side of which is impregnated with PVA and MDF with a similar treatment. The use of moisture-resistant drywall for these purposes is also a good option, but as a last resort. Multilevel structures are created from it, but it is required to periodically update the whitewash, because even the highest quality paints do not last long. V small kitchen reduces space.
Cheaper finishing the ceiling using expanded polystyrene plates. All defects are hidden under them, they are easy to install and also replace. Choose only laminated material that is lightly dirty and easy to clean. Nevertheless, despite the attractiveness of this option, the application is fraught with problems: the relief of the slabs after six months begins to turn yellow and blacken.
Options for arranging a small room
Khrushchev and panel house differ in the extremely limited size of the kitchen. It is uncomfortable, cramped, the plaster is crumbling, the pipes are rusted. With proper planning, even such a "crumb" can be transformed.

To begin with, they take out all the household appliances and furniture, otherwise there will simply be nowhere to turn around to carry out repairs. Old communications and finishing materials are ruthlessly removed, a half-rotted window is removed. You can start work. After completion comes important point- to place the equipment in a new way to make it as convenient as possible even in such a limited area. The layout is possible according to one of the options:
- single row;
- angular;
- L-shaped;
- letter P.
In order to properly organize the space, only the furniture that is really needed is placed. You should not clutter up with things you can do without. They part with all sorts of boxes, boxes, stands. They decisively get rid of everything unnecessary, inconvenient, even if it is expensive as a memory. The walls are used as much as possible for wall cabinets, shelves - the floor area is freed. They buy built-in household appliances that take up little space. From furniture, preference is given to a folding table and the same chairs. On hob, sink and work surface are installed on one solid worktop.
If not physically, then visually expand the space, creating modern design, glossy surfaces in pastel colors. Lots of lamps - on the ceiling, shelves, above the table and work surface. There are no heavy curtains on the windows, the material is translucent or blinds. Several mirrors will further increase the space. Furniture is chosen with a glossy light-colored surface.
Kitchen equipment - what to improve, what to part with?
A complete apartment renovation is not only a new decoration of the walls, ceiling and floor, but also the replacement of pipes. They start with communications that are outdated, get in the way, look ugly. WITH metal pipe supplying gas to the stove, part. Allowed now flexible hoses which are compact and the wall space can be used. It is forbidden to do this on your own, you will have to call specialists. If worth gas water heater, at the same time remove it, having received permission, and move the new water heater to another place.

Water pipes change before repair. The most affordable solution is polypropylene, which is not afraid of corrosion. The connection requires a special welding machine- can be bought inexpensively or rented. In order not to think about it, they use metal-plastic. Installation is simple, it is carried out with a special mount. The old mixer is also being replaced.

In Khrushchev, one socket was originally installed, placed on the far wall, which in modern conditions does not meet the needs. A socket group is required, the place of which is above the desktop. It consumes a lot of electricity, therefore, a separate power wiring is provided. Instead of a standard junction box, a shield with automatic devices, an RCD for kitchen equipment, washing machine, boiler.

Ventilation is a weak point and needs to be improved to prevent odors, steam and grease from spreading throughout the apartment. It is impractical to use a hood with a charcoal filter - it requires frequent replacement and costs a lot. Install a conventional one with an aluminum mesh filter. A separate vent is punched in the standard channel. If the system is not connected to the toilet and bathroom, it is made below the existing hole. A built-in fan will improve traction. At the same time, they get rid of the chimney, freeing up space on the wall.
The refrigerator is not installed next to the stove - the heating increases the consumption of electricity. If possible, they are taken out into a cool room - onto a glazed balcony (with the exception of sunny side south), into the hallway. But not every housewife will like to constantly run for groceries. The way out is a small single-chamber unit without a freezer. In place of large equipment, space is freed up for a washing machine. A compact refrigerator is installed on top.

Under the window - a niche for the refrigerator
Replacing an old window with a plastic one is the best inexpensive solution. The material is resistant to temperature fluctuations, has good heat and noise insulation, and is easy to clean. The use of a wooden structure with double-glazed windows is preferable, but the cost of a natural product is higher than an artificial analogue.

Do not disregard the door. The old chipboard frame is replaced with a new one - there are many attractive inexpensive options in stores. V small apartment the canvas is often simply removed. But the renovated kitchen with the leftover box is unattractive. An arch is arranged in its place. You will need very little drywall and water-based paint... The main thing is that such an opening organically fits into the interior, space is freed up.
Repair and finishing work - sequence of actions
When it became clear what to do, materials were purchased, the most crucial moment begins - do-it-yourself kitchen repair. It is important to do everything in stages, avoiding mistakes that many who do it for the first time sin. If you ignore design, this happens much more often. Then it is difficult to accurately calculate the amount necessary materials, install few outlets, forget about the hood and the like.
Violation of the sequence leads to unnecessary waste of time and money, already finished surfaces become dirty. Work begins with communications: water supply, sewerage, electricity, ventilation. Then the windows and doors are next. After them proceed to the room itself. First, preparation of the subfloor, rough finishing of the ceiling and walls. Then, in the same order, the finishing is done. Completes all the installation of equipment and furniture.
Room preparation
After the room has been vacated, they proceed to the surfaces. You should start from the ceiling. In houses with bituminous roofs, residents on top floor often suffer from leaks. Partially they are saved by foaming rusty - tile seams so that the water flows into the next bathroom, where the material is not afraid of moisture, there is less electrical equipment. Before that, be sure to free the channels from the old wiring. Level check the horizontal. If the difference exceeds 30 mm, alignment is impractical - expensive and difficult. The problem is solved by the device of a false ceiling.

An examination of the floor is carried out in order to determine its condition. It makes no sense to lay a new coating on the old flooring. There are so many defects that it is better to remove them completely before screed. Replacing it is necessary if cracks with a width of more than two millimeters are found, especially intersecting ones. Depressions and protrusions can be leveled if the general condition is good. Check the horizontality - it should not exceed 3 mm, and ten on the diagonal, which is available for correction.
Use building level not less than a meter long. If small irregularities are found, so as not to engage in the screed device, marmoleum is used for flooring. This is actually linoleum made from natural raw materials, brought to perfection. Tropical crops are used for manufacturing, which makes it cheaper than laminate. The pressed cork layer makes it very warm. The material is not afraid of moisture, dirt, even spilled paint does not stick. This is a completely eco-friendly product that will last 20 years. To lay it, no special tools and skills are required.
A screed with large holes or protrusions that is skewed must be repaired. The most acceptable solution for such a case is a cement-based self-leveling floor. It is raised 10 mm from the highest mound. The leveler is not too expensive in price, for a small area it will not take much. The finishing floor is laid directly on it. Cracks in the old base do not need to be repaired, and a perfectly flat surface will create good conditions for further work, water will not flow into the depressions.
In the old kitchen, the walls have absorbed a lot of vapors, which sometimes penetrate to the ground. Simple cleaning is useless - finishing materials do not stick. The coating is pre-soaked - paint and plaster soaked in grease. Spray with water from a spray bottle, close windows and doors, and stand for 2 hours. Then quickly remove the coating using a spatula or abrasive mesh. If it fails the first time, repeat.
Oil, alkyd paints are removed using a composition designed to remove them. Work with a sponge, apply on small areas, so as not to spoil an expensive product in vain. Our drugs are cheaper than imported ones, but their action takes time. A respirator and rubber gloves are used to protect the skin and respiratory organs from aggressive liquids. For airing, everything is opened wide.

On surfaces soaked in grease, paint and plaster will not adhere and will begin to flake off. Therefore, everything is washed - ceiling, walls, floor. Use any dish detergent diluted 1:20 with water, add table vinegar. Their compatibility is checked beforehand. If bubbles appear, a pungent smell, take another remedy. A metal sponge is used, which is often dipped in a solution, rubbed with pressure. Washed twice.
Finally, when the surfaces are dry, priming is carried out. Use means of deep penetration into concrete. Before buying, they carefully read the recipe. Biocidal additives are required. If there is a thiuram derived from it (tiram, arosone, fernazone), the composition is not suitable for these purposes, a different one is chosen. The impregnation is done twice with an interval of a day.
Ceiling lathing, sheathing and wiring underneath
It has already been said that in the kitchen, in order of preference for the ceiling, they use:
- plastic lining;
- laminate impregnated from the inside out with PVA emulsion;
- MDF with the same finish;
- green drywall last.

The lathing is made without crossbars, using wooden slats or metal profiles. The distance between the logs is 0.5 m, the fastening step is 0.4 m. They are placed along the stretched ropes, placing pieces of plywood for alignment.
It is convenient to install wiring in the suspended ceiling. In order not to make grooves, channels are cut out in the slats, where it is placed freely hanging. A flexible three-core double-insulated cable with a cross-section of at least 1.5 mm2 is used, for a socket - 2.5 mm2. A parallel connection is used: from the shield, one wire goes to the outlet group, the second to the main luminaire, the third to the point ones (a cross section of 0.7 mm2 is allowed). Such a scheme guarantees increased safety and ease of repair.

A branch on the sockets is also allowed under the ceiling. From the center, where the lighting network ends, they turn at an angle of 90 ° to the wall, laying is performed in a strobe. The connections to the switches are made in the same way. The cable is fixed first with masking tape, then with alabaster. For spot lighting, a space of 8 cm is required. An additional 20 × 40 mm lathing is arranged on the central chandelier or plafond. It is better to limit yourself to the main lighting on the ceiling, because extra holes are a way for fumes to penetrate.

After laying the electrical communications, they proceed to the sheathing. There is nothing special about the technology. Laminate and MDF panels on wooden lathing are installed using mounting glue, additionally small nails in the corner of the groove. The plastic is fastened with self-tapping screws. When buying, check the entry of the tongue of the tongue into the mating groove - ideally freely or without significant effort.
Plasterboard is mounted using conventional technology. Sheathing with panels, silicone sealant is squeezed out into the groove of the previous one before installation - it will become an obstacle to the penetration of vapors. The streaks are immediately removed with a rag soaked in vinegar.
Wall finishing and finishing flooring
The tiles in the kitchen do not fully comply with the rules of hygiene - dirt accumulates in the seams. To cut them, use the composition used in the baths, adding 10% water emulsion. Smooth with a piece of insulated cable 5 mm in diameter. If your finger, even with a glove, remains invisible to the eye irregularities - an ideal place for dirt to accumulate and germs to multiply. It is recommended to use ceramic tiles only for the apron. As a budget option - plastic and MDF panels, thanks to the reliable connection of which the working area is protected from dirt and steam.
The best wall decoration in the kitchen is washable wallpaper. They do not accumulate odor and can serve for a long time. If you choose the right color, then it is guaranteed that you will not have to think about repairs for a few extra years. White and bright ones are the least suitable, and light beige pastel shades with a medium-sized pattern do not lose their appearance for more than 10 years. Help is required, then things will go faster - one person glues, the other combines.

Installation tile on the floor - a laborious occupation, the cost is quite high. The cork is warm but absorbs moisture. Linoleum - an opportunity to quickly make a floor covering at low cost. Yet the best way- marmoleum, little known natural material, which is also inexpensive.

Kitchen with marmoleum laid on the floor
Finish with the installation of skirting boards. They are needed not only as a decorative element, but also serve to isolate the joints from fumes around the perimeter. Fastening is carried out on liquid nails or silicone glue, spreading over the entire surface. The streaks are immediately removed. If you want to plant it tightly, self-tapping screws are used, the heads of which are recessed and covered over.
On the ceiling, the skirting boards will have to be additionally fastened with screws or small nails. They take phosphated black, which are less noticeable. Set after about 0.5 m, the extreme ten centimeters from the corners. If they fear that the elements will be noticeable, smear liquid nails by choosing a suitable shade.
The kitchen is one of the main areas in the house, so its design is very important. How to equip your kitchen in a new way, make it more comfortable, beautiful, comfortable and functional? Some design tricks will help you achieve what you want and get a more perfect interior.
Arranging a luxurious glass apron in the work area
Kitchen apron is an important design element that no kitchen can do without. It performs not only a decorative function, but also protects walls working area from hot sprays, hot fat, steam and other adverse influences.


Traditionally for arrangement kitchen apron applies. However, if you want to make your kitchen more attractive, you can replace this material with.


Skinali, will become a real decoration of the room and transform it for the better.


The main advantages of this solution:

Installing a TV in the kitchen
It is safe to say that the TV is also a household appliance that has become a part of the life of every person. And in the kitchen (a room where households spend a lot of time), you definitely cannot do without it. To enliven the interior with this device, you need to choose the right way to place it.


There are several good options:
- Install the TV in the niche by attaching it to the wall.
- Just put the TV on the shelf.
- Hang it high - for example, above the refrigerator.
- Place the TV in the work area at eye level.
- Hang on the wall using a special sliding bracket.
- Place the TV in the corner of the kitchen.
- Place it in the dinette.


Installing a sink opposite the kitchen window
Sink installed under the window- a technique often used by European and American designers. Especially often, such a solution to the arrangement of the kitchen can be found in country mansions.


Even if the house has a modern Dishwasher, the sink will still remain the centerpiece of the work area. The sink located right under the window is also a great opportunity to admire nature and listen to birds singing while washing dishes.


Unfortunately, arranging a sink in such a place in urban apartments is associated with some difficulties, but they can be overcome if you follow the advice of designers. Such a solution can completely transform the interior of the kitchen, making it more interesting and modern.

However, the implementation of such an idea is fraught with some difficulties. It is recommended to entrust such work only to a specialist - that is, to a qualified plumber. The lengthening of communications and pipes will become the most critical part of the process.

To organize a normal drain, you will have to raise the drain pipe by about 5 cm - this is a calculation for each additional meter of transfer of the sink.

In some cases, the sink has to be moved long distances - for example, across the entire kitchen, to the opposite wall.

Regardless of what kind of sink will be installed near the windowsill (round, oval, square, mortise, ceramic, composite, etc.), splashes from it will fall on the glass and stain it. This means that you will have to do additional cleaning regularly.

To avoid such a situation, it is recommended to install the sink near a deep window sill. If between window frame and the sink has a distance of about 20 cm, then you can close this space with tiles, or pick up a special sink with a high side.


If the window sill is flush with the sink, you can install a mixer on the edge of the frame - then not all splashes will reach the window and you will not have to wash the glass so often.

Placing a bar in the kitchen
Such an element modern interior, as, belongs to the culture of America and Western European countries. In fact, this is a kind of dining table that performs several functions at the same time.


The bar counter is capable of transforming the kitchen beyond recognition, making it original and special. She will become respectable and stylish element premises, and will emphasize the good taste of the owner of the home.


- The kitchen is small and the traditional dining table takes up too much space.
- If the kitchen space needs to be divided into several functional zones - dining and working.
- If you want to equip a special corner for installing a mini-bar (for this, the kitchen should be spacious enough).
- If it is necessary to combine the balcony and the kitchen together (in this case, the bar counter can be equipped from the lower part of the wall between these two rooms).
- If the kitchen space needs to be optimized as much as possible, make it more functional and comfortable.
The size of the bar counter will depend primarily on the size of the kitchen itself. The more spacious it is, the larger this design can be. It is also necessary to select special high chairs for the bar counter.


Arrangement of a kitchen island
A kitchen island is called a multifunctional table, which is located in the center of the room, being part of the so-called "working triangle". makes it easier to move around the kitchen, making it more functional and convenient.


However, it can only be equipped in a spacious room. Such an interior came to us from the restaurant business and every year it is gaining more and more popularity.


The island includes several household appliances that are indispensable in any kitchen. You can arrange them at your own discretion - this can be the built-in countertop of the island hob, sink, dishwasher, oven, etc.


In addition, the island can serve as a bar counter, work surface and dining table. In fact, this design replaces a good part of the headset, freeing up the wall.


Using a transforming table in the kitchen
A transforming table can be a real boon when it comes to arranging a small kitchen. The main feature of this model is that, if necessary, it can be increased not in width, but also in length and also in height.

If necessary, such a table quickly turns into a fairly compact product that can easily fit in a room of even the most modest size. Manufacturers equip such table models with special devices, thanks to which the control process becomes very simple and easy (even a child can cope with the task).


With all the indisputable advantages, this model also has some disadvantages: its high cost, inconvenient position of the legs, some bulkiness and weight. However, such massiveness goes well with all traditional kitchen interiors.

Installing a moisture dehumidifier in the kitchen
Special dehumidifier is simple and effective method regulation of the level of humidity in the room. For houses and apartments, manufacturers offer mobile household models that collect excess moisture.

Such devices improve ventilation functions, increase the service life of the building, eliminate fogging of windows, and save furniture from mold and mildew.
Why does the kitchen need a moisture dehumidifier?
- According to research, a person loses about 900 grams of moisture per day. If the humidity in the room is increased, the person absorbs it even more, and losing less. As a result, excess moisture accumulates in his body, which significantly worsens his state of health. This leads to an increase in the load on the body - the heart suffers most from high humidity.
- High humidity in the room is dangerous for asthma patients - it can cause bronchial edema and spasms, difficulty breathing. People with arthritis and osteochondrosis also have a hard time tolerating high levels of humidity. Many types of mold are pathogenic forms and are sources of increased danger. Installing a moisture dehumidifier in your kitchen can help you avoid many unpleasant diseases.
- In the humid environment that inevitably forms in the kitchen, mold spores thrive. A fungus appears on the walls, which not only spoils appearance interior, but also penetrates the human lungs. A compact dehumidifier does not take up much space in the kitchen, while it will help keep households healthy, as well as protect walls from gradual destruction.
Arrangement of an arch in the kitchen instead of the front door
Arch in the kitchen, replacing the usual front door- this is one of the simplest and most elegant ways to visually enlarge the room, make it more spacious and bright.

Designers offer a huge number of types and shapes of arches: they can be ornate, classic, strict geometric, ellipsoidal, and so on.


For the manufacture of such structures, you can use different materials: light drywall, chipboard, brick. The elegant arch will fit perfectly into, it can also be built when arranging a kitchen in any of the modern styles.


The arch will make any room more original and attractive. It is only important to remember that such a design has one drawback - it does not prevent odors from the kitchen from entering the rest of the rooms. To avoid this, you will have to install a good hood above the stove.

Combining balcony and kitchen
A great way to redevelop a kitchen and completely transform it during the renovation process is to combine it with a balcony. To do this, you will have to partially or completely remove the wall between the two rooms.


Designers advise not to demolish the entire wall to the base, but to leave the lower part of it in order to turn it into a bar counter. This design can simultaneously serve as a dining table if the kitchen is small.

It is important that the balcony is well insulated. It will be possible to place a refrigerator on an already attached balcony - thus, it will be possible to save even more space in the kitchen, freeing up space for other purposes.


The main stages of renovation in the kitchen.
The sequence of actions for the correct repair in the kitchen.
Interesting kitchen renovation ideas (real photo examples)