Step-by-step construction of the roof of the house
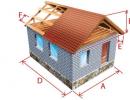
Before, starting to describe the step-by-step roof construction, it is necessary to deal with its device as a whole. As a rule, all roofing systems include three separate parts, in the aggregate, which are a single roofing design:
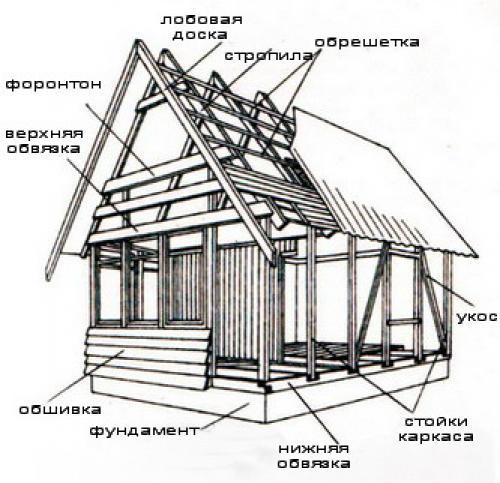
1. The main part of the roof can be called its carrier frame, which consists of a rafter system, crates and a skunk board. For the device of the carrier frame, materials such as reinforced concrete, metal and wood can be used.
However, during the construction of a private house, the tree is most often used, which not only has a low price, but in principle it is easy for the roofing device. It is this option for the construction of the roof and will be discussed below.
At the same time, we note that for the device of the rafter system, it is best to use boards with a thickness of 5 cm and 10 cm wide, and a 2,5 cm thick boards and 10-12 cm width are suitable for the device.
2. The second part of the roof is an insulating layer, from which the roof service life is also dependent.
As practice shows, one of the main roof problems is the evaporation and appearance of condensate, which has a significant impact on the carrying structure as a whole and simply can lead it to an unsuitable state. And so that this does not happen, it should be properly selected the insulation layer for the roofing device. To do this, mainly use runneroid as the cheapest material, but also very often the use of a pair-waterproofing film or pergamine can also be found.
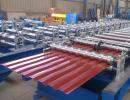
3. And the latter is no less important part - it is a roofing material that can also be different species.
The most common and cheapest material for the roof is, of course, asbestos-cement and bitumen slate. The second place in popularity is most likely occupied by Ondulin, very similar to the wavy slate and, having excellent resistance to negative impacts. Less than claimed metal tile, which is considered the most practical material, but it causes some difficulties when installing.
All these parts of the roofing system must be fully fulfilled, since it is precisely the reliability of the entire finished design that depends on them. And the roof, whatever kind of type it, should be able to perform the following functions:
- the roof must withstand the wind and snow load;
- must be waterproof;
- the roof design should not spout condensate;
- the roof should provide normal humidity in the house and even the temperature;
- there must be good resistance to temperature differences and chemicals;
- and the last, the roof must be designed so that it can be cleared of pollution and repair.
Roof construction steps
As we have already mentioned earlier, we will consider the most commonly used in the construction of private houses the carrying frame design of the roof of the tree, as an insulating and roofing material, take the cheapest materials - rubberoid and slate.
Note that there are two methods for fastening the bottom of the carrier roof frame to the wall of the house: the frame is either fixed on the ceiling beam, or the frame is fixed to a special Mauerlat, which is a thick wooden beam with a size of 15x15 cm in a section, stacked along the wall axis.
Mauerlat helps evenly distribute the load in the places of the roof design along the entire wall of the structure, but most often you can do without it, that is, use the first option, but at the same time, consider that the strength of the beams themselves and walls of the house should be so high to withstand all roof.
When describing the construction stages, the carrier roof frame is attached to the beam of overlapping.
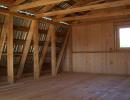
Step 1 Device Slinge
We start building a carrier frame. For this, the first thing with the help of nails with a length of 1.5 cm is necessary at the top point to cut rafters with each other in the form of an end connection. Then a slightly retreating below from the top point, about 60-65 cm, it is additionally necessary to bore rafters with each other, the design in the form of the letter "A" should be obtained.
First of all, extreme rafters are set, while their lower ends are stacked on the wall of the house with the release of somewhere 20 cm. To the house, the extreme rafters are also attached with the help of nails 20 cm long, and are additionally strengthened with two injections - one edge, which is fixed to a rafting board, and the other to the ceiling beam.
Then it is necessary to install rafters in the center of the house and on top to mount the skateboard, which will give the rafters a stronger connection between themselves. After all this work done, the remaining rafters can be installed on the same principle that they did earlier. At the same time, it must be remembered that ideally the distance between the rafters should be no more than 50 cm.
Step 2 Device Crates
Before proceeding to this step, we note that the crate system can be two species that have their own design features and are intended for a certain type of roofing material.
The first and most time consuming is a solid type system, which, as a rule, consists of two solid layers, whose seams intersect in each row. The first layer of such a system is mainly made from edged boards, and a water-resistant phaneer is used as a second layer.
The second most common and most simple type of crates is a shit system, which is usually used for hard roofing material. And in our case, we will use this type of crate. For this boards, the crates are laid at a distance of approximately 5 cm from each other with a release of approximately 25 cm for extreme rafters. The shell boards are attached to the help of nails, that is, to each rafter foot two nails.
Step 3 Isolation
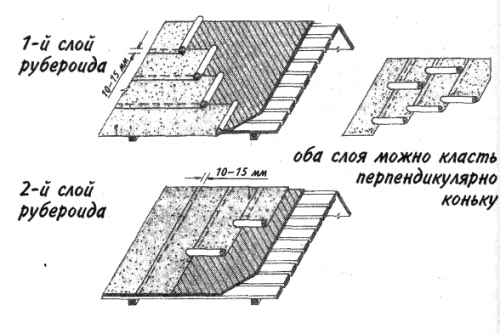
To organize isolation over the crate, it is necessary to pretend the rollers of the rubberoid vertical with a navel of at least 15 cm. Fasten the ruberoid to the crate can be medium nails with a wide hat.
At this step, you should also mention both insulation. If it is assumed that the house will be without a attic or with a residential attic, then between the rafters it is recommended to still be laid and the material for insulation, which is most often used by foam or mineral wool.
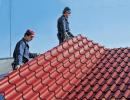
Step 4 Roofing
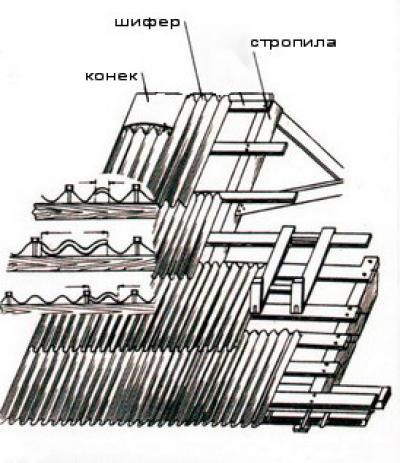
The last step in the construction of the roof is the flooring of roofing material, in our case it is 6-tivolny slate. Start to lay slate must always be reduced. At the same time, when laying the first three rows, it is necessary to check how even these rows are obtained, otherwise, if one of the slate rows will have at least the slightest deviation from the smooth line, then it will have to overlap the entire roof.
When laying, it should also be noted that the cassette of the second row of the slate on the slate of the first row with the longitudinal laying should be at least 10-15 cm, and with the transverse laying of a single slate sheet to another should be at least one "wave". The fastening of slate sheets is carried out using special slate nails.
Conclusion
As you can see, the construction of the roof consists of just a few simple steps, while the proposed version of the roofing system is good for such reasons as:
- The construction of such a roof does not require a huge number of building materials, and, consequently, large material costs;
- The installation of the roof, described above, is so simple that it can be easily and quickly independently, and, therefore, you can save on the hiring brigade of builders.
- And the last, building the roof with your own hands you will always be sure that all the works are done qualitatively and the roof will not let you down in rainy weather.