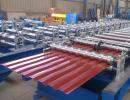
What technology laying metal tile on the roof
Most developers prefer metal tile. The technology of performing metal tile laying on the roof is quite simple, so the laying of this material can be carried out independently. If there is no free time, specialists are hired to perform roofing works.
But still much cheaper to fulfill roofing work yourself. To do this, you just need to carefully examine step-by-step installation instructions, which is often attached when buying roofing material.
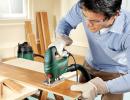
For self-installation, metal tiles will need tools:
- Ladder
- Wooden staircase (stacked directly on the roof)
- Roulette
- Reika
- Chalk, marker, simple pencil (for applying)
- A hammer
- Durable rope
- Scissors for metal
- Boards for lifting profile sheets on the roof
- Screwdriver (if possible on the battery)
Calculation of the required amount of roofing material
Metal tile laying scheme involves the accurate calculation of the number of building materials for overlapping the roof. Sheets of metal tiles are asymmetric, the calculation of their quantity has its own characteristics. You can not replace one sheet to others.
The manufacturer's plant indicates the size of the sheet metal tile horizontally, vertical, but, in addition, for this material, the effective dimensions of the sheet are provided, when calculating the overflow of sheets is taken into account, the effective overlap area is determined. It is also necessary to take into account the asymmetry of the roof.
Preparation of the roof
The technology of laying metal tile on the roof provides for preliminary training. In order for the metal tile to lay correctly, it is necessary to perform, mount the gutter for water drain, cornice strips. It is first recommended to check the roof on the evenness, namely: the horizontality of the arrangement of the skate, the length of the roofing rods horizontally. In the event that the roof went to the skew, it must be aligned.
Controlling
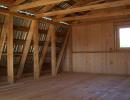
The roof is erected by a counterclaim: bars (50 mm section) are stuffed on the rafting boards. 
Waterproofing material
Then the waterproofing material is stacked: the film is fixed not inserted, with allowances (better than one holistic web, but if it is impossible, then the pectorist, which should be at least 15 cm). It is impossible to use waterproofing material made on the basis of bitumen. After some time, he will lead the counter tests on the bars. As a result, condensate will be collected. 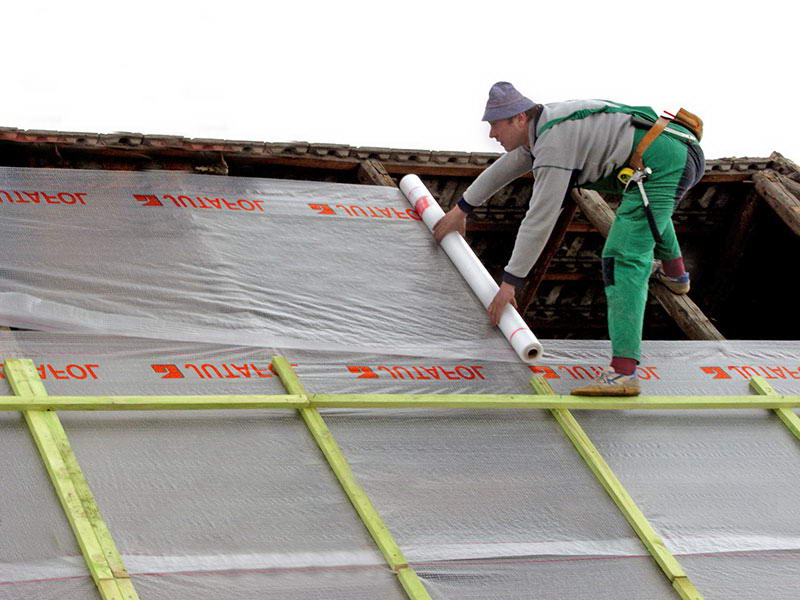
Okeekhet
After laying a waterproofing layer from the board with a cross section of 3.2x10 cm, a doom is placed in a step of equal to the foothold of the metal profile wave, which manufacturer indicates the instructions. The bottom board of the bottom should be higher than the rest of approximately 15 mm. 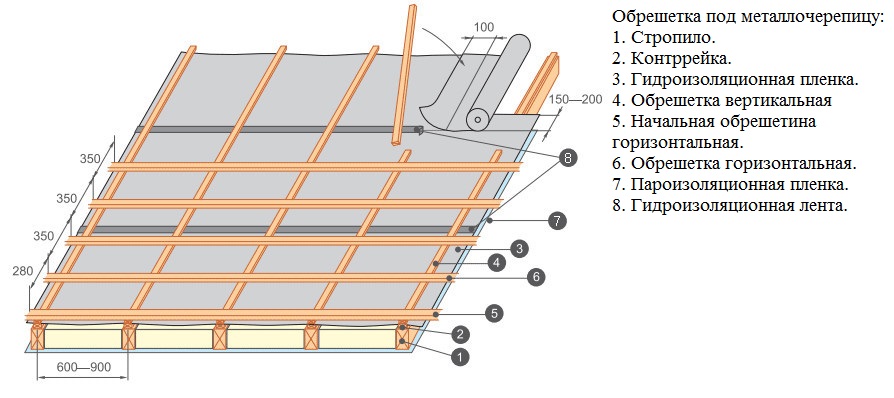
The parallel to fasten the board to the eternity is checked using a plumbing (this is an important point, since this board will be placed under the step of metal tile). The nestless doom performed in the future will lead to a variety of problems, for example, the sheets of the material will not be shrinking, poor-quality fixing and other nuances.
If the wave step of the profile sheet is 30 mm, the distance between the first two bruises of the crate should be 23 mm, and already between the rest - 35 mm. The wave step is 35 mm, then the distances between the bars will be 28 mm, 35 mm, respectively. Wave step 40 mm, distances between bars - 33 mm, 40 mm.
Leveling roofing rods

Also, in the preparation of the roof for laying metal tile, it is worth paying separate attention to chimney, inner corners. A solid doomle is mounted on these areas if additional aprons are appropriate.
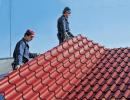
Design elements Before starting their installation are processed by antiseptic means. First, it is necessary to raise the roofing material to raise the roof (the rise of metal tile is carried out by one sheet of building material). For this, lags can be used, strong straps specifically designed to perform lifting work (the lifting technology is selected depending on the height of the construction).
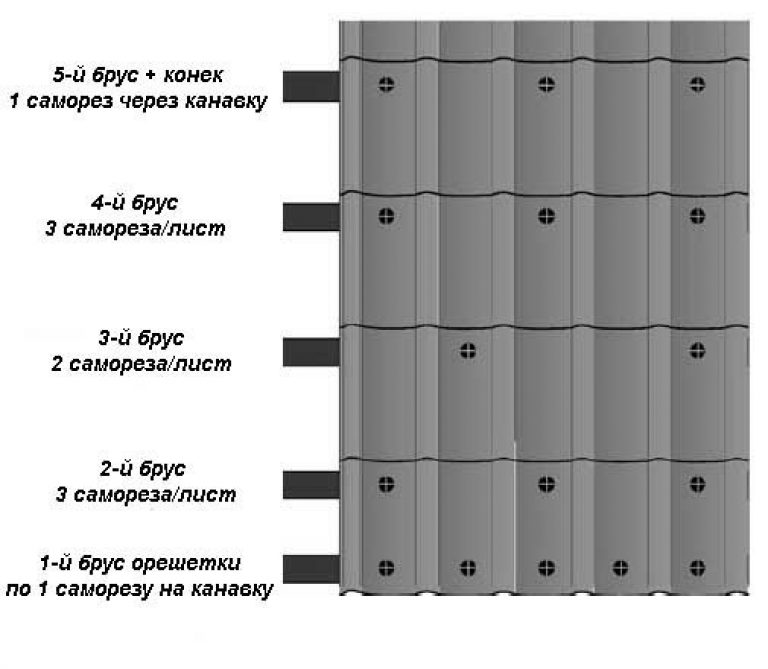
- If the length of the sheets of the coating is similar to the length of the roofing slope, then the first sheet of coating on the roofing end is aligned, the eaves. For fastening the profile, special self-tapping screws are used (for metal crates, self-tapping screws are taken - 0.48x2 cm, for wooden - 0.48 × 28 cm). The length of the self-samples is determined by the manufacturer of metal tile and the type of profile used.
- In areas of profile adjoining a profile, the fastening is carried out with a chess order using self-soles, the consumption of which is approximately 8 pieces per m².
- When the installation of tiles sheets is carried out from left to right, the edge of the stacked sheet of the profile is started under the edge of the previous one. Installation of tiles sheets is carried out on the right left - the professional sheet needs to be laid on the previous one.
- The first sheet of the material should go beyond the edge of the roofing cornice of 5 cm, it is temporarily attached to the crate of a self-tapping screw near the cornice, the edge of the skate.
- The following professional owl is further stacked. Sheets should be put together with each other as tight and precisely longitudinal side overlap without distortion, gaps. To compound them, the screws of 0.48 × 2 cm are used, the fastening itself is carried out through the top of the wave from the roofing cornice to the skate.
- Similarly, a 3-4 sheets of profile sheets are made and then it is possible to remove the temporary tapping screw, which was originally used for fastening the first sheet of metal tiles. A whole unit is equal to roofing cornice.
- On both sides of the laid block, the final removal measurement is carried out. In the case of proper alignment, all sizes must coincide, then the sheet needs and can be fixed to the crate using the self-press. The rest of the profile sheets are attached to the crate, are connected on the joints.
- After the end of construction work, it is necessary to remove the entire chips, which was formed as a result of cutting the building materials, drilling holes. To do this, uses a soft brush. Damaged areas are tinted with special paint.
- If the skate has several rows, then the installation of metal tiles is carried out according to a different method: the sheets are extension in a certain order, which is determined by the grooves for removing the water located on the longitudinal edges of the material. When using this styling technology, the connection of the sheets is made along the roofing slope of the pectorist 15 cm and more.
- The fastening of the transverse profile is performed in the end of the transverse wave with self-draws of 0.48 × 2 cm, intended for metal surfaces.
- On Valma, the installation of metal tiles is carried out from the top point, dropping down evenly on both sides. Installation scheme is similar to the previously described scheme.
- The capillary profile groove is overlapped by a previous sheet of metal tile.
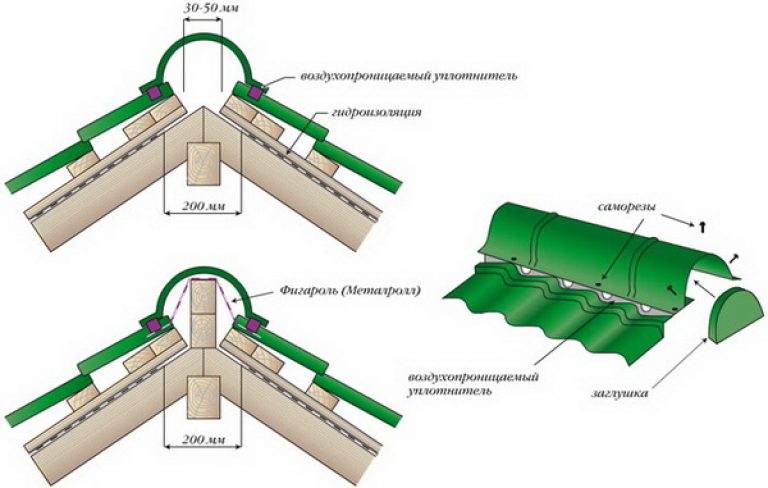
Fixation of roofing skate
In the attic, ventilation must be ensured, so the professional knots should be converged under the ski plate. Kind is fastened with self-reserves to roofing through the wave. 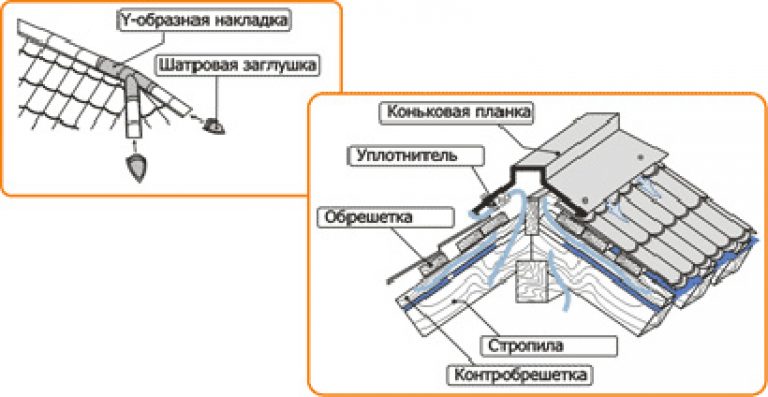
The backstage of the planks should be 10 cm and more. Arrangement of the ridge of the semicircular configuration of the hollow roof is performed using special linings, plugs.
Installation of the cornis plank
The burdock of the cornice provides plaques protection against the effects of atmospheric precipitation, respectively prevents their destruction. Installation of planks with an adhesive 5 cm, step 30 cm. Galvanized nails are used for attachment. 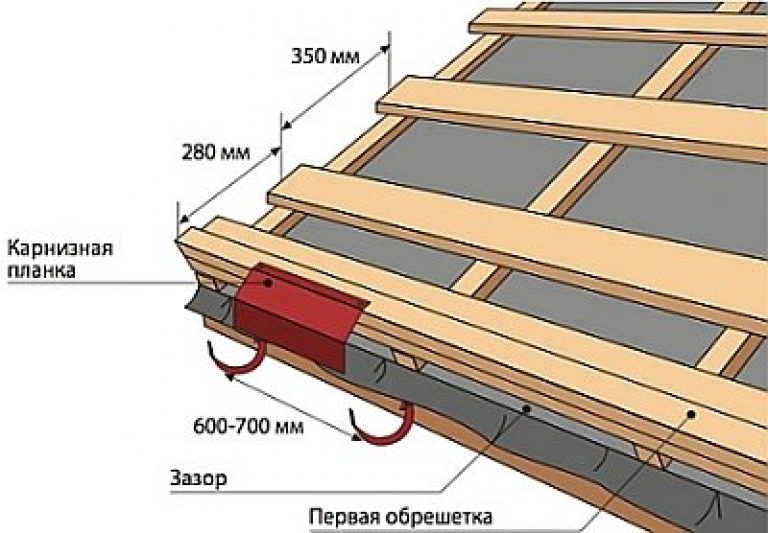
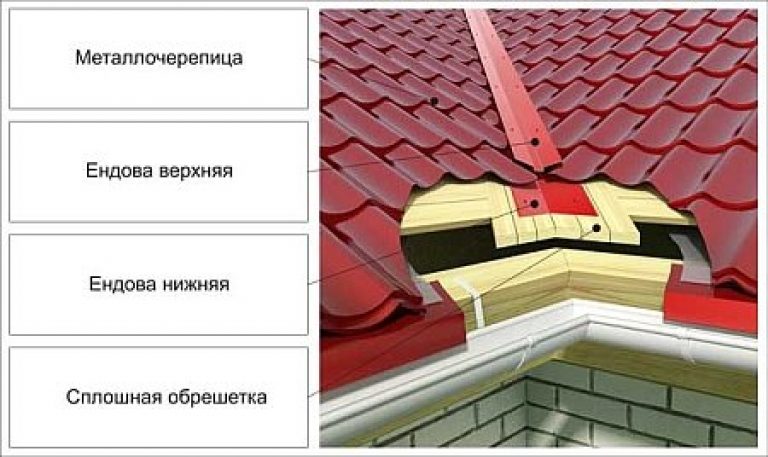
Installation of endanda
Planks under Undova are mounted at the level of the crate. Between them you need to leave two centimeter ventilation gap. The burdock of the cornice is cut, mounted on the corners of the endand. 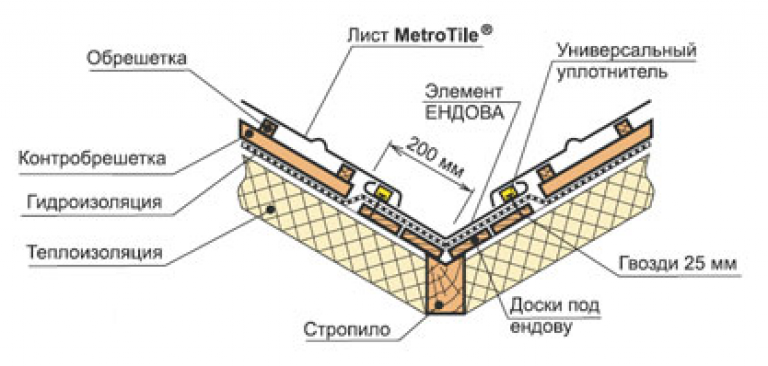
After that, the installation of the profile of the lower end is carried out, which trimmed on the form of the cornice plank. Along the Indo Plank, the marking of the guides is applied, with a distance between them at least 20 cm.
After completing the installation of the roofing coating, the decorative lining with an increment of 0.5 m is mounted along the rope of endands.
Installation of the end plank
This element of the roofing design is fixed by self-strokes to the end board, and the step is taken - 1 meter, and the crate (step - 40-80 cm). 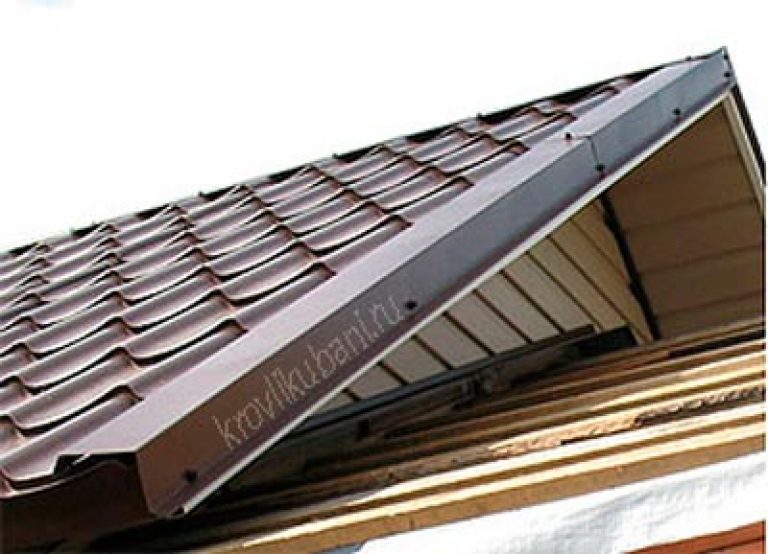
Installation of the seal
The sealing material is attached immediately before laying the skate bar. It is glued towards the middle at a distance of 0.25 m from the edge of the skate. 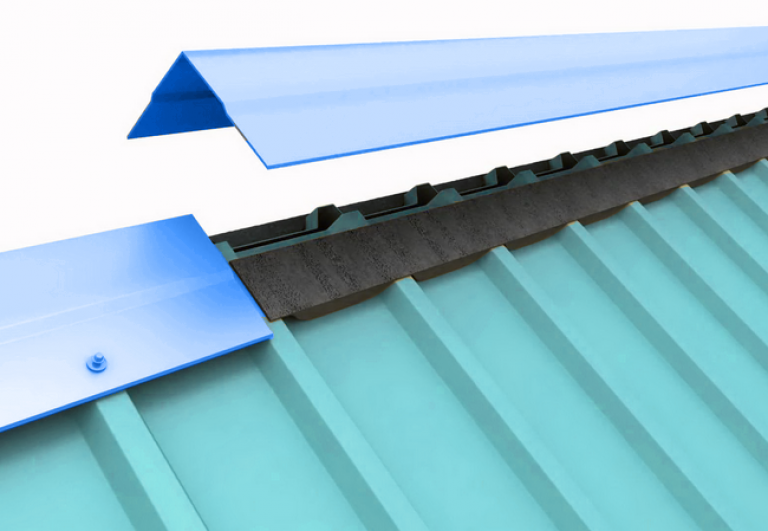
Setting the skate
Fastened by self-drawing to metal profile through three waves of the profile. The minimum nestrest is 10 cm.
Arrangement of snowstores
Increased wastewater life. Watering is provided for the installation of additional elements - snowstores. They are placed in areas where snow alignment from the roof is undesirable. The plank of the snowmaker is fixed under the second transverse pattern of the proflist. The lower edge of the plank of the snowstand holder is attached to the metal tile, the reference corner to the crate. 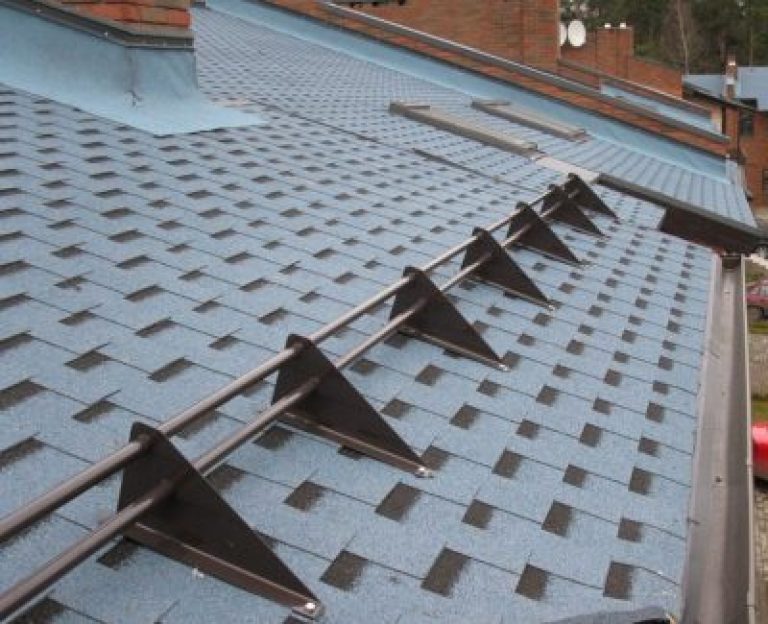
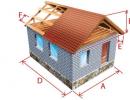
Output
The use of metal tile sheets for overlapping the roof provides the ability to create a strong reliable roof for any building with a sufficiently long service life. This building material is ease, ease of installation work, so it can be covered with a roof of your own home yourself without attracting professionals.