Facing a chimney in the house. We are trimmed by a chimney with a profile. Trummage pipe shale: stages of work
For the safe operation of the heating system, an insulation of a brick chimney is performed. Due to modern materials, the facing of the structure prevents overheating of the adjacent structures and walls, gives chimney to the negative impact of the external environment, creates an attractive designer effect. The pipe is carried out along the outer wall or partially mounted indoors.
Properties of chimney materials
Facing chimney brick involves the use of materials that reliably isolate the room from the combustion products and will not break the harmony of the interior. The outer finish of the pipe is developed not only to prevent the ignition of the roof, many elements of which are made of wood, but also in order to minimize the effects of the external environment.
Insulation materials inside the house
To masonry the smoke removal, heat-resistant bricks use, inside the wall, blocks of a ceramzite concrete are also used. The isolation of the chimney comes down to the decoration of the structure with refractory materials: clinker stone or tile, tiled tiles, natural stone, special plaster. Laying of refractory finish provides access to cleaning the pipe from combustion products.
Plaster
Relatively inexpensive building material, finishing from which will take some time. The main minus is instability to frequent thermal loads. With constant heating and cooled, such a coating is deformed, cracks appear on it. So that the finish is durable, it is recommended to plaster on the fixed metal grid.
Tile finish
 For interior finishing works, you can use tiles.
 For chimney cladding, the same texture is used as for the furnace or fireplace. The most expensive and time consuming is the way to finish with tiles that are manufactured under the order. Natural stone increases heat transfer. The building materials market presents a wide range of tiles of different shades and patterns. This method of finishing the least costly.
Materials for the isolation of chimney outside the house
The trim of pipes on the roof is carried out to protect the structure of the negative environmental impact: precipitation, wind, temperature drops. Hot air inside the chimney and the cold outside provoke the formation of condensate, which subsequently destroys the pipe. With the help of refractory materials, structures give strength, insulate, isolate.
In order not to disturb the integrity of the roof and prevent pollution, it is better to strip the chimney to laying roofing materials.
Clinker tile or brick
It is used to finish any part of the chimney. It is recommended to use a full-length brick that falls on a special solution for clinker. Such a stone has high strength and resistance to a sharp change of temperature. Brick pipe cladding is flat and aesthetically attractive. If the outer part of the chimney is high, use the tile.
Stucco finish
 From the side of the street, the design can be plastered.
 Easy way of chimney cladding. Plastering is different shades and is suitable for any roof coatings. To launch the construction, use cement mortar. For the stability of the finish, the other basis is used: silicone, acrylic, silicate, mineral. It is recommended to stack the chimney with the subsequent application of paint, which will protect the finish from the effects of moisture.
Cement-fibrous plates
Light refractory materials for which high strength is characterized. Chimney from such plates will be the original decoration of the house. Environmentally friendly material is represented in a variety of textural colors. Shale plates have a graphite shade and shape of scales, arcs or a polygon. The finishing of the professional flooring looks modern, used for the roof and chimney.
Sequence of work
The total internal cladding technology is reduced to several stages:
- Prepare fire-resistant glue, grout and tile selected for decor.
- Soak in water tile by about a quarter of an hour.
- Divide glue according to the instructions.
- To deceive the adhesive to the surface of the tile and chimney.
- Attach the finishing material to the base.
- Secure indents between tile by temporary plastic fasteners.
- Clamps are seized after soaring glue.
- Fill the seams of grouting, it will dry in a few days.
 For the street part of the construction you can use a straightened.
 For the finishing of the part of the chimney, which is located on the street, the professional clothes are often used, which are attached to the self-tapping screw. It is forbidden to use vinyl siding, which is deformed from high temperature. Sequence of work for finishing with plaster and tiles:
- Clear and project the surface.
- Reinforce the pipe with a galvanized metal grid.
- Apply a solution from cement and clay sand.
- Stacking the surface (attach clinker tiles or natural stone), observing the procedure for the actions of the inner cladding.
- Already in itself an extremely responsible task, requiring special accuracy, sequence of action, strict follow-up to the developed technological recommendations. Whatever the roof coating material is applied, it must eventually ensure one hundred percent protection of the building from the destructive action of atmospheric precipitation.
One of the most vulnerable from the point of view of possible penetration of water and complex in the installation of nodes is torturing the roof to the chimney tube or ventilation. From how qualitatively the sealing of such sites will be made, the durability of the rafter system, the attic ceiling, and often - even finishes in the house itself. Therefore, it is very important to take this stage of roofing work with special attention and accuracy.
Features of the aisle of the flue of the chimney through the roof
The qualitative adjoining of roofing material to the pipe can be done only if the roof has a reliable rigid crate corresponding to the type of roofing and the rolling rods, on which the load is evenly distributed both from the mass of the roof system itself and from external influences.
- The optimal option is the one when the chimney pipe is installed before the arrangement of the crate. That is, B. samoa The design of the rafting system is provided for it, a passage strengthened by additional details. In such cases, the adjoining of a sheet or piece roofing material will be done much easier than in those when the finished crate has to organize a passage for the newly erected pipe.
- If the pipe is set later, then to free the place to pass the chimney, it will be necessary to dismantle some elements of the crate, which may well be loosen the overall design.
- In advance, it is necessary to envisage that the pipe does not occur on the rafter foot, as its partial or complete dismantling is an extremely unwanted operation. If the pipe still fell on one of the rafters, and part of it has to be deleted, then before carrying out this process, it is necessary to immediately install the retaining racks under the remaining parts that are fixed on the beams of overlapping. In addition, most often also have to bind parts of this leg with whole rafters, horizontal jumpers.
- Whatever option neither considered, Around the chimney pipe, it is necessary to equip an additional reliable framework, which should be firmly connected to other elements of the rafting system and roofing gear.
Prices for chimney pipes
chimney pipe
- The lumen between the chimney and the elements of the rafter system is regulated by the rules of SNiP 41- 01-2003, paragraph 6.6.22. It says that the distance from the surfaces of concrete and brick chimney pipes to any details of the rafting system and roofing "pie" made from combustible material should be no less than 130 mm. From ceramic pipes that are not insulated, this clearance must be at least 250 mm, and if there is thermal insulation - also at least 130 mm.
Ostable not closed space Between the pipe and combustible or even weak-threshable roofing coatings should only overlap completely non-flammable Materials (usually sheet metal is used for these purposes).
Construction of roofing nodes
When a reliable foundation for the arrangement of the roofing material adjustment to chimney will be ready, you can move to the installation of the sealing elements of the coating.
The design of the coating system of the coating to the pipe can be different, depending on the selected roofing material. Functions that are imposed on the elements included in the adjustment design is sealing and waterproofing of the roof coating joints and ventilation or chimney pipes, as well as removal and redirection of water flows flowing from the roof of the roof to the pipe from above.
The scheme of arrangement of such an adjunct ideally should be determined by the preparation of the project of the rafter system and roofing. The fact is that some options suggest the installation of individual design details before laying roofing.
In addition to the roof type roof coating, the location of the chimney pipe, its shape, as well as the material from which it is made should be taken into account.
Construction professionals usually recommend applying to arrange the adjoints only ready-made structures that are manufactured by roofing manufacturers. However, very many masters prefer to produce these details on their own.
It should be noted that the chimney tube passing through the roof directly at the ridge line of the roof - seal the easiest. With this location, water during the rain, as well as snow nanos in the winter, are not able to accumulate above the rear wall of the pipe, which minimizes the risk of roofing in this, perhaps the most vulnerable place of the adjoining.
It will not be difficult to equip a reliable adjoining of roofing material to chimney, which It is also in close proximity to the skate line, that is, almost immediately behind the skate element. Above the pipe is also a very small space that does not allow the ability to accumulate snow and water.
But to perform high-quality sealing of the chimney, located in the middle or lower part of the roof, is much more complicated. In this case, waterproofing should be particularly reliable. Therefore, in fairly often, and in particular, for example, when the roof is covered with soft bituminous roof, it is necessary to equip an additional scope design - as shown in the illustration above. Such a special roof break will breed the flow of water, directing them along the side walls of the pipe. Similar protective extensions to the pipe are usually called rash.
And, of course, the most difficult to high qualityly equip the adjoining around the chimney coming to the middle or lower part of the endand. The pipe in this case will be on the path of expressly directed flows of water, which during the rain or melting of the snow will be drained in the jet of junction of the skates. In this case, it is extremely important to reliably seal not only the rear side of the pipe, but also its side lines. Therefore, at the design stage, it is necessary to really try to avoid such a location of the pipe.
Now, in order to answer the most popular questions that arise in the process of arising from this roof node, it is necessary to consider several options for sealing pipe passes through the roof.
Sealing passes round in pipe cross section
As you know, ovens and fireplaces in recent years are increasingly equipped with chimney pipes of circular cross-section of different diameters. Modern chimney metal pipes are most often "sandwich design", that is, consist of three layers - two metal cylinders, outdoor and internal, and layer of thermal insulation between them. Mineral wool on basalt basis is used as thermal insulation.
Prices for metal tile
metal tile.
Manufacturers have provided for sealing the adjoining of such round pipes to the roofing coating special elements - penetrations. These parts can be made of metal or from an elastic heat-resistant composite material, which is mounted in a complex with metal elements.
In principle, on the same principle a hermetic adjacent of the roof and for ventilation pipes is placed.
Metal penetration for round pipes
Options for finished metal products for arranging roof adjustment to round tubes usually consist of two parts. This is a cap-apron and the so-called "sole"which is a tough basis and made of steel sheet on which the manufacturer is fixed with a cap. Different with the angle of the lower plate of the design with respect to the cap, therefore, are selected depending on the roof slope. As a rule, in specialized stores you can always find the desired version of the products, as they are produced to the rods of the roofs of various steepness of the skates.
The top of the cap before mounting the design to the roof is cut to the diameter of the chimney pipe, as it should be freely passing through the hill of the cap. Then, the "sole" is rigidly fixed on the surface of the roof using roofing screws, which wear sealing elastic gaskets made of rubber or neoprene.
Very often, when mounting the metal peaks on the embossed roofing coating, to enhance the sealing of the adjoining, the metal sheet is fixed above the pipe, which is fed under the ski element and fixes the folding on the top side of the "soles" of the peaks.
After the sole is fixed on the surface of the roof, and the pipe will be skipped through the penetration, the top edge of the cap is pressed to the chimney using a special clamp, which is installed in the heat-resistant elastic gasket. This element will protect the joint of two elements from moisture from entering it.
Ready elastic penetrations
As mentioned above, except for metal penetments, it is possible to find both elastic, equipped in the lower part of the sole of soft flexible metal, such as lead or aluminum. Through this plastic, but preserving the laying, framing the "sole" of the peak, is fixed to the crate, through the surface of the roofing material. The cap is made of weather-resistant elastic rubber, and tightly covers the pipe around the circumference, especially since it is also also "grabbed" with a metal clamp.
Prices for slate
The advantage of elastic penetments is their versatility, as they can be installed on the skates, which are erected under any bias. Due to the flexibility of the combined base of the penetration, the sole is easy to apply the form of the roofing material.
Such elastic penetrations for round pipes are often referred to as Master Flash. The disadvantage in the assortment of such products is not felt in our time. And the installation is very simple, and is available to any owner of the house.
Video: Installation of elastic penetration for the chimney "Master Flash"
Sealing roof adjoining to a round tube with an aluminum or lead ribbon
In cases where for any reason, there is no possibility of using finished penetrations for sealing pipes, then a special self-adhesive aluminum or lead ribbon can be used to perform these works. Due to the flexibility, heat resistance and universality of this material, using it you can form the penetration yourself.
The tape segments are flooded with a vertical part of the pipe with the transition to the roofing coating. And then the ribbon is fixed around the chimney - so sealing junction junction.
Such material has high resistant to various external negative impacts: high and low temperatures and their sharp drops, to moisture, ultraviolet radiation,
In order for the tape to provide high-quality waterproofing of the adjoining, and the sealing vested as long as possible, the tape must be pasted on a clean, degreased and dry surface and pipes, and roofs.
Sealing options for roof adjustment to rectangular or square pipes
To arrange adjoining around pipes with a rectangular or square cross section (most often brick), ready-made standard systems manufactured by roofing manufacturers are also used. In this regard, acquiring one or another roofing material, you can immediately buy or order for specific sizes a set of penetration details for a brick or concrete chimney.
This standard version made from sheet metal can be used for such roofing materials like , profiled sheet, as well as a familiar slate of the old and new modification. For these coatings, it is commonly used below the shock sealing scheme.
So, before on the frame of the crates, the shears of roofing will be recorded, preparatory works are carried out in which the following steps are included.
- Extra bars are fixed around the pipe, their size in the section may be the same as other elements of the crate.
- Then, from the front wall of the pipe down to the roof cornice is fixed, so-called "tie", equipped Filming on both sides. Tie is usually made of galvanized sheet metal.
- Next, around the pipe, top of the "tie" fit and the wall profile is fixed. Its upper edge, having a bend in the opposite direction of 8 ÷ 10 mm in size, is boated in a pre-cutting trunk on the wall of the chimney.
- Then, on this bog of a used apron and walls of the pipe, it is necessary to apply an atmospheric sealant, that is, intended for external work.
- The next step is to install roofing material.
- The final step is to install and fix the external wall profile - apron consisting of four elements installed on all sides of the pipe. These details of the apron are screwed to the walls of the chimney, and also be fastened with each other at its corners.
Another, more modern use of adjoining sealing assumes the use of self-adhesive waterproofing lead ribbon, which is convenient for use both on the smooth and on any embossed roofing.
When using such a tape, it must be fixed on the surfaces of the pipe walls using special clamping metal slats, which can be made independently. The top joint of the planks with the walls of the pipe is necessary to additionally coat the layer of weather-resistant sealant.
Flexible waterproofing self-adhesive tape is perfect for sealing the adjoining of roofing coatings having high enough Relief drawing, as it easily takes its shape when sticking and saves it. Such a tape is very often used to close the joints, if the roof is covered with ceramic tiles, slate or ondulin.
Prices for ceramic tiles
ceramic tile
Sealing the adjoining of the ondulin roof to the brick chimney pipe - step by step
It has already been said above that many manufacturers of roofing materials seek to accompany their products and corporate tighting systems of pipes. One example can serve as an adjustment system for a pipe is quite popular in our time of wavy cellulosen-bitumen roofing material Ondulin.
| Illustration | Brief description of the operation |
|---|---|
| In this case, an embodiment of the arrangement of the roof adjustment is covered with ondulin, to the chimney or fireplace pipe of the rectangular cross section. The sealing system will be mounted after roofing the roofing material on the crate. The gap between the coating and side sides of the pipe, as well as below, should be 20 ÷ 30 mm. On the back of the chimney, that is, referring to the skit, the distance between the pipe wall and the lamination bar may vary between 50 and 100 mm. |
|
| In order to secure the sealing adjoining an apron around the perimeter of the pipe, it is necessary to turn on the additional elements of the crates in the roof design, which are fixed along the chimney pipe walls. For this additional crate, a bar is suitable, having a size in a cross section of 40 × 40, 40 × 30 or 50 × 30 mm. |
|
| The first step is the adjoining on the joint of the roof with a pipe from the front side of the pipe closes the covering apron made specifically for Ondulin. Typically, the roofing material manufacturer also produces challenges for designing adjoins, skate and other complex and vulnerable coating nodes. Therefore, purchasing material, it is necessary to immediately ask the assortment of challenges, and, producing preliminary calculations, they must immediately include in the project. |
|
| The covering apron is applied to the place of its future installation - along the bottom, facing the edge of the pipe. On the apron there is a markup, for which it will be necessary to make sections. The top, smooth part of the apron should remain exactly the width of the pipe, and the wavy part should have one wave with each of the sides. In this case, cut the wavy part is necessary along the bottom ridge of the wave. First, the markup is made by a pencil. |
|
| And then the revealing apron on the applied markup is performed. Cut the item is more convenient enough to be a sharp construction knife. |
|
| Next, the finished apron is pressed against the pipe and is fixed to the surface of the roof with the help of branded roofing nails. Nails must be logged in through Ondulin in the lamp timing installed around the pipe. |
|
| In this case, nails are driven into the top of each relief wave apron. It is not fixed only on extreme, leaving the dimensions of the pipe waves on both sides. It is very important nails to drive correctly, strictly vertically to the surface of the roof. And to compete efforts to not deform the coating with too strong fasteners. |
|
| Now it is necessary to prepare a waterproofing self-adhesive tape "Ondoflash super". This material is excellent for sealing complex areas - butyl-rubber component has excellent waterproofing qualities, and the aluminum base allows you to give tape very complex forms. Standard ribbon width - 300 mm. The length of the first segment should be 250 ÷ 300 mm |
|
| A sliced \u200b\u200bpiece of ribbon is applied to the future place of installation and is pre-bent along the relief of the sealed corner. The function of this segment will be consistent with the sealing of the edges of the previously fixed apron. |
|
| After fitting the ribbon to the installation site, the protective film closing the adhesive layer is removed from its back side. | |
| The tape is applied on the area of \u200b\u200bthe roof adjuncing to the pipe along the front corners so that it can simultaneously close the upper and lower part of the apron at 70 ÷ 80 mm. In order for the tape to be bent into the required position and firmly adjacent to the material of the roof, apron and pipes, her angle is cut. |
|
| Further, the ribbon is necessary with good strengthening to press all surfaces. It is especially important that the tape fits most closely along the joint line. First, such sealing is carried out on the same lower corner of the pipe, and then the same is performed from the opposite side. |
|
| The next step towards the pipe is applied apron of lateral adjustment. The part is pressed to the surface of the roof and the side wall of the pipe and mark the lines of the cuts. |
|
| The tops of the top of the apron should be made clearly along the vertical borders of the pipe, that is, the edges of the apron are cut under a certain angle. And the lower part of the part on the roofing coating should go beyond the pipes both in the lower and in its upper part 100 ÷ 150 mm. |
|
| Sections are produced on the marked lines using a sharp knife. At first, the metal ruler is applied to the markup and it is necessary to carry out a knife with a mesmer pressure along it. |
|
| That is, the material of the apron cuts over for about ⅔ its thickness. Then, from a small bending effort, the detail of the apron neatly rolled along the cut line. |
|
| The next step is the prepared side parts of the apron are nailed to the roofing surface, under which additional elements of the crates are fixed. In each of the lateral details, the apron is enough to drive three nails - one in the center and one at one and below. |
|
| Next, a piece is cut off from the waterproofing self-adhesive tape, along a length greater than the pipe width by 200 mm. This segment will go for sealing the rear, the most vulnerable part of the penetration of the chimney pipe. | |
| The cut part of the waterproofing tape is applied to the place of its future installation and bends along the line of the adjuncing of roofing sheets to the pipe. At the same time, its lower part is trying to maximize the maximum to give a form that repeats the waves of ondulin sheets. | |
| Further, the protective film is neatly removed from the tape, and the waterproofing material is tightly pressed against the surface of the pipe and to the roofing coating. The side sides of the tape are cut so that the top of the cut parts can be glued to the lateral sides of the pipe, where the elements of the apron are already fixed. Thus, the ribbon isolates the junction of the side element of the apron with the wall of the pipe, not letting the water drop here during the rain. |
|
| The following task - the waterproofing tape is glued with the front side of the pipe. It is fixed from above the front top of the apron, that is, the one that goes on the pipe. The width of the tape should be 100 ÷ 150 mm, and its length exceeds the pipe width by 200 ÷ 300 mm, as it will bend on the side of the pipe, and hide under the lateral parts of the apron. The tape is also needed very well to press the brick or plastered surface of the pipe. |
|
| Further, the upper edge of the waterproofing tape from the front of the chimney is pressed with a metal fixing plate. Its fixing is made on the dowel. |
|
| The same planks are screwed to the side sides of the pipe, 15 ÷ 17 mm below the edge of the apron. The photo is clearly visible how the fixing rail must be located, the ends of which are cut along the line of corners of the pipe. |
|
| Further, the edges of the apron, which remained on top of the screwdrived side clamping slats, it is necessary to be somewhat from the surface of the pipe. | |
| Now this formed corner between the wall of the pipe and a slightly bent edge of the apron is tightly filled with a layer of polyurethane sealant. For this operation will require a special construction syringe gun. |
|
| Now it remains only to cut and put an extra piece of Ondulin on the back side of the pipe. Its width should be equal to the width of the location of the side elements of the apron. And the length is from the skate to the pipe. The additional segment of the ondulin is placed on top of the onset coating, as well as on top of the waterproofing ribbon glued to it and the pipe. |
|
| The laid extra fragment of Ondulina is nailed to the crate directly through the coating bent down below. Fixation is performed by roofing nails, driven by the top of each coating wave. |
|
| When it is completed to arrange the adjustment of the roofing material to the pipe, one can move to the further installation of the skate elements. This skate element will be closed the upper edge of the Ondulin Pallet Sheet on top of the pipe. |
The information presented above rather convincingly indicates that there is nothing supernaturally complex in sealing a section of the roof adjustment to the chimney tube. Such work can be performed on our own. However, it is not necessary to forget about compliance with all security requirements, since work will be held at high altitude. Perform any installation operations on the roofing rods without safety devices - extremely lightly!
In the completion of the publication, we propose to see the video, in which the process of sealing the tiled roof adjustment is displayed.
Video: Sealing adjoining to the roof tube from ceramic tiles
With proper styling, the roof of the house can be guaranteed to avoid leaks during the rains and spring melting of snow. According to this criterion, you can judge the reliability of the roof. It should be remembered that any design of the roof consists of a variety of elements. The list includes endandes, front planks and lobes. However, based on the practice, the most risky leakage element is a chimney.
A few decades ago, the liveshings coped with this problem with the help of a brick chimney thickening. However, such work requires certain knowledge and skills, and modern designs are increasingly erected from metal. Typically, chimneys are performed with a round cross section. To disassemble how to close the pipe on the roof of a professional flooring, a simple instruction will help.
Causes of leakage
The roof covered with a profiled sheet must be equipped with several holes through which the chimney pipe and ventilation channels will be displayed. As a result, the monolithium of waterproofing may be disturbed, which will increase the risk of leaks. It is quite difficult to solve this problem if the chimney had to withdraw through the already designed roof.
For high-quality sealing sections of the pipes of the pipe to the professional floor, you need to make quite a lot of effort.

If the work performed poorly, many problems arise:
- Begins to flow water. It happens if the sealing of the junction of the chimney and the professional flooring is equipped poorly.
- Began to rot the system of rafters. After entering water inside the roofing pie wet wood, from which most roof elements are made. As a result, the design is deformed.
- The roofing material itself begins to be covered. Professional flooring is not very well protected from corrosion from below.
- Aging heat insulation. When the insulation wets, its effectiveness is significantly reduced.
To increase the reliability of the roof, you need to properly choose the disclosure of the chimney and ventilation channels. Thanks to this, it will take the pipes much easier.

FEATURES OF MONTAGE
What needs to be performed so that at the points of the pipe adjoint pipes to the professional flooring did the leaks arise? To do this, you need to correctly sew the joints. Experienced assemblers note that when solving the problem, it is important to consider the location of the chimney. The closer the chimney is located to the skate, the smaller the water falls onto her shake with chimney. The risk of leaks in this case is reduced.
In addition, the pipe installed as high as possible on the skate, has the smallest plot located in the cold air zone. This allows you to minimize the formation of condensate that contributes to the growth of soot inside the chimney. In addition, if condensate is constantly being formed in the pipe, the pipe walls are exposed to acid feeding the metal.

Different designs of chimneys should be considered separately to figure out how to make them a joint with a roof of the corrugated floor.
Rectangular products
Today, more and more manufacturers take care that the joints of the roof and smoking pipes are securely protected from water. For this purpose, special challenges are being developed. They are installed near the funds, skate, pipes. Such elements are called aprons.

The main purpose of the apron is the collection of water flowing along the chimney and roofing skates. With the help of such a moisture device, the eternume is in the flow system. However, in the process of installation it is important to consider one important point. You need to take care of the correct waterproofing. As you know, under the corrugated floor it is necessary to lay waterproofing film. It does not matter whether the roof is insulated or not. Together, the junction of the pipe to the roofing coating is made for the chimney installed. The edges of the section are left with a width of 50 to 100 mm. In the future, they will be fixed directly on the chimney design.
However, these are not all moments that need to be considered. In places of connection, it is necessary to create a reinforced layer of waterproofing. Therefore, quite often under the apron install a special tape. It must be placed under the apron plackets located on top. Partially ribbon enters the professional flooring. The scheme of work when creating a waterproofing layer should be like this:
- first, the tape is applied to the lower edge of the chimney pipe;
- after that, the joints must be embedded on the sides of the pipe structure;
- at the final stage, the top edge of the chimney is placed.
Often there are situations when it is necessary to hold the stove pipe through the already created roof from the corrugated floor. This work can be done quite simple. However, it is necessary to take into account one subtlety. It is necessary that a hole for the chimney in the roofing material be less than 1.5-2 cm. In this case, the chimney will not be able to crawl. But for this edge of the professional flooring just cut off and fuse.
After mounting the chimney, they will firmly fit to it. This allows you to create additional shuch protection from leaks. Under the professional flooring, in this case, it is necessary to mount the lower bar of the apron, and from the top of the waterproofing tape.

Cutting Pipes
It is easiest to close the bog of the pipe with the roof of the corrugated, if it is held through the horse. That increases the reliability of the connection. In such structures it is impossible to form snow pockets. The risk of leakage appears precisely if available. There are one significant disadvantage in such options - to carry out the pipe through the top of the roof, split the skate element should be divided. This means that under the edges of the plots you need to install two additional racks. It is possible to seal the place of the adjoint by the apron. However, it must have a certain configuration. This element made of smooth metal sheets is manufactured.
Attention! Often the space between the professional flooring and the apron is filled with a sealant on silicone basis. Modern manufacturers offer the consumer to use self-adhesive ribbons, which are performed from butyl rubber.

The upper zone of the adjoining between should be sealed with a standard method - with the help of the upper elements of the apron, sealed with a sealant. Silicone composition is not afraid of high temperatures.
The junction of the pipe and professional flooring on the skate
Not in all cases, the layout of the building allows you to remove the chimney through the cover of the roof. Therefore, another way is selected - make a hole on the skate. In this case, the work on the embezzlement of the adjoining is significantly complicated.

The main goal is to correctly install the top element of the apron. Therefore, the main rule is the installation of this element under the professional flooring.
Attention! If the upper side of the chimney design has a width of more than 80 cm, the shaped apron with a flap is installed on it. Reminds such a construction of a breakwater, removing water in different directions from the chimney.

Installation of such apron is associated with certain difficulties. In addition, in places of adjustment of its elements and professional flooring, two endands are obtained. It is necessary to seal it in the same way as the roof endands. This requires the installation of additional planks and enhancement of waterproofing.
Round trumpet
Many smoking structures for furnaces are equipped with round channels made of metal sheets. Such products are multi-layered and additionally insulated. This pipe is sealing by a variety of ways. It is worth disassembling the most popular:

When a residential indoor room is located under the roof of the house, the passage for the pipe is not only sealed, but also carefully inspired. The gap formed between the apron and the pipe must be closed using a special thermal resistant gasket. It is attached to the plane of the product.
As can be seen, it is possible to equip the roof joint from the rubber floor with a furnace pipe yourself, knowing the features of the installation of various designs. In the process of work, it is important to follow technology. This will ensure the sealing of the place of the adjoining.

How to make a passage in a professional flooring without a disturbance of the rafter system
If insulated roofing pie has already been completed, there will be a lot of problems with a chimney through it. The main difficulty lies in compliance with the requirements of fire safety. It is necessary to preserve the integrity of vapor and waterproofing.
The design of the chimney should be placed at some distance from wooden rafters. Therefore, the passage of pipes through the roof of the corrugated floor is created in a special box, which consists of rafters located next to the chimney channel. Between them are fixed two beams. They are placed above and below the chimney design. From transverse beams and rafter feet to the chimney design is selected in accordance with the standards of fire safety. This indicator is in the range from 130 to 250 mm. It depends on the material from which the chimney structure is manufactured.

The inner part of the box must be filled with insulation with non-flammable properties. The high density material manufactured using basalt fiber is usually used. It has low hygroscopicity, in comparison with ordinary insulation.
To ensure the tightness of the roof, on the hydro and vaporizolation at the point of passage of the pipe, it is necessary to cut through the envelope professional flooring. Its edges should be fixed outside the wooden box.
For cutting a professional flooring under the pipe in a place where it will be carried out, a solid crate should be created. Due to this, it will turn out to firmly fix the lower bar of the adjoining and the roofing material near the walls of the chimney structure.

conclusions
The choice of method of sealing the joint of the pipe and the professional flooring depends on the shape of the chimney and the peculiarities of the roofing structure. You can create a reliable adjoining using apron (for rectangular structures) and good items (for round-section products).
Choosing a chimney output location is also of great importance. The lower the slope is the pipe, the more water accumulates at the joints. It increases the risk of leaks. The optimal option of the smoking hole is in the ridge of the roof or not far from it.
Following the technologies of close-upping pipes and professional flooring for certain chimneys, you can safely protect the roof from the flow. It is especially important to do this in the presence of a warmed veranda.
The furnace is composed, and the pipe is proudly towers over the roof of the house. Do you think work is finished? Not at all - it's time to think about how to isolate the chimney pipe and protect the house from the fire, and the roof of leaks. Well, if you think about this question still in the process of designing the furnace - in this case, the insulation of the chimney will be reliable and safe. Isolate already built chimney more complicated, sometimes this work entails a change in the design of overlaps and roofs. However, the costs are replenished by the feeling of safety and comfort.
It is necessary to isolate the chimney from two negative destructive factors: from overheating of structures and from leakage in places of joints. Therefore, in the article, we will consider two types of isolation of the chimney:
- Fireproof thermal insulation;
- Waterproofing.
It is recommended to immediately perform comprehensive insulation, solving not only the main problems, but also improving the operating conditions of the furnace. For example, thermal insulation of the pipe passing through the unheated attic reduces the risk of overheating of the wooden elements of the roof and reduces the risk of condensate formation, which can lead to excessive deposition of soot, corrosion or damage to the pipe. Waterproofing pipe will help to avoid rotting the rafter system and floors, as well as the destruction of the pipe in the case of wetting.
Methods of fire-fighting isolation chimneys
The easiest and most reliable, but not always the cheapest way to establish a chimney of the typewich type from ceramics or metal. In such chimns, the inner tube performing the function of removal of smoke is made of heat-resistant steel or ceramics and is thermally insulated with non-combustible insulation: mineral, stone or basalt cotton. The outer layer of the sandwich chimney is made of steel or ready-made ceramzite-concrete blocks.
Prefabricated ceramic chimney - a safe solution to the problem
Prefabricated chimneys are equipped with elements for fastening, revision, maintenance, as well as for connecting multiple heating devices. Installation of such a chimney is easy, but requires compliance with the instructions, only then it will be completely safe.
Thermal insulation pipe type "Sandwich"
Video - Sandwich diaphragm for the passage of pipe through overlaps
Another isolation method used when building an oven is a brick chimney. Due to the low thermal conductivity of the brick, its walls are not heated to dangerously high temperatures, so no additional measures for the heating of such a chimney are not required, apart from the correct execution of the fire cutting cutting of overlaps and roofs. To save and facilitate the design, the brick chimney sometimes finish with a pipe made of metal or ceramics. In this case, they are thermally insulated according to the technology described below.
Thermal insulation of metallic and ceramic single pipes is possible using boxes from non-combustible materials and mineral non-combustible thermal insulation - stone or basalt wool. You can exploit such chimneys and without thermal insulation, but the execution of fire cutting on all the rules is necessarily in any case.
Methods of waterproofing chimneys
Waterproofing of the chimney is installed at the place of its exit to the roof. The larger the pipe and the farther from the skate it is located, the more complex conditions of operation expect it: when it is raining, more abundant water flows, in winter - elevated snow load. Rain and melt water in case of insufficient waterproofing penetrates the house, leading to leaks, rotting wooden and the destruction of concrete and brick structures, including the smoke itself.
The method of waterproofing depends mostly on the shape of the pipe and the type of roofing coating. For round pipes, metal or polymer cutters are used, for pipes of rectangular section - metal aprons and plars of adjoining. About how to perform waterproofing the pipe, described in detail in the article, and then it will be about the technology of thermal insulation of the chimney.
Insulation of the chimney pipe
Before proceeding with the isolation of the chimney pipe, it is necessary to test compliance with the requirements of SNiP 2.04.05-91 and, if necessary, correct the shortcomings:
- The height of the pipe to ensure good thrust and the permissible temperature of the flue gases at the output should be 5 meters or more;
- If the roofing coating relates to burning materials - slate, ondulin, rubberoid - top of the pipes necessarily put an intrinsulator - a fine metal mesh;
- The distance between the chimney pipe and the combustible structures - overlaps, walls, a rafter system - should be at least 250 mm;
- Between the upper overlap of the furnace and the ceiling must be withstanding the fire distance. For metal furnaces, it is at least 1.5 meters, for bricks with a two-row overlap - 0.5 meters, with a three-row overlap - 0.25 meters, subject to the ceiling finishes over the ovens of non-flammable materials;
- In places of passage of a brick chimney through the ceiling, a flush is performed - thickening of the pipe. The thickness of the roller is 1-1.5 bricks.
Watching a brick pipe
The brick tube is heated from the outside, therefore, it is necessary to isolate it soon with the purpose of improving the operational conditions and extending the service life. The most affordable method of insulation of the brick chimney is plastering with cement mortar or cement-based and lime-based solution. You can add sainted slag crumb instead of sand.
The composition of the solution:
- 1 cement bag (25 kg);
- 2 buckets of hazed lime;
- 10 sand buckets or sand mixture with slag crumb;
- 5 buckets of water.
- For the preparation of the solution, 3.5-4 water buckets are mixed with a cement bag and 2 buckets of harated lime - Pushonki. After thorough mixing, sand and slag crumb, as well as the remaining water rate, are added. The resulting composition should be used in cool weather for 5 hours, and in the heat - in 1-2 hours, so it can be prepared by parts.
- With large irregularities of the pipe, the layer of plaster is quite thick, so it is recommended to first close all the slots and the differences in the specified solution, and then cover the pipe reinforcing grid.
- Watching is carried out in two layers. For the first layer, the solution is dissolved somewhat stronger, to a sour cream state, and they are applied by spraying: take a certain amount of solution on a trowel or spatula and pounce on purified from dust and slightly moistened brick surface. The first layer does not align.
- For the second layer, a more dense solution is necessary. It is applied by a trowel and rub it up to a smooth surface. Plastering is needed the entire floor from the floor to the ceiling or roof.
Saving brick pipes asbestos-cement sheets
This method is superior to plastering in heat maintenance indicators of 2-2.5 times and consists in sticking asbestos-cement plates on a cement-lime solution to the outer walls of the pipe.
- According to the above technology, a plaster solution is prepared.
- The pipe is reinforced with a mesh and spray the first layer of solution. Dry it.
- Cut asbestos-cement sheets in the size of the pipe. Apply the second layer of the solution on the sheets of asbestos cement and glue them to the surface of the chimney.
The shortcomings of this method refers to the low ecology of asbestos - it highlights carcinogens, so it is impossible to use this method of isolation in residential rooms. On the non-residential attack, the thermal insulation of chimney asbestos will reduce the temperature difference from the inside and outside the pipe and significantly reduce the formation of condensate, and will also improve its fire protection.
In addition, the brick tube can be sewn with sheet gland using a layer of insulation. How to do it, you can learn from the video.
Video - Pipe Tube Sheet Iron
Metal single pipe insulation
The most dangerous embodiment in fire is the chimney is a pipe from a metal that is not protected by the heat insulator. The distance from such pipes to wooden and plastic structures should not be less than 0.6 meters. But even the observance of this distance will not protect you from burns in a random touch, so the pipe is better to isolate, without waiting for problems.
Uninsulated metal pipe - frequent cause of fire
The easiest way to insulate a single pipe is to wrap it with a layer of non-combustible insulation, for example, basalt wool, and to protect it with metal or plaster on top. The melting point of this material is approaching 1000 degrees, which is significantly higher than smoke temperature.
- Mats from basalt wool thickness of at least 5 cm turn around the penetration pipe and fasten it, wrapped over steel wire.
- Ward the heat-insulated pipe with the reinforcing grid, they fix it, and plastering according to the technology described above in two layers of cement-limestroke.
- The plaster can be replaced by thin-sheet iron, turning it on the diameter of the insulated pipe and the rugging at the place of connection of the edges.
Insulating passes through overlapping and roof
The most responsible areas of isolation of chimney are passages through overlaps, so they pay special attention. Isolate passages necessarily when using any chimney: and sandwich tubes, and brick, and metal in isolation.
Passages in compliance with the following conditions:
- In the floors and the roof, holes are performed for the passage of the pipe with such a calculation, so that the distance from its edges to the walls of the pipe was at least 25-35 cm.
- The edges of the opening are treated with asbestos-cement or metal sheets, arrange a box for thermal insulation.
- The space around the pipe is filled with stone or basalt cotton wool without the formation of voids and gaps.
- Wooden structures that are in close proximity to the aisles of chimney are treated with anti-view compositions.
Isolation of passes through the overlap of basalt cotton
Having understood how to isolate the chimney pipe, you can easily fulfill this work, however, remember that even the isolated chimney pipe requires proper operation: spend cleaning from the soot at least three times a year, remove the ascent of the furnace firebox input times, not to burn in it not intended For firebox materials and objects (garbage). All this is the key to the long and secure chimney service.
The smoke tube can be found almost on any roof of a private house. Well when he is competently designed and erected, then can only please its effectiveness and appearance. If, in the construction process, all the requirements for the installation were not taken into account, in particular, the roof seal around the chimney was not performed, it could be fraught with the occurrence of problems.
To ensure the proper operation of the heating device, the flushing of the chimney to the roof must be tight. Ensure it is called roofing.
How to close the chimney on the roof: a passage node
The design of the node of the flow rate through the roof determines the rules of fire safety. A sufficiently high temperature of the furnace gases transmitted during the discharge heats the elements of the chimney to such a value that can cause roof ignition. This is especially important for roofs with a wooden carrier structure. To prevent such situations, the roof chimney finish should be carried out according to the following rules:
- Between chimney and easily flammable elements of the roof preserve the gap, the dimensions of which are regulated by building standards.
- The chimney on this site is treated with materials that contribute to a decrease in fire danger, say asbestos.
- The flue of the chimney through roofing pie is carried out, as a rule, using a galvanized metal box, in which the space to the pipe is laid by non-flammable materials of the glass gamble.
To mount the skate, it may be necessary to make changes to the rapid system, and the installation on the skate threatens the formation of an additional huge pocket for snow.
It is worth noting however, that today this problem is quite easy to solve, thanks to modern types of materials - an additional element that is boatdown under the skate bar, almost eliminates the likelihood of leaks.
Sealing roof chimney: old and new technologies
Earlier sealing roof with chimney Provided mainly by primary means. Today, the market range includes many unified nodes - they can be considered universal, as it makes it possible to use them in different conditions.
Traditional methods of sealing
Roof chimney finish- So else is called the salary or collar made of metal sheets - these are rectangular stripes, with a width of about 40 cm, corresponding to the size of the chimney pipe. They are bended in accordance with the angle of passage of the chimney through the roof surface. The finishing length is calculated based on the following parameters:
- chimney dimensions;
- slope angle;
- type of finishing used.
Ready salaries on the roof, if they are completed
- from a galvanized sheet, connect with each other and solder;
- from steel sheets - standing double fold.
For chimney finishes on roofs of tiles or corrugated plates, the connection is used by a layer fold. On the pitched roofs with a slope of 30 ° behind the chimper, the "bumper" is installed - a special timber that protects its back from the rainwater streams, forcing the pipe.
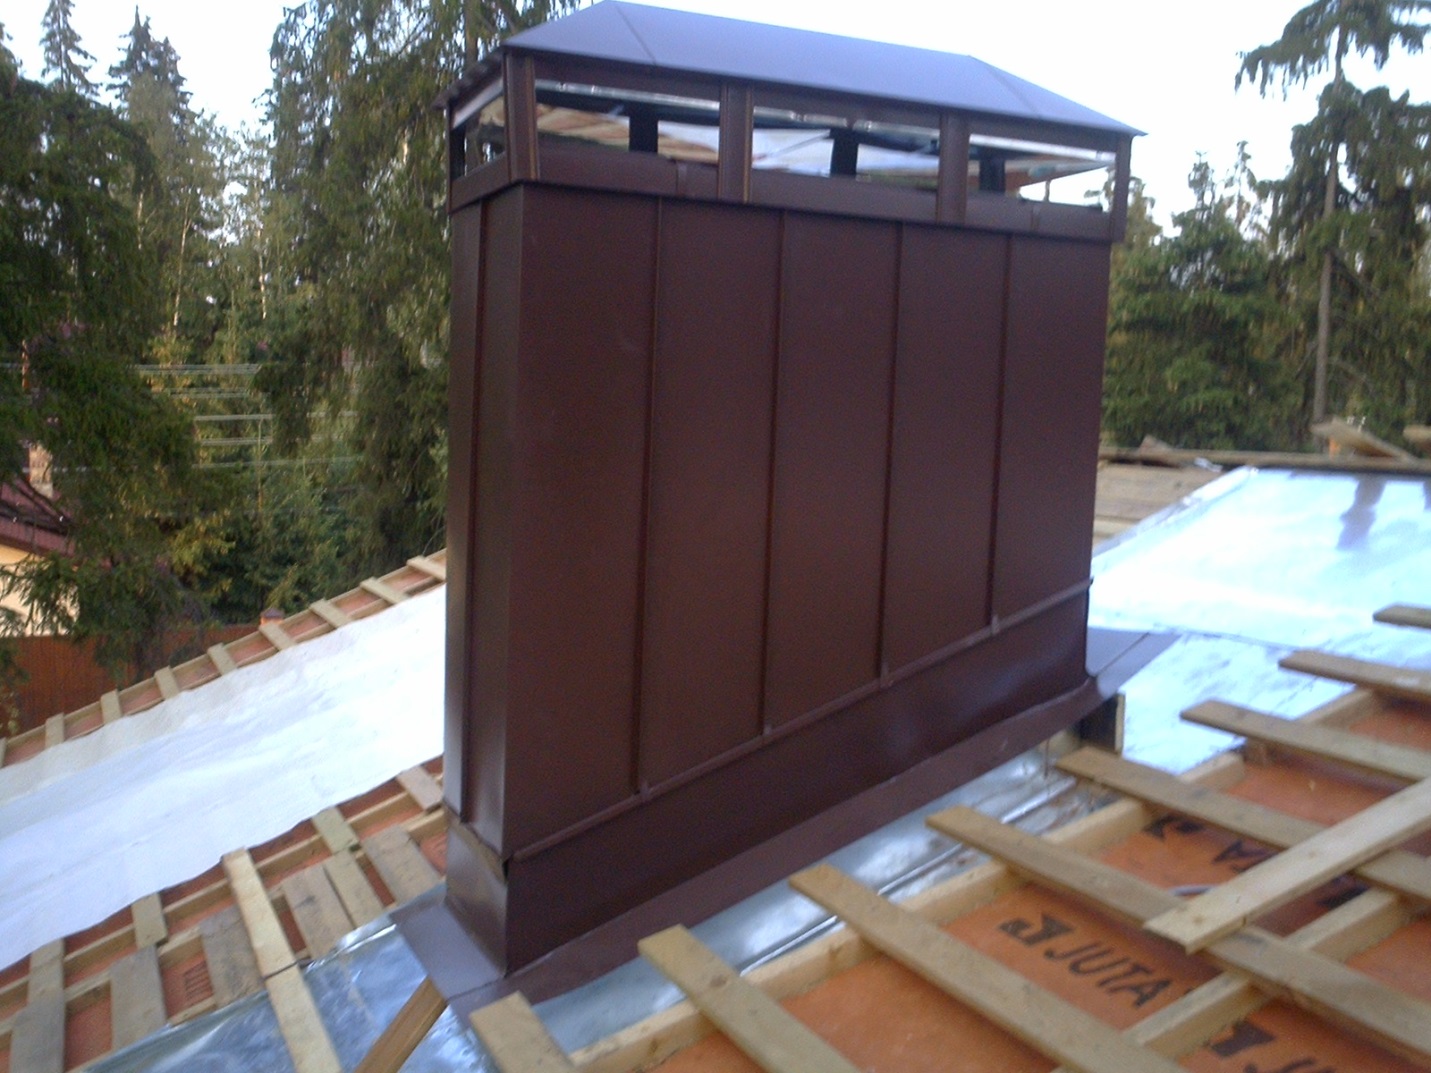
Modern isolation materials for chimneys
A protective apron is arranged around the chimney. It can be performed in two ways: from flexible lead (aluminum) tape or use galvanized metal, which is covered with a special polymer composition.
Elastic chimney aproninstall two layers along its entire perimeter. The bottom layer is started under the roofing coating, say, tile, and the upper - superimposed on it. Then, tightly pressing the layers, glued to the surface of the chimney pipe. The top layer of the apron on the chimney is closed using metal profiles. The waterproofing film of the corresponding color can be bought with roofs.
Steel apron- Moody flooring roofing can be insulated with rubberoid.
- In this case, before laying apron, its edges bend on the walls of the chimney pipe.

- Above and below the pipe additionally laid bars of crates.
- The elements of the tiles will be laid on them.

- In the wall of the chimney pipe, the groove is cut, in which the top edges of the steel apron should be inserted.
- The elements of the apron are fixed around the perimeter of the walls of the chimney pipe, starting from the lower element.

- The grooves on the walls with the inserted upper edges of the apron elements are filled with silicone for roofing or polymer sealant
The most reliable solution is the combination of these two ways: a metal apron and a flexible sealing tape.
Roofing chimney seal: Universal insulation solution
It deserves special attention among the devices of a new generation of special attention, it is suitable for any diameter. In addition, its conical design allows you to install a seal on the roofs with any angle of inclination. This roofing penetration, due to elasticity, allows for sealing on any roofing.
Roofing seals of this type are made from high-quality silicone or special rubber, the operating temperature range of which is -74- 260 °.
Installation of roofing seal Master Flash
The device of such roofing is quite simple.
- The diameter of the seal ring is approximately 20% less than the diameter of the pipe.
- Master Flash is installed a bit with difficulty (tight), so it can be processed, say, shampoo.
- The maximum fit to the roof material throughout the profile is achieved by simple flange compression. The joint is sealed using special compositions, after which the Flash wizard is attached to the surface using self-samples (installation step -35 mm).
Chimney pipe cladding: materials characteristics
The chimney is finished to lay the material for the roof, which avoids possible damage or contamination of the coating and significantly facilitates the work.
There are a lot of facing options and choose it depending on the type of material used when performing the chimney.
A rather practical solution is considered to use clinker tiles or bricks. They are not visible to dirt, they are well harmonized with any kind of coating for the roof.
Clinker brick it is distinguished by its strength and resistance to sudden temperature drops and the aggressive influence of the atmosphere. When cladding uses an exceptionally complete brick. It is placed on a special masonry solution, and the seams are filled with special compositions for grouting.
Clinker tile compared to brick easier and thinner, however, it looks no worse than it. Clinker tiles are more suitable for lining of very high chimneys.
Chimney can also be separated stucco. This is a relatively easier and accessible method of finishing, but, unfortunately, not particularly durable. For finishing works, a tie of cement or lime-cement mortar is used. To increase the endurance of the finish, respectively, and its service life, the screed is covered, say, silicone paint.
Mineral, acrylic, silicate and silicone species of plaster are stronger than traditional.
Little-format cement-fibrous plates - Durable, resistant to moisture, UV radiation and sharp temperature drops. They are nonsense and environmentally friendly, externally quite attractive. Plates have a wide range of colors and a small weight. The surface of them is absolutely smooth or structured.
Chimney and roof are lined with extremely durable and durable natural material - shale . Depending on the deposit, the slate has a purple, green or graphite color. Plates from this material have a different form - rectangle, arcs, scaly, octagon.