How to install an internal socket on the wall. Instructions for installing sockets in concrete walls. Diagrams for connecting outlets to the electrical network
For each of these types, junction boxes, sockets and switches are produced, which are also called electrical points or network connection nodes.
When installing them, many home craftsmen focus on room design and ease of use. However, it is worth considering such requirements for their electrical characteristics as:
reliable contact connections that ensure high-quality transmission of electricity with minimal voltage losses;
strong electrical insulation of current-carrying conductors and structural elements under the potential of the network;
operational safety, including ease of operation, limited tolerance, fire protection.
Installation of sockets and switches in hidden wiring
Walls made of concrete slabs, bricks, foam concrete
In old Soviet-built houses, void channels and outlets were created inside the walls for mounting switches and sockets. They were wired and metal boxes were installed, mounted with a solution of concrete or alabaster after the cable was installed.
When the mortar firmly seized the installation box, a socket was inserted into it and the screws of the sliding legs installed in the spacer bracket securely fixed the body. In this way, the socket was fixed inside the wall through an installation box and hardened concrete.
The internal fastening of the circuit breaker was also carried out using this technology, which has been proven for decades. Switches with sockets are also attached to it now. Only instead of metal boxes, they began to use non-combustible plastic materials based on high-strength grades of polypropylene, which have good dielectric properties and resistance to fire.
In addition, when spreading the sliding legs in a dense plastic housing, a strong connection is created that reliably holds the socket in the wall. When the box is made of metal, it provides less friction (better sliding on the created surfaces) and withstands mechanical loads worse.
For this reason, old sockets are often pulled out of the installation boxes, creating a pre-emergency situation.

Now many apartment owners are replacing outdated electrical wiring or laying a new one on their own in buildings under construction. Often there are cases when walls made of concrete, brick, foam blocks do not have internal cavities for mounting cables and wires.
Now residents have a lot of electrical appliances, and sockets to use them may not be enough. Therefore, it is customary to install not one, but several sockets assembled in sequential blocks. For their installation, special socket boxes are used, as shown in the figure in black. You can also type a design from single modules that are inserted into one another. This option is shown in the picture with blue boxes.
After the installation hole for one or more sockets is ready, a socket with a cable is inserted into it and fixed with mortar.
When the mixture hardens and allows the socket to be mounted, it can be secured with the same spacer bracket with sliding clamps. In addition to this method, modern socket outlets have sockets for screw fastening of the internal contact mechanism. This allows you to select the optimal installation option.
Fastening the mechanisms of sockets and switches with self-tapping screws is noted for increased reliability and durability.
Walls covered with ceramic or plaster tiles
It can be quite difficult to install an outlet or a switch inside a wall when it is already covered with ceramic tiles. In this case, there is a high risk of damage to fragile surfaces. Many electricians simply refuse such work, not wanting to get involved with a fragile material that can form cracks in the most unexpected places.
However, this work can be done quite well with the use of a dedicated tool and with care. The technology shown in the photographs allows you to install a socket on a ceramic tile. You just need to take into account that inside the wall in the selected place there is a cavity for laying a cable or old wiring has been laid.

Drilling holes in ceramics can be done with special drill bits or a diamond-coated bit. However, it is better to acquire the latter for permanent professional work because of its cost. And several sockets can be installed in the tile with a drill, creating holes for them along the perimeter of the circle, as shown in the photographs.
Initially, you will need to mark up on the tiles with a pencil, ruler and compasses, taking into account the horizon line. Then the centers are drilled on it and chamfers are removed along the entire circle using a ballerina drill.
After the drilling work is completed, they begin to knock out excess pieces by blowing a hammer on a chisel, chisel or chisel. In this case, the accuracy of actions is important when it is required to limit the impact force due to the fragility of the ceramics. A sharpened blade will chip off edges easily and will not allow deep cracks to extend beyond the marked area.

When the inner space of the tile is removed by the cutting edges of the chisel, you will immediately need to align its walls. To do this, use an emery wheel driven by a conventional drill.
Drill holes in the loose concrete for the installation box. In this case, it is important not to touch the already machined edges in the ceramic with the drill;
drill out the concrete under the tiles first with a small drill and then widen it with a large one. It is not recommended to use a thick drill immediately due to the increased loads that will be transmitted from the concrete wall to the ceramic tiles;
remove excess concrete between the holes with an electric chisel as shown in the bottom photo. You can also work with a hand tool.
During these operations, it is better to use a professional hammer drill. An impact drill will also cope with such loads, but the whole process will take a little time and will require more effort.

After all the excess concrete has been selected to install the box from this place, you need to drill a hole to the inner cavity into which the cable will be laid and run it into this line. If the box is installed in place of the old outlet, then this task is greatly simplified.
After the cable has been inserted, it will be visible in the prepared hole. To grip it, use a simple homemade hook made from a small piece of soft wire, inserted behind the back of the cable.

Then the rest of the wires are brought into the same box through the made jumpers, and the whole structure is pressed into the cavity cut out in the wall, which is filled with mortar. For better fixing of the box, it is recommended to break the protective partitions of the holes in it to fill the insides with excess concrete, which can be easily removed before hardening with a piece of rag.

When the putty hardens inside the box, connect the wires to the terminal blocks and assemble the socket mechanism, checking the horizontal installation.
If the installation quality is satisfactory, then a decorative cover is installed on the entire structure and fixed with a screw connection.

At the same time, it is not recommended to rush to close the covers before carrying out electrical checks of the circuit. Indeed, if a break in the electrical connection is detected or, even worse, an error in the connection, which creates a short circuit, then they will have to be removed again.
Sometimes electricians forget or do not specifically check the installation before applying the operating voltage to the circuit, hoping in a hurry that the short circuit that has arisen should turn off the protection of the circuit breaker, and a wire break will manifest itself as an inoperative outlet. Then, they say, you will have to look for a malfunction. This is a misconception that characterizes the low qualifications of the performers.
In order for the outlet to work, you will also need to connect the cable on the opposite side of it. According to all the rules, for this it is necessary to make connections inside junction boxes or shields. But, after all, this is not always possible or advisable. Especially if a small revision of the scheme is done without violating the design of the premises.
In this case, the most acceptable exception to the rule is chosen - the splicing of wires in the internal cavities of the wall. It must be done especially carefully, accurately and reliably. Otherwise, any mistake will cause the wall to break for future troubleshooting.
To connect the ends of the wires, they are put on before connection to strengthen the insulation. Since the metals of the docking wire can be different, for example, copper and aluminum, steel terminals with screw terminals are used.
Direct connection of such conductors is highly undesirable due to galvanic processes occurring at the point of contact. During long-term operation, they lead to oxidation of external surfaces and an increase in transient resistance.
Wires with cleaned ends are inserted into the terminal and clamped with screws with a force that ensures tight contact, but does not violate the integrity of the metal part of the conductor. Then, the prepared heat-shrinkable tube is shifted to the docking site and heated. If there is no industrial hair dryer, then it is quite possible to get by with the flame of a match or lighter, as shown in the photo.

The check of the assembled structure should end not with the determination of the phase conductor by the indicator, but with the test of each new socket under load. For this purpose, you can use the same drill or hammer drill that you worked with. Only the conclusion about the operability is made after the control hole is drilled in any material, for example, a metal corner. Engine idling may not reveal a latent defect, which will manifest itself much later.
Walls with plasterboard partitions
Installation of sockets and switches inside thin-walled structures made of plywood, drywall, chipboard is carried out in the same way. The peculiarity of the technology consists in the way of fixing the installation box on these building structures.
For this purpose, clamping screws with stop plates are placed on the outer side of the special socket case.

To install such a box in drywall, it is necessary to cut a hole for the box. You can work with an ordinary knife, having previously trained on the wreckage. But, even edges and tight edges are provided by a special circular saw - a crown inserted into the drill chuck. It creates a neat hole very quickly.

After that, it remains to insert the box into the hole and tighten the fastening screws, which will move the fixing plates from the inside and tightly clamp the body in the drywall sheet.
Installation of sockets and switches in open wiring
With this method of fastening electrical wiring, special attention should be paid to the integrity and strength of the insulation, its ability to withstand the effects of random mechanical loads.
For the installation of sockets to building structures, open wooden socket boxes are used - special cut out discs or plates of a rectangular or rounded shape, which are impregnated with a protective fire-fighting compound at the factory.

They can also be made of polystyrene, getinax and other non-combustible materials with dielectric and heat-insulating properties with a plate thickness of about 1 cm.
They are fixed on the wall with screws with a head for "sweat" or glued. On wood and other materials that can catch fire in the event of a malfunction in the electrical wiring, additional protection is installed with a thickness of about 3 mm from paronite gaskets.
The housing with the socket or switch mechanism is mounted to the installed socket with the top cover removed with two conventional screws with semicircular heads. If you use countersunk models, then their conical end during twisting will cut into the hole and begin to push apart, wedge the body material and, as a result, split it.
And when such fasteners are not tightened, the socket housing together with the mechanism will loosen and eventually simply break. Therefore, for fastening, screws are used that press the case tightly to the socket without wedging the material.
But, here it is necessary to ensure that the housing cover does not crush the wires or cable. If this happens, then over time, the compressed insulation will collapse from the constant mechanical influences made during the installation and removal of the plug into the contact mechanism. To do this, break out small areas in the lids, indicated by plastic membranes - pre-pressing.

For old sockets and switches, the box lid was more fragile and could crack when removing the pre-molding. Therefore, it was previously done undercutting with mechanical tools. Modern cases are stronger and more rigid. They allow the web to be removed by simply cutting off a knife. But, it is not recommended to perform this operation without a tool with bare hands - you can easily injure your fingers.
Greetings to all readers of our blog.
Today, dear readers, I want to highlight the topic of how to install the sockets. This procedure is very often demanded when replacing an old outlet with a new one in the event of a breakdown, when carrying out repairs in rooms and a complete replacement of electrical wiring.
The work itself is not very difficult, but, as in everything, there are peculiarities and "zest". So let's get started ...
As you know, sockets are the end points of the electrical network to which consumers are directly connected (irons, refrigerators, televisions, etc.). They are both external and internal. The principle of connecting to the electrical network is the same for some and for others, the difference is that the inner ones are installed in special boxes (socket boxes) recessed into the wall and practically do not protrude, while the outer ones are attached directly to the wall surface and are completely visible.
Let's look at everything in order:
ATTENTION: When carrying out any work on the electrical wiring, do not forget to turn off the electricity, and additionally check its absence from the network after disconnecting.
1. Fastening of external sockets.
The principle of installing an external socket is very simple and requires minimal effort. This type of consumer connection is used mainly in rooms with external wiring, in rooms whose structures are made of flammable materials (for example, wooden buildings).
Of course, when using external wiring and external means of connecting consumers, the aesthetic appearance of the room deteriorates - all the wires are in plain sight. But, on the other hand, when there is a choice between an aesthetic appearance and the safety of life, safety is unambiguously chosen. Due to the fact that all the elements of the wiring are visible, the problem area is easily identified. For example, in case of poor contact, you will immediately see places where the case melts, a change in the color of the case and the appearance of smoke.
Installation of an external socket is carried out as follows.
- disassemble the case;
We unscrew the mounting bolts and remove the top cover.

- using screws, we screw the base to our surface (for example, to a wall);

If the structure is attached to a flammable material (for example, wood), it is advisable to lay a non-combustible material (paronite, gypsum) under the base. This extra layer will create a barrier between the flammable material and the outlet and prevent fire.
- we connect the electrical wires (more on this in clause 3 "Connecting sockets to the electrical network").
- we fasten the cover to the body and completely assemble the socket.
2.PTypes and installation of boxes for internal sockets.
A completely different installation principle is used for internal sockets. When attaching them, a box must be used. This is a special cylindrical box in which the body of the outlet itself is placed.
Previously, metal boxes were used. A recess was made in the wall at the place where the electrical wiring was output, if the wall was tiled with tiles - or of the required diameter. A box was mounted in it with the help of alabaster and contact wires were removed. Only then, a means for connecting end consumers or a switch for connecting voltage to was attached to the box.

Currently, with the advent of plastic in wide use, boxes began to be made from it. In such a box, the socket holds well both with the help of the spacer lugs and screwed on. Another advantage of such a box is its budget price.
If there is a need to put several sockets, the boxes are easily connected to each other into a block.

Depending on the material of the walls into which the installation box is planned to be mounted, boxes of various modifications are also produced.
Conventional boxes are used for mounting, for example, in brick walls. To do this, a hole is drilled with a crown at the place of the outlet of the electrical wiring and the future outlet or switch. Already in this hole, with the help of alabaster, the box is fixed flush with the surface of the wall into which the wiring is led out.
If you plan to mount the box into a plasterboard wall, then you must use a special box "with ears" as in the photo below.

We drill a hole with a diameter of 68 mm in drywall. and insert the box into it. By tightening the screws, the ears on the back of the drywall tighten the box and secure it firmly in place. The free space between the drywall and the wall must be at least 45 mm so that the box is completely sunk and flush with the outer surface of the drywall.
Note: modern sockets sold in the store are almost all designed for plastic installation boxes with an inner diameter of 65 mm. and not always suitable for metal (old) boxes. The inner diameter of the metal box is 68 mm. The extension of the legs of modern sockets is not enough to fix the case in the old box. Therefore, when buying an outlet in a store, check if it is suitable for old boxes.
3. Connecting the socket to the electrical network.
All preparatory operations have been completed and you can install and connect our new socket.
- Remove the top cover by unscrewing the bolts from the front side;

- We relax the contacts into which the power wires will be inserted so that the distance between the clamping jaw and the stop is greater than the diameter of the contact wire and it can be freely inserted to a depth of 5-10 mm.

- We clean the ends of the power wires brought out into the box. We orient the ends of the wires so that they fall into the places of contacts of the body and bend them in the form of a springy snake (as in the photo below). This type of bend makes it possible to remove the case from the wall to tighten the bolts of the wires on the case and to exclude sharp bends of the wire when it is inserted into the box;

- We tighten the bolts of the wires in the housing sockets.

It is necessary to tighten very tightly, since when a powerful consumer is connected (for example, a 2 kW heater) and a poor contact, the junction will start to warm up. This will lead to melting of the wires, plastic housing, and ultimately failure of the entire structure and wiring.
What if the ends of the wires in the box are short and do not allow plugging in the outlet?
In this case, there are several ways out of this situation:
The best, but also the most difficult way is to lengthen the wires by soldering a wire of the required length and insulating the soldering point. This method is suitable if you have all the necessary accessories (soldering iron, solder, etc.) for soldering, if the wiring is copper and the length of the lead wire makes it possible to do this.
If the wire breaks off under the very body of the box, you can carefully open the place where the wiring is terminated in the wall and make the extension soldering procedure where it is convenient. Of course, the aesthetic appearance of the wall will be disturbed and this place will have to be a little, but still, the loss of view will be minimal compared to replacing the entire wire from the junction box to the outlet.
If the electrical wiring is aluminum, and it often breaks down, the soldering method will be unacceptable.
In this case, if the length of the broken end allows, you can use the terminal. On the one hand, we insert the stripped broken end of the wire into it, on the other a stripped piece of the extension wire and tighten the contact points tightly.

Of course, this method creates an additional contact point where heating is possible, which creates a certain risk. Otherwise, you will have to replace the entire lead wire from the junction box to the outlet of the wiring from the wall.
This was a small digression, but let's move on to further installation. We connected the wires and now we need to install the socket in its place in the box.
4. Fastening of internal sockets.
Depending on the type of box, internal sockets are attached to it in two ways:
- using the fixing lugs;

Their principle of operation is simple. The lugs have a curved shape and resemble an "Archimedes lever". When screwing in the bolts passing through the legs, one side of the foot is pressed against the body, and the second, passing through the stop, moves to the side. Tightening the bolts on one and the other side of the body in turn, the legs rest against the box and wedge the body in the required position.
This method of fastening is now practically not used. It is used only in cases where the socket is installed in a metal box, mainly in buildings of "Soviet" times.
The following mounting method is more convenient, lightweight and practical.
- fixing the case with two screws;

Depending on the need, we orient the case in a vertical or horizontal direction. We direct the screws into the special holes in the box and tighten.

The socket is connected to the mains, fixed in the box and the last step is to put the top cover back in place, apply voltage and try to work by connecting the consumer.
Now you also know how to install the socket. I look forward to your comments and will definitely answer everyone.
See you soon, and easy repairs to everyone.
In conclusion, a small video installation of an outlet in a wall lined with plasterboard.
Best regards, Vladislav Ponomarev.

High reliability of fastening electrical switching devices, ensuring their safe operation during the entire time of using electricity, is one of the main requirements that apply to apartment wiring in any room.
A home craftsman engaged in repair and construction work in the electrical diagram of rooms must:
- professionally carry out the installation of sockets and switches;
- correctly lay and connect wires to them;
- observe technological developments that take into account the physical processes occurring when an electric current of increased power flows.
Only in this case, the sockets and switches will not fall out of the mounting slots over time, spark, warm up, create a fire hazard,.
Modern home wiring is done in just two ways:
- by the overhead method directly on the surface of building structures of the building - open;
- inside the walls with the output of the switching devices to the outside - closed.
For each of these methods, the industry produces all the necessary equipment:
- wires and cables of various cross-sections with layers of insulation, designed for use in household wiring;
- switching devices of electrical points (connection nodes):
- sockets;
- switches;
- socket boxes;
- junction and junction boxes.
For long-term safe operation of electrical wiring elements, the home craftsman can only provide:
- reliable, tight contacts in the places where wires are connected, which create minimal voltage losses at the transition resistances;
- high insulation of current-carrying conductors, excluding
- safety, taking into account:
- ease of management;
- restriction of admission of unauthorized persons;
- fire protection.
Let us analyze these points using examples of work in electrical wiring laid in different ways.
How to install sockets and switches in a closed wiring
Building structures made of reinforced concrete, bricks, stone slabs
With the factory method of manufacturing panel buildings, technological voids are immediately created inside building structures - channels for laying electrical cables and wires. After assembling the frame of the building, places for electrical communications have already been prepared inside the walls.
It remains to lay the cables in them, and at the ends to mount the nodes for connecting electrical points.
Design features of installation boxes
These fasteners are designed to securely hold the sockets and switches within the building elements.

All installation boxes are mounted after the cable has been laid, placed in the mortar, fixed with it in the prepared wall recesses, and are strictly oriented.
The material for the installation boxes used to be metal sheet.

In it, the body of the socket was fixed with spacer pads due to the creation of a pushing force with screws on special stop paws. If the electrician during installation made a small mistake in tightening the fastener, then over time the fastening weakened, and the socket fell out of the installation box.
During operation, such things should not be allowed, and electricians periodically needed to carry out an external examination, check the condition of electrical points, and eliminate any faults noticed in a timely manner. When this process was not carried out, very dangerous prerequisites were created.
One of the reasons for the occurrence of such malfunctions lies in the rather high sliding of the metal of the sliding legs on the tin of the installation box.
Modern flush-mounted flush-mounted cases are made of durable plastic materials based on non-combustible grades of polypropylene with high mechanical and dielectric properties.

The metal of the sliding tabs cuts into this material when the fastening screws are clamped, and the socket is firmly held during the entire period of use.
For this reason, when carrying out the reconstruction of the electrical network, it makes sense to abandon the metal installation boxes and switch to new, polypropylene ones.
Fastening the housing in the installation box with sliding tabs is not the only one. On the surface of modern boxes, reinforced platforms are created for fixing sockets and switches with self-tapping screws, which hold the fastened mechanism through special mounting holes.
Replacing single sockets with blocks
When renovating an apartment, you should take into account the increased number of electrical appliances in home use and install not one outlet, but a whole block of them. For this purpose, the installation boxes are designed according to the principle of serial connection with each other. They can be assembled into a tape of any length according to the number of switching devices used.
A reasonable technical solution is the use of a set point for the location in this place of a set of switches used to illuminate various parts of the room.

The use of ready-made internal channels in the wall saves the home craftsman from creating new highways associated with the implementation of dirty construction work on chasing, drilling, plastering, leveling surfaces.
Pavel Sidorik offers an interesting technology for mounting socket outlets in a closed wiring in his video. He visually supplements the material of the article. I recommend it for viewing.
Building structures with ceramic tiles
When a room owner has a design idea for installing a closed outlet or a switch on the surface of a wall covered with tiles made of ceramic materials, then a certain part of even experienced electricians refuses and does not undertake to implement such ideas due to a fragile material that can crack in the most unexpected places with a small violation of the technology of its processing.
However, it is technically possible to implement it. Your attention is offered a description of one of the options for such work with illustrations of the stages of implementation with photographs. They clearly show the technology used by the home craftsman.
In our opinion, it can be taken as a basis, but it can clearly be improved. We invite you to comment on this material after reading. We are interested in several opinions of different experts on this issue.
Please note that the owner indicated the place where the outlet used to stand and a cable was connected to it before the tile was installed inside the wall. You just needed to connect to it, and there was no need to lay it.
The sequence of construction operations for installing the outlet
The technology of installing a socket inside a wall with glued tiles is shown in a sequential series of photographs.

For drilling ceramics, use specially designed sharp drills or cutters with victorious tips, or better - diamond dusting. Naturally, the tool of the last class is more expensive than the usual one and it is not profitable to purchase it for a single piece of work.
The drill should be positioned close to the hole just created each time, but the edges should not intersect. Otherwise, creating neat grooves will be problematic. The depth of the holes must match the thickness of the tiles.
When all the holes along the perimeter of the contour are made, it will be the turn of a hammer and a sharp chisel. You can also use a chisel or chisel. Using the method of applying small-force point strikes, all the partitions between the holes are cleaved.

Work must be done carefully: the cutting edge of the percussion tool must not extend beyond the outer limits of the holes.
After removing the partitions, remove the tile area located on the inside. Make sure that all mechanical connections to the outside are severed.
After rough removal of ceramic residues, one proceeds to sequential leveling of sharp edges by grinding with an abrasive wheel with a hand drill.
Then you need to:

- with a small diameter concrete drill, drill out the concrete slab under the tiles to the depth of the installation box. When working, you should step back from the edge of the tile, do not allow contacts of the working tool with fragile ceramics;
- to expand thin holes with a thicker drill, but it is impossible to drill concrete with it immediately: increased loads will be transmitted to the tile material;
- remove excess concrete between holes or with a hand tool.
The last step can also be performed with a hammer drill. But in this case, it will stretch in time, create unnecessary difficulties.

When the inner cavity of the wall is prepared in terms of volume and allows the installation of a junction box, a line is created to bring the cable to the outlet and lead it from the inside of the wall.
You can pull it out with a homemade hook from any piece of wire, which is pushed into the hole and pulled out after grabbing the cable.
The end of the wire is taken in the hand and carefully removed outward, inserted into the installation plastic box.
The remaining ends of the connecting wires are brought into the same block. The cavity made in the wall is filled with a prepared building mixture and a common installation box is pressed into it, controlling its position on the wall. After that, excess lumps of solution squeezed out through the holes are removed with a slightly damp cloth.

With the help of a building level, the position of the installation block is monitored and adjusted.
Features of connecting wires
The ends coming out of the installation box are mounted to the terminals in the usual way - using screw clamps.
Sometimes, to connect the outlet in this way, a non-standard situation is created when it is impossible to completely lay the cable from the distribution apartment box to the new switching device and you have to build up a piece of the old, already laid one.
Before starting work, you need to have a pointer on it or in another way. Only after his absence can one work.

The place for extending the cable will most often have to be hidden right in the wall, which is not entirely correct in terms of installation technology and safety rules. But, you have to put up with this. But you will have to worry about the reliability and quality of the connection.
Heat-shrinkable tubing provides good insulation of electrical circuits from building structures. It is put on the free conductors on one side of the cable before the electrical connection.
The ends of the wires of the abutting cables can be made of different metals: aluminum and copper. Their contact is made through steel tube adapters with screws, which are immediately securely clamped. Then a heat shrink tube is moved to this place and heated with an industrial hair dryer or even a lighter flame.
Under the influence of temperature, the material of the tube tightly fits the junction of the wires in the terminal, reliably insulates it.
Final stages of installation
It is better to divide them into executions:
- electrical checks of the assembled circuit;
- final closing and fixing of decorative covers.
Electrical checks of the work performed
This is a mandatory item that must be followed before applying operating voltage. The circuit must be completely assembled, and the protective covers do not need to be closed. This will save you from unnecessary operations when eliminating detected errors: break points, short circuits, insulation violations.

After the continuity of the electrical circuit, voltage is applied to it, the presence of phase and zero potentials is monitored. However, bad contact can only be detected under a load created by a powerful consumer, for example, a drill.
If it does not work normally at idle, but under load, when a thick hole is drilled in the metal, then the work is done correctly. In this case, heating of the socket contacts should not be observed.
Installing and closing the decorative cover, fixing it with screws.
These operations are performed at the very end, as final ones.

Building structures with plasterboard partitions
Walls made of plasterboard, DPV or chipboard have a small thickness, but they have strength, allowing them to be mounted on the surface or embedded in sockets and switches built into them. For these purposes, the industry produces special plastic socket boxes.

They have movable plates located on the back of the case. Through the holes in the drywall, screws are screwed into the plates, moving these latches to the surface of the wall. Due to this, a reliable fastening of the socket to the building structure is created.

For internal mounting of the socket or switch, a hole must be cut in the drywall for the installation box. Gypsum and cardboard can be easily processed with an ordinary sharpened knife. A single hole can be cut out neatly with little effort.
If you need to install a lot of installation boxes, then you get a special crown with circular saws for processing drywall. It attaches to the drill chuck and allows you to quickly create neat holes with smooth edges.
Installing the trimmer in the cut-out hole and tightening the mounting screws does not cause any particular difficulties and is shown in the video by Evgeny Romanov.
How to install sockets and switches in open wiring
The method of overhead fastening of switching devices requires additional compliance with protective measures. All electrical wiring elements are accessible for direct human contact and must be equipped with a layer of insulation with increased strength.
At the same time, it is necessary to exclude the possibility of a fire in the event that a short circuit is created anywhere in the circuit. For this purpose, the wires are separated from the wooden walls at a distance, and under the installation boxes, special socket boxes are mounted on metal gaskets.
The housing of the socket boxes can be made of wood, beautifully decorated, but they must be impregnated with a fire-fighting solution that prevents combustion.

The socket is attached to the building structure with ordinary flat head screws. A hole is pre-drilled in the wood, preventing the formation of cracks in it.
The cover is removed from the socket and the case is fixed to the socket with self-tapping screws, the wires are connected.

To securely enter the cable on the cover according to its size, it is necessary to remove a part of the pre-pressing - a thin part of the wall. Then the wire sheath will not be pinched by the cover when the fastening screw is tightened.
Old masters remember that earlier socket covers were more fragile and could crack if handled carelessly. Now the jumper can be cut off with an ordinary knife.
As you can see, it is quite possible for a home craftsman to install sockets and switches on building structures. Do not just forget about the rules of electrical and fire safety.
Dmitry Avdeev reminds of this in his video on the method of laying open wiring in a retro style.
Ask questions on the topic of the article in the comments.
Even a novice electrician will be able to carry out the installation of the outlet and the connection with his own hands. The event does not present any particular difficulties, and besides, it will save you from 500 to 700 rubles (the average price for a master's work). Today, it is customary to use the mounting of sockets in an external and hidden way. Next, we will look at how to install and connect both versions.
The outdoor method is used when (over decorative wall decoration). In this case, the body is fixed to the wall with dowels.
The installation of an internal socket is used if the line is laid in special grooves (for example, during the installation of electrical wiring in an apartment). In this case, you first need to, and then proceed to connecting the outlet itself.

Now we will consider in detail each of the methods.
We draw your attention to the fact that wiring with a ground loop is currently used, therefore, this article will consider the technology for connecting a socket with a grounding!
Installation options
Inside the wall
Installation of the socket inside the wall is carried out more often, because in this case, the recessed body does not catch the eye and does not spoil the interior of the entire room.
Before starting work, we need the following materials and tools:
- plastic socket - 1 pc .;
- internal socket - 1 pc .;
- alabaster;
- screwdrivers (curly, straight and with indicator);
- sharp knife;
- pliers.
Please note that wiring is not covered in this article. The connection to the electrical outlet is carried out in ready-made grooves with supplied conductors! You can learn more about laying the wire in the article:!

So, to make the information easier to perceive, we provide you with step-by-step instructions for installing a socket into a concrete wall:
Step 1 - Power outage
It is very important to turn off the electricity in the room before starting the electrical work. To do this, turn off the corresponding automatic machine in the switchboard, and then check the presence of current at the installation site using an indicator screwdriver. We talked about that in a separate article.

Step 2 - Installing the socket
Today there are metal and plastic socket boxes. It is necessary to give preference to the latter, because they are low cost and are sized to meet new standards. If you decide to install the socket into a metal socket box, it is unlikely that it will be possible to fix the core with expanding paws, as a result of which the case will dangle and eventually fail.
It is recommended to use alabaster to install a plastic socket in a load-bearing wall. The strobe needs to be slightly moistened with water, then apply 2-3 mm of solution and quickly fix the product.

It is also possible to mount with self-tapping screws, but in this case, the reliability of the installation will not be so high. After that, wires of electrical wiring are inserted into special holes, as shown in the photo.

Step 3 - securing the chassis
Now you need to install the case itself - the place where the contacts will be connected. To begin with, all 3 cores (ground, zero and phase) must be cleaned with a knife from insulation. The stripping length must be at least 7 mm (preferably 10 mm). In order not to damage the current-carrying conductors, we recommend that you read about. Further, all contacts must be fixed in the case. The design of the mechanism includes 5 screws: 2 lateral for the spacer feet, 1 for grounding (in the center) and 2 for phase / zero (right and left of the center). All you need to do is loosen the 3 center screws, insert the bare cores and tighten them carefully with a screwdriver.

An important rule for installing an outlet is that the phase must be connected to the left hole (if you look at the housing fixed in the wall), and zero to the right. This custom has been used by electricians for a long time and allows you to quickly find each of the conductors, if absent.
After that, it is necessary to fix the case in the socket box. To do this, place it evenly in the wall (so that after the installation is completed, the outlet is not skewed) and, using the side screws, spread the legs so that they securely cut into the walls.

You should also give useful advice here. When, give preference to products that have legs with two teeth - they are more firmly fixed in the wall! Instead of legs, an overhead body can be used (shown in the photo below). In this case, the fastening is carried out with self-tapping screws on both sides of the rim.

Step 4 - Installing the edging
Now that all the screws are securely tightened, you need to hide the case behind the decorative trim. It is also secured with a central screw. There is nothing complicated, just tighten the screws all the way.


That's the whole technology for installing and connecting an internal socket with your own hands. Be sure to ensure that all wires are securely tightened. If the joints are loosened, after a while the case will begin to melt due to heating, which will soon lead to spontaneous combustion of the wiring and!
Open way
An external version of an electrical outlet is used in the garage.
The advantage of this design is as follows:
- easier replacement, repair and installation;
- problems can be quickly identified by the appearance of the product.
Disadvantages:
- increased cost of the product;
- exposed electrical wiring can degrade the interior of the room.
So, let's look at how to install an external outlet yourself, as well as connect it to a 220 Volt network. As in the previous case, you first need to de-energize the room and make sure there is no power using an indicator screwdriver. Next, you need to disassemble the case, which consists of a back cover with a core and a front cover.
First of all, we attach the back cover to the wall. To do this, we lean it, set it in level (so that there are no distortions) and mark the locations of the mounting holes with a simple pencil. After that, we drill out the marked places with a drill and drive dowels into them. Now you can fix the cover with self-tapping screws and proceed to connecting the wires.

We draw your attention to the fact that it is recommended to put paronite between the back cover and the wall (which is usually wooden). This material will prevent spontaneous combustion of the wall when the insulation ignites.
When all three contacts are tightened with screws, you can install the front cover, which is where the process of connecting the surface-mounted electrical accessories ends. It remains only to bring to your attention a few useful tips that will allow you to properly connect the outlet yourself!
Experienced electricians advise considering the following guidelines when installing an outlet in your home:
Video instruction
Visual video lesson
So we examined how the installation of the outlet and the connection with our own hands is carried out. As you can see, the installation is not too difficult, so at home anyone who follows our recommendations can do everything on their own!
Related materials:
- an extremely responsible business, requiring certain knowledge and experience in performing such work. Therefore, such large-scale events are most often entrusted to electricians. But some problems that arise, for example, when carrying out cosmetic repairs or simply during the operation of an electrical facility, can be solved on our own. Such available operations include connecting stationary lighting fixtures, installing new ones or replacing broken sockets and switches.
In this publication, we will focus on sockets - we have to deal with them most often. The saturation of everyday life with useful electrical appliances is constantly growing, and new equipment often requires new connection points. In addition, any socket is not forever, it is designed for a certain number of plug connections. And sooner or later it develops its resource, begins to spark, loosen up, and sometimes completely crumbles into dust. And just when carrying out cosmetic repairs, the owners often want to replace all the sockets and switches with new ones that are most suitable for the style of the chosen finish.
So, he is considering the question of how to connect the outlet yourself, without calling the wizard.
Briefly - about the types and arrangement of sockets
For a person who will undertake the installation of an outlet for the first time, it would be logical to first understand how it works. Its structure is not particularly complex, but nevertheless.
Consider the diagram. True, it does not reflect the entire variety of designs of modern sockets, but the principle of the device is approximately the same.

The main role is played by the body (item 1), in which the contact groups and terminals are assembled, as well as devices for fixing the socket in the socket of the socket or directly on the wall surface. The body is made of a dielectric material - most often it is plastic, but it can also be ceramic. Sockets with ceramic bodies are somewhat more expensive and are considered to be of higher quality. However, they require careful handling during installation - if you accidentally drop the socket or, for example, overtighten the fastening screws, the case may break and cannot be restored.
On the front side, the socket is closed with a plastic cover (item 2). The lid has a shaped groove with holes-sockets, where the pin contacts of the plug enter. The cover can be solid or collapsible - it often has an additional decorative frame (item 3). With proper installation, this frame will be firmly pressed against the wall and completely cover the installation site of the outlet. The cover is fastened to the body with a screw (pos. 4). There may be several screws - for example, on double or triple sockets. As a rule, the screws from the inside are equipped with a simple stopper, so that in the unscrewed position they do not fall out of their seats.
The contact group is located in the housing. Since we will consider only single-phase 220 V sockets, there are two such contacts - for connecting zero and phase (pos. 5). The most commonly used spade (plate) contacts. Spring-loaded ones are considered more reliable for switching and durable, but they are now rarely found on sale.

To connect to the contacts of a wiring suitable for the socket, each of them is equipped with a terminal (pos. 6). There are many types of terminals, but conditionally they can be divided into two categories.
- In one (predominant) conductor fixation is ensured by tightening the screw. The screw head in different socket models, by the way, can be located in different ways - from the back, from the front, from the side or from the top-bottom.

Many sockets at night are equipped with additional contacts for connection to the ground loop. Most often in our area there are models with two grounding curved petal contacts, located respectively above and below (pos. 7). The metal plate of this PE contact also has its own terminal (item 8) for connecting the wire.
For fixing the socket in the socket box, two variants of clamps can be used simultaneously or separately.
- Firstly, these are special locking paws with sharpened toothed edges (pos. 9). Each such foot is equipped with a screw (pos. 10), when tightened, it moves out to the side and firmly rests against the body of the socket.
- Secondly, most modern socket outlets also provide for fastening the socket with a screw (self-tapping screw). For these fasteners, there are special lugs (pos. 11) of a characteristic arcuate shape - this makes it possible to slightly correct the position of the socket.
By the way, the above was shown, perhaps, and not the most typical example of an outlet. The overwhelming majority of modern models are also equipped with a metal support (pos. 12) - a special plate that greatly simplifies the installation process.

When installed, this support perfectly rests against the plane of the wall, that is, it is impossible to make a mistake with the depth of the socket housing. The plate itself will then be completely hidden by the decorative cover.
The caliper always has the aforementioned lugs for screw fastening to the socket. In addition, there may also be holes in the corners (pos. 13). They are very useful when the socket is installed on a rigid base without a socket at all. For example - on a wall lined with clapboard or other panels, provided that there is a small space under the trim, sufficient in depth for the socket housing. In this case, a window of the required size is simply cut out, and the socket itself is attached to the finish surface through a support with four self-tapping screws. It couldn't be easier!
As mentioned above, sockets can be single, and even triple, that is, designed to connect several electrical appliances at once. Another approach is when several single sockets connected in parallel are installed for these purposes.
A few words on the types of outlets.
- In the recent past, type "C" prevailed - only two contacts, zero and phase. It is still widely used today - it is quite suitable for electrical appliances of small and medium power that do not require mandatory grounding.

This type, by the way, is also not homogeneous. Surely many have come across that such sockets of the old "Soviet" type do not include the plugs of many electrical appliances, since the pins have a larger diameter than the holes. However, now, as it seems, the "Soviet" type is no longer on sale, so the problem becomes insignificant.
- Type "F" has the same two sockets for the prongs of the plug, but is also equipped with contacts for grounding. It was this type that was shown in the diagram when the outlet was considered.

Such sockets dominate in our time, since a person's life is more and more saturated with a variety of equipment, for the safe operation of which grounding is necessary. However, such an outlet allows you to connect other electrical appliances without any problems. Except, perhaps, only the old forks with a round, not having curly cutouts on the rim of the case.
- It is permissible in our conditions to install sockets of type "E". The sockets for phase and zero do not differ from type "F", but the ground contact has the shape of a protruding pin.

Such sockets are not particularly popular with us. But if you pay attention to the design of the plugs of most modern electrical appliances, you will notice that it is suitable for both types, "F" and "E" - a special hole with a contact is provided for the entry of the pin. But another plug will clearly not fit, that is, the socket does not differ in universality. In addition, the rotation of the plug in the outlet by 180 degrees is completely excluded, and this sometimes becomes useful during the use of electrical appliances.
Of course, there are many more types of outlets. Here, only three were highlighted, since it is they that are most often used in Russian conditions.
The sockets also differ in the degree (class) of protection of the case. This indicator is indicated by an IP index and a two-digit number. The first number indicates the class of protection against the penetration of solids and dust, the second - about the protection against the effects of water.
- For ordinary premises of a house or apartment, the IP22 or IP33 class is quite sufficient. If the outlet is planned to be installed in a children's room, then it is better to purchase a model with a class of at least IP43. A feature of such products is the presence of a cover and special shutters that overlap the sockets for the plug pins when the socket is not in use. This will make it difficult for a curious young "researcher" to access current-carrying contacts.
- But for bathrooms, showers, kitchens, models with a class of at least IP44 are purchased - here the humidity is also high, and there is a very high probability of splashing water on the outlet.

- IP44 class is also suitable for installation in an unheated basement.
- An even higher class is needed if the outlet needs to be installed on the street or, for example, on an open balcony. This takes into account both dust exposure and direct precipitation. So, for safety reasons, it is recommended to use models with a protection class of at least IP55.

Now that the general concepts of the design and types of sockets have been obtained, you can refer to the schematic diagrams of their connection.
Diagrams for connecting outlets to the electrical network
Outlet connection diagrams are not particularly complicated. But it is still necessary to consider them.
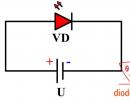
First - a diagram of connecting the sockets to a single-phase network, in which there is no grounding loop.

On the diagram, digital designations show:
1 - general safety paired machine.
2 - a circuit breaker that turns off the phase on the line to which the sockets will be connected.
3 - zero bus.
4 - distribution switch boxes. According to the rules for laying the wiring in the house, they must be located exactly above the outlets so that the vertical outlet section descends downward. Each outlet (or block of multiple outlets) must have its own junction box.
5 - conditionally shows a cable of hidden or open wiring.
Find out from our new article on our portal.
Please note - in accordance with the rules followed by professional electricians, it is customary to place the phase on the outlet on the left, zero on the right. Unfortunately, not everyone does this. Although such an installation greatly simplifies both the operation of some devices (those where the mandatory position of the phase and zero is fundamentally required), and diagnostics and repair and maintenance work if there are problems in the network.
And where is the best place to install the sockets?
This publication is devoted specifically to the connection of outlets, and not to planning their location and the rules of wiring. These questions are so important that a separate article is given to them on our portal. In it, by the way, a lot of attention is paid to the peculiarities of the placement of sockets in the kitchen, where the maximum "concentration" of large household appliances is usually observed.
The second scheme is also single sockets, but already "F" type, with connection to the ground loop.

6 - bus for connecting grounding (PE) wires. They are shown in green in the diagram.
However, another version of the connection is also possible, often used, for example, in utility rooms, especially with an open type of wiring. In this case, the ground loop runs from below, along the floor along the perimeter of the walls. And a separate wire rises to the outlet from it. And the eyeliner itself from above is the usual phase and zero. In this case, the switching at the socket terminals does not change in any way.

Now - let's slightly increase the area of connection of outlets and see how switching is performed if it is necessary to install a block of two or more pieces.
If the connection goes to the network without a ground loop, then everything is relatively simple. In this case, the sockets are connected with a so-called loop. That is, the phase wire approaches the first, from which it is connected with a jumper to the second. Further, from the second jumper goes to the third. The zero contacts of the sockets are switched in the same way.

The method, I must say, is not without flaws. For example, with insufficient contact of one of the wires, say, on the second outlet, the third one already a priori becomes inoperative. However, this is easily diagnosed, and for prevention purposes, it is recommended to tighten the screw terminals annually.

If the design of the terminals in the sockets provides such an opportunity, the best solution would be to make connections not with jumpers, but with a solid wire. In a small area, the insulation is removed, the wire is bent in a loop and this loop is clamped in the terminal of the first outlet. Then a section of insulation is removed for the second outlet - and so on. The fuss, of course, is much more, it is required to provide in advance for the required length of the wires of the supply line, but the sockets are obtained according to the degree of their performance - they are independent of one another.
It would seem that in the same way, you can connect sockets with a grounding contact with a loop. However, such a connection (using jumpers) is undesirable, since it does not differ in reliability. If the absence of a phase or zero becomes immediately noticeable to users, and measures to restore the outlet's operability are taken immediately, then the unreliability of the protective grounding may remain undetected for a very long time. And this can pose a very serious threat to the operation of electrical appliances.
By the way, the rules for the operation of electrical installations directly prohibit the serial connection of the grounding wire.
"PUE-7
1.7.144. The connection of each open conductive part of an electrical installation to a neutral protective or protective grounding conductor must be performed using a separate branch. Sequential connection of exposed conductive parts to the protective conductor is not allowed. "
Therefore, you should act, as a last resort, as shown above - with a common ground wire and creating several sections on it for terminal connection (although this will not be entirely correct).
And best of all - on the grounding wire suitable for the first socket, perform a high-quality twisting (unsoldering). And already from it to each outlet of the unit, lead a separate ground wire for individual connection.

Will such a twist fit in the box of the first outlet? Numerous examples presented in photographs on the Internet convince that it is possible to do this.

You can put a deeper socket for the first outlet - not 40, but 60 mm - it will be much easier to fit the wires there. By the way, if space permits, nothing prevents you from performing such twists (desoldering) for a phase with zero - the reliability of the outlet block will only benefit from this. Naturally, all connections are carefully insulated with electrical tape or heat shrink tubing. And the twists themselves are very convenient to do using special PPE caps - it turns out quickly, neatly, and very reliably. Wago terminals are also very convenient for such purposes, but for loaded lines, high-quality twisting will still be more reliable.
Sometimes they do this too - they put on one more socket, and it is used as a local junction box. Then, after switching the entire unit, it is closed with a plug, and then with a decorative wall decoration. In this case, certainly nothing will prevent you from making a reliable high-quality eyeliner to all the sockets of the block.
Socket installation process - step by step
In this article, we will not focus on laying wires to the installation site of sockets, installing boxes and sockets. This is a topic for a separate and very detailed consideration, and it has already found coverage on the pages of the portal.
How to independently lay the wiring in a house or apartment?
The task is not an easy one, requiring certain knowledge and very high care when carrying out work. In addition, in the course of its implementation, many general construction operations will have to be performed. The theoretical foundations and all stages of installation are described in great detail in the large instructional article of our portal.
When installing sockets, you should adhere to the established color coding of the wires. It is customary to switch zero with blue (blue) wires, grounding - green-yellow. There can be various options with a phase - brown, black, white, red and others, but in any case - they are always different from zero and ground.

When installing outlets, and during other electrical operations, in any case, the first thing to do is to make sure that the line is completely de-energized. Some measures are taken to prevent its unauthorized inclusion - this should be constantly monitored until the end of the work.
Below we will consider several options for installing outlets. They are all, of course, similar, but they have some differences related to the peculiarities of specific cases.
Single socket installation
A very common case - it was produced, and it's time to install new sockets. A cable is connected to the socket, which is still inside it in an insulated state.
| Illustration | |
|---|---|
 | When pasting the wall with wallpaper, two diagonal cuts at once indicated the location of the socket outlet. This is where the socket is to be installed. |
 | First of all, you must fully open the socket itself. Fragments of wallpaper around the perimeter are carefully trimmed with a sharp knife ... |
 | ... and are removed. The action is carried out carefully so as not to accidentally damage the finish in the area that will remain uncovered by the outlet. |
 | The hidden end of the power cable is pulled outward. |
 | After finishing work, a lot of debris, remnants of mortars, and dust can accumulate inside the socket after finishing work. All this needs to be cleaned out. |
 | After removing large debris, small ones can be quickly cleaned with a vacuum cleaner. |
 | Everything, the place is prepared - you can proceed to the installation work. |
 | First of all, if necessary, shorten the cable suitable for the outlet. It is usually assumed that it should protrude beyond the wall surface by 60 ÷ 80 mm. |
 | Further, it is necessary to remove the outer layer of protective insulation (braid) from the cable. It is shown here that the master is wielding an ordinary knife. It is possible, of course, but still - not entirely correct, since it is so easy to damage the insulation of the wires. Below, in the following table, a more competent approach to this operation will be shown. |
 | The braid is removed to free the wires. Its remains are carefully cut and removed so that they do not interfere with the work. |
 | The freed wires are immediately bent to the sides several times, exactly in the order in which they will be connected to the outlet: phase on the left, zero on the right, and grounding - in the center. The ends of the wires (about 25 mm) can be bent down a little at once. |
 | With the help of an insulation stripper, the ends are exposed - about 10 mm from the edge. |
 | The ends of the wires are stripped and ready for installation. |
 | This example uses a socket equipped with self-tightening spring terminals. That is, the work is simplified to the limit. The stripped end of the wire is inserted into the hole of the terminal and simply sinks into it until it stops. Switching an outlet takes only a few seconds. |
 | After that, it is necessary with a pulling movement to check the reliability of fixation in the terminals of all three wires. If everything is ok, you can move on. |
 | The connected wires are slightly bent so that they are located along the back of the socket housing. |
 | In this form, the socket is ready for installation in the socket of the socket. |
 | In this example, the fastening screws are still in the socket. Of course, they should be unscrewed. But usually this operation is carried out a little earlier, when cleaning the socket box from construction debris. |
 | The socket housing is inserted into the socket of the socket and approximately, by eye, is aligned horizontally. Then it is temporarily fixed with self-tapping screws. First, on the one hand ... |
 | ... and then from the opposite. At the same time, the self-tapping screws are not tightened yet. |
 | The next step is to set the upper edge of the socket strictly horizontally. To do this, a level is applied to the upper edge of the caliper, and the necessary position adjustments are made. The arcuate cutouts under the self-tapping screws make it possible to slightly turn the socket in the desired direction. |
 | Then, without knocking down the exposed position, the fastening screws are tightened. After that, the screws of the stopper-paws are screwed in, which, dispersed to the sides, will abut against the walls of the socket and finally fix the socket. |
 | You can proceed to the final assembly. The decorative frame of the shown rosette model consists of two parts - it is first assembled. |
 | Then a central cover with a socket for a plug is inserted into it. |
 | In this form, they are connected to the body of the installed outlet. The system of grooves and protrusions on these parts will ensure a perfect unambiguous alignment - somehow it is simply impossible to install the cover unevenly. |
 | It remains only to tighten the fixing screw in the center - it will finally press the cover to the socket housing. True, you shouldn't use “fanatical” efforts when screwing in, so that the plastic of the cover does not crack. |
 | That's it, the socket is installed - the correctness of its placement is being checked. If this was the only electrical task, you can turn on the machine and check the functionality of the outlet. |
Installing a block of two outlets
The situation is similar - after finishing it is necessary to install a block of two single sockets. The master will connect them with a loop. The negative aspects of this method have already been mentioned above, but very many do just that.
| Illustration | Brief description of the performed operation |
|---|---|
 | Even before the start of finishing work, two socket outlets are placed in the right place at a set distance from one another. The power cable is routed to the left |
 | Two single Legrand sockets will be installed and covered with one common frame. |
 | This is the remainder of the three-core cable coil that was used for hidden wiring. A piece of it will be required to connect the outlets with each other. |
 | After cleaning the socket boxes from construction debris, you can immediately unscrew the fastening screws from them. They are usually left in place after installing the socket outlets before finishing so that the holes are not clogged with mortar, but now they should be removed. |
 | The end of the supplied cable is pulled out of the socket. When trimming the excess, the master is guided by the "rule of 4 fingers" - this is how the cable should protrude beyond the surface of the wall for the convenience of further electrical work. |
 | The braid is removed from the cable. But here the master first deliberately demonstrates how to do it. When trimming the sheath with a knife, there is a high probability of damaging the insulation of the wires inside. |
 | Such a nuisance can happen. In addition, damage to the insulation can be almost imperceptible, but once, already during the operation of the outlet, play its fatal role. |
 | A special knife with a heel should be used to strip the outer insulation of the cable. |
 | When working with such a tool, the risk of damaging the insulation of the cable wires is completely eliminated. |
 | The ripped braid of the cable is cut and removed so that it does not take up space in the box and does not interfere with work. |
 | After that, the ends of the three wires are exposed by about 10 mm. For this, a special tool must also be used - an insulation stripper. Making cuts with a knife is to provoke a break in the conductor. In addition, scratches on the conductor are very unhelpful for good contact when connecting in terminals. |
 | Stripped wire ends in the first socket. Now it is necessary to bring in it and wires for switching with the second outlet. |
 | For this, a piece of the same cable is taken that was used for the lead-in. This is important, because if you really do a loop, then only with completely identical wires. The braid is removed to a length from the edge of about 200 mm. After that, the wires from the side of the second socket are pushed into the first through the channel between them. |
 | This is how it will look in practice after pulling the wires. |
 | The ends of the inserted wires are also stripped of insulation, you can proceed to connecting the first outlet. This model has three screw terminals, but each has two identical insertion slots. |
 | In them, wires with the same color marking are wound in pairs. In the left pair - white (phase), in the central pair - green-yellow (ground), in the right pair - blue (zero). After installing each pair, the terminal is immediately tightened tightly with a screwdriver. After tightening all three terminals, the wires at the back are slightly bent down along the body of the socket ... |
 | ... and then the socket is gently inserted into the socket and roughly aligned. |
 | The socket is not yet fixed with self-tapping screws - first you need to immediately install the second one. Here it is even easier. |
 | First, the required length of the wires is also measured with "four fingers", and their ends are stripped from insulation. |
 | Then the wires are inserted in the same order to the socket terminals and tightened with the screws. |
 | After that, the wires are bent along the body in the same way, and the socket is installed in the socket of the socket. |
 | Now you can pre-fix the sockets with self-tapping screws - two pieces each, left and right. At the same time, the screws are not yet tightened to the end. |
 | The next step is to horizontally align the outlets. The master has a special tool for these purposes - miniature levels. They, firstly, are well fixed by magnets to the socket supports and do not bind hands, and secondly, they allow alignment with very high accuracy. It is clear that if there are no such levels, you will have to do with the usual ones. |
 | After the necessary adjustments have been made to the position of the sockets, they are finally fixed. First, the self-tapping screws are tightened all the way, and then the screws that will unclench the persistent legs of the sockets. |
 | After the sockets are exposed, and after fixation, the correctness of their position is checked again, you can proceed to the final procedures - the installation of the outer cladding and covers. The common frame is unpacked and tried on. |
 | Then they are inserted in turn and finally fixed with the cover screws. |
 | That's it, the installation of the double socket strip is complete. |
By the way, it is not uncommon when it is required to have two sockets in a certain place, but there is no desire to fiddle with two subgrids and the assembly of the unit, they simply install one double. In fact, its installation practically does not differ from the usual installation - it is just that it is larger in size. But there is one important nuance that must not be forgotten.
The fact is that in most models, in order to provide contacts on both plug-in plugs, two plate buses are installed inside the socket - for phase and zero. But sometimes it happens that there are two terminals on each of the buses - as if for convenience during installation. And a fairly common mistake performing such an installation for the first time is that the phase and zero wires are clamped in the terminals of one bus.

The consequences of such inattention are quite obvious. When the power is turned on, there is an instant short circuit. And it will still be very good if the matter is limited to just a burnt out or melted socket. Everything could be much sadder.
So attentiveness and accuracy during electrical work must be fully mobilized.
Features of installing sockets on a plasterboard wall
Another option that is often encountered during repairs or an option is an outlet (one or a block of several) must be installed on a plasterboard partition or on a wall aligned with it.
Naturally, this issue is thought out in advance, and a cable is pulled to the panned installation site even before the installation of gypsum plasterboards, enclosed in a special corrugated pipe for safety.
The process of installing sockets, in principle, does not differ much from the options discussed above. The nuance here is, rather, the installation of socket boxes.
| Illustration | Brief description of the performed operation |
|---|---|
 | For a similar task, special socket boxes for drywall are used. There are several of these models, but they all have one thing in common. |
 | On both sides of such a socket, there are presser feet, which move along the groove intended for this upward when the screw (self-tapping screw) is screwed in. Thus, the paws will press the socket on the back of the drywall sheet. |
 | The design of the case of the socket and the legs themselves are different. In this example, the body has the shape of a truncated cone, that is, the legs, when moving up, will also diverge to the sides. In other embodiments, the shape of the guide groove is made such that when the screw rotates, the tab first rotates 90 degrees and then moves upward. But this is not particularly reflected in the installation procedure. Before starting installation, the feet must be in the lowest position. |
 | In the socket boxes, windows are cut and then squeezed out for the passage of wires. In the first - at the bottom for cable entry and at the side for a switching channel with a second socket. In the second - only on the side for switching. |
 | The sockets are ready - you can go to the markings on the wall. The location of the sockets, that is, the area where the supply cable is hidden under the drywall, should be known to the owners. In this case, a block of two outlets will be installed, and they, of course, should be located on one horizontal line. |
 | The vertical line is also drawn - this is the axis of the first rosette. At the point of intersection, a round window for the socket box will be drilled further. |
 | The standard distance between the centers of the socket boxes, if they are planned to be assembled into a single block, is 71 mm. This segment breaks off along a horizontal line. Naturally, when marking the centers of the holes, the location of the elements of the wall frame structure is always taken into account so as not to fall on the posts or lintels. |
 | Both centers are outlined - you can proceed to drilling. |
 | For this, a special crown with a diameter of 68 mm is used. You can, of course, cut it out with a knife or a file, but there is a very high risk of accidentally making a mistake, going beyond the boundaries of the cut, and the socket box may not have sufficient support for reliable fixation. When drilling, no special effort is needed - drywall is easy to cut. Excessive pressure can damage the back cardboard coating of the gypsum board. In addition, do not forget that somewhere behind the plasterboard wall there is also a cable, which can be damaged if the crown uncontrollably falls into the depth of the wall due to great effort. |
 | The first window for the socket is ready. Move on to drilling the second. |
 | Both socket outlets are drilled. |
 | Now it is necessary to find the cable laid there behind the plasterboard cladding ... |
 | ... and gently pull the end outward. |
 | Then the cable is passed through the hole in the bottom of the first socket, and the socket itself is carefully inserted into the cut-out socket ... |
 | ... until it stops, so that the side on the outer circumference rests against the surface of the drywall. |
 | After that, the second socket is inserted into its socket. |
 | The socket boxes are trimmed along the vertical axis, and then they are fixed. To do this, turn the screws (or self-tapping screws) clockwise to move the presser feet. On many models (in particular - on the demonstrated one) this movement is well observed visually. For some, it is invisible, and you have to focus on the effort on the screwdriver. In any case, the rotation of the screw is carried out until it is felt that the foot rested against the drywall. They move to the opposite foot - and bring it to the same position. After that, another half-turn is made on both screws - and that's enough. In no case should you overtighten - the foot can begin to crush drywall from the inside. |
 | Similar actions are repeated on the second socket. They can be assumed to have been successfully installed. |
 | Next, the cable sheath is removed. In principle, sockets can also be installed. But it is recommended to also putty this knot - this will increase its strength. And, in general, it is better to finally mount the sockets after finishing the finish. |
 | This means that the ends of the wires must be insulated ... |
 | ... and then gently roll up and hide in a box. The installation of the sockets themselves, when the final conditions are created for this, is no longer different from the examples discussed above. |
* * * * * * *
So, the issues of self-installation of sockets were considered. Of course, the examples shown are not limited to the variety of possible installation options.
If, after reading the article, a reader who is inexperienced in electrical engineering still has unresolved questions, the fear of self-installation has not passed, it is better not to take it. Call an electrician - it will be safer and more reliable.
But if you decide to do it yourself, then always before starting work, make sure that the network is completely de-energized. And after the installation is complete - carefully check the correctness of all connections, the quality of the insulation - and only then can the voltage turn-on test be carried out.
At the end of the publication - an interesting video on the same topic:
Video: The nuances of proper installation of grounded sockets