Tls client does not see the certificate. Electronic budget. Root certificate not found. Common mistakes when connecting to gis
In connection with the change of the server certificate lk.budget.gov.ru, it is necessary to make changes to the configuration of the Continent client installed on yours, namely to change the server certificate. The new certificate is available for download on the website in the section GIIS \ Connection to the systemhttp://www.roskazna.ru/upload/iblock/e91/lk.budget.gov.ru.cer
Or download from the OTP website
To create a new connection ( Continent - 1.2.1073.0).
Go to the "Start" menu
1. In the search bar, type "Configurator"
2.Select a configurator
3. Go to the "Connection settings" tab
4.Click the "Add connection" button

5. In the line Address / server name, specify ( lk. budget. gov. ru)
6. Click the "Next" button

7. Press the " Select certificate”

8. In the search bar, select a folder or path to a file lk. budget. gov. ru. cer
9. Select a certificate
10. Click open

11. Make sure that the required certificate is selected and click next

12.Address of receipt CRL: leave unchanged and click "Next"

13. Receiving address CRL: leave unchanged and click "Next"

14. New connection of successfully created one, close by button "Ok"

To edit an already created connection, you need:
1.Click the "Edit" button

2.Select a certificate from the list
3.Click on the button "Select certificate"

4. In the search bar, select a folder or path to a file lk. budget. gov. will inform you about the successful change of an existing connection

Certificate replacement completed
Setting up an electronic budget workstation takes place in several stages, they are not complicated, but require care. We do everything according to the instructions for setting up an electronic budget. Briefly and to the point ...
Electronic budget workplace setup
Root certificate e-budget
Create a key folder in My Documents to store downloaded certificates in this folder:
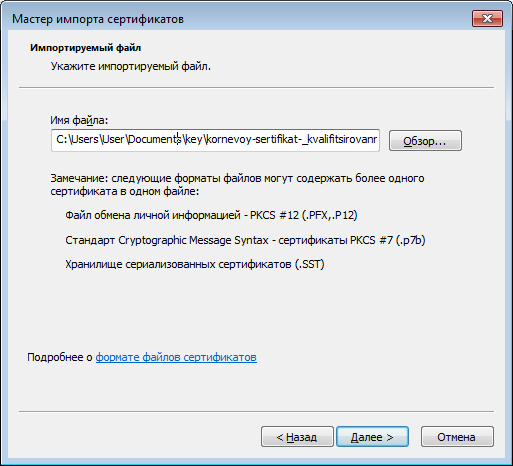
On the site http://roskazna.ru/gis/udostoveryayushhij-centr/kornevye-sertifikaty/ in the GIS menu -> Certification center -> Root certificates, you need to download “ Root certificate (qualified) "(see figure), or if you received a USB flash drive with certificates, copy them from the Certificates folder.
Continent TLS VPN Certificate
The second certificate that you need to download is the Continent TLS VPN certificate, but I could not find it on the new roskazna site, so I put a link from my site. Download the Continent TLS VPN certificate to the key folder, it will be useful to us later when we configure the Continent TLS client program.
Install the downloaded Root Certificate (qualified) to work with an electronic budget.
In the START menu -> All programs -> CRYPTO-PRO -> run the Certificates program.
Go to Certificates as shown in the picture below:

Go to the Action menu - All tasks - Import, the Certificate Import Wizard window will appear - Next - Browse - Find the downloaded Root certificate (qualified) in our case, it is located in My Documents in the key folder
If everything was done correctly, then the root certificate of the Federal Treasury CA will appear in the certificates folder.

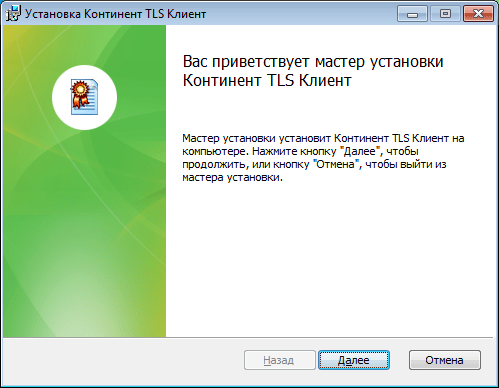
Installation "Continent TLS Client" for working with electronic budget
Continent_tls_client_1.0.920.0 can be found on the internet.
Unpack the downloaded archive, go to the CD folder and run ContinentTLSSetup.exe

From the item, click on the Continent TLS Client KC2 and start the installation.

We accept the terms

In the destination folder, we leave it by default

In the Configurator Launch window, put a check mark on Launch Configurator after installation is complete.
During installation, the Service settings window will appear:

Address - specify lk.budget.gov.ru
Certificate - select the second certificate downloaded earlier in the key folder.

Click OK and complete the installation, Done.

On request to reboot operating system we answer No.
Installation of the electronic signature tool "Jinn-Client"
You can download the Jinn-Client program on the Internet.
Go to the Jinn-client - CD folder, run setup.exe
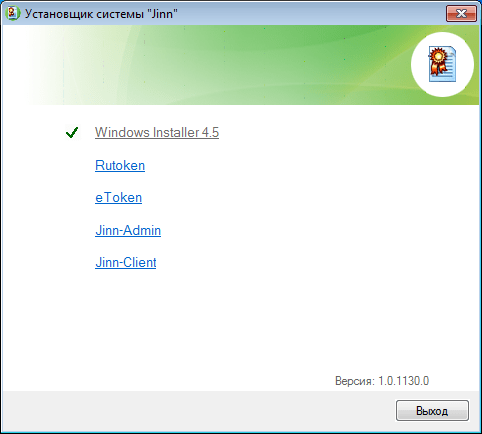
Click from the Jinn-Client list, the installation of the program starts

Ignore the error, click Continue, Next, accept the agreement and click Next.
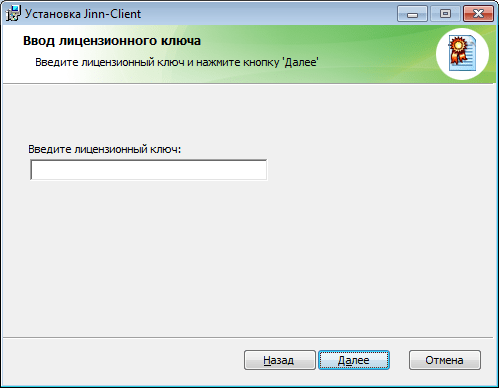
Enter the issued license key

Install the program by default, click Next


We are completing the installation, we answer the question about restarting the operating system No
Installation of the module for working with electronic signature "Cubesign"
If you need an archive with the program, write in the comments.
Run the cubesign.msi installation file


Configuring the Mozilla Firefox browser to work with the Electronic budget.
1. Open the "Tools" menu and select "Options".
2. Go to the "Additional" section on the "Network" tab
3. In the "Connection" settings section, click the "Configure ..." button.
4. In the opened connection parameters window, set the value
"Manual configuration of the proxy service".
5. Set the values of the HTTP-proxy fields: 127.0.0.1; Port: 8080.

6. Press the "OK" button.
7. In the "Settings" window, click the "OK" button.
Login to the personal account of the Electronic Budget
A window will open with a choice of a certificate for entering the personal account of the Electronic Budget.

We select a certificate for entering the Personal Account of the Electronic Budget, if there is a password for closed part write the certificate and click OK, after which the Personal Account of the Electronic Budget will open.

I told you how to install the Continent AP program on Windows 7. The fact is that this program uses certificates in its work, with the help of which a secure connection and data exchange with the Continent AP access server are created. In this article I will try to tell you how to create a certificate issuance request for the AP Continent, as well as how to install this certificate into the program.
I will show, as always, with pictures, though they were made on a computer running Windows XP. So let's get started ...
After installing the Continent AP, a "gray shield" icon should appear in your tray. If you click this "shield" with the right mouse button, a context menu will appear, as shown in the picture below:
Here you need to select the "Certificates" menu item, and then "Create a request for a user certificate". The following window will open (Fig. 2):

This form must be completed. Remember to insert a blank key carrier before doing this. After all, after filling out this form, the generation of private keys will begin, which occurs on the rejected key carrier. This can be, for example, a USB flash drive. If you use the Crypto PRO 3.6 or higher program on your computer, then the flash drives are enabled by default. And to be more precise, "All Removable Media". I do not consider generation on a key carrier of the "Registry" type. this is prohibited in our UFC.
So, let's get back to filling out the form (Fig. 2). As you can see, it consists, as it were, of two blocks. I outlined them in yellow. If everything is intuitively clear with the upper block (you need to fill in all the fields), then I will dwell on the lower one in more detail. You must immediately check the box " paper form". By default, it is not installed. Using the" Browse "buttons, you can select a location to save files. And there will be two of them. * .Reg and * .html. The file names can be edited as you like, without changing, of course, file extensions.
By default, the program offers to save under the following name: the name of the computer on the network (I circled it in blue), the date and time of the request. As you can see from the figure, the request was created on December 10, 2015 at 9 hours 51 minutes 46 seconds on a computer named "imyacompa". The last 3 characters are added randomly. They always consist of three digits and I did not notice any system in their generation.
It is worth noting that if you downloaded the Continent AP version 3.5.68.0 from my site, then most likely there is an old template of the printed form. After installing this program, you need to change this template. This is relevant for our region, namely Chelyabinsk region... Changing the printable template will affect only the printable in * .html format, it will not have any effect on the * .req file.
If your region uses an old template, then you should follow the guidelines for your region. You can download the new template from the following link. If you are in our region, then before generating keys and a certificate request, change the template in accordance with the instructions in the attached file.
So, having decided on the name of the files, you can start generating a certificate request by clicking the "OK" button. As mentioned above, we will get 2 * .req and * .html files, as well as private keys on a USB flash drive or any other medium.
Next, you need to act in accordance with the procedure for submitting requests for a certificate, which is valid in your UFC. Here we print a * .html file on paper, sign it by the owner of the certificate and the head of the organization. Then we transfer to the Treasury a paper copy and a * .req file on removable media and in return we receive a certificate.
So, the request was sent to the UFK, we received a certificate. By the way, time may pass between sending a request and receiving a certificate, everyone has different ways, but the main thing is to wait for the certificate. What's next? And then right-click on the "shield" of the AP Continent and do what is shown in the picture below:

Namely: go back to "Certificates", and then "Install user certificate". The arrows in Figure 3 show what to do. Before that, insert the key carrier with the private keys obtained as a result of the generation, and also prepare the certificate received from the UFC. I copied it to a key carrier so that it was always at hand. You can do it your way: rewrite it anywhere, the main thing is that during installation you can get to it. By the way, along with the user certificate, our UFK also issues the root certificate of the Continent AP. This certificate, when installed, must be located in the same directory as the user's one. In general, the figure below shows all this:

The root certificate of the Continent AP is the root. This certificate is required when installing Continent AP for the first time. After installing the custom certificate, the program installs the root certificate if it is not installed. Otherwise, it does nothing. But if the first time the program does not find the root, then there will be problems. Therefore, it is better to always be together with the user certificate in the same directory.
Here, Figure 4, during installation, of course, you must select the user certificate. It is underlined by me in the picture. And the yellow folder is the private keys obtained when generating the request. There are six files with * .key extension. By the way, the keys are standard for the Crypto Pro 3.6 program. After all, it is she who generates these keys. So, having selected the user certificate, we press the "Open" button and get to the following picture:

The topmost line is the key container with private keys. And at this stage, we just have to indicate to the program the key container corresponding to our certificate. Namely, the one that was generated when creating the certificate request. In general, I will allow myself a small digression ... All EDS that are generated using Crypto Pro (you do not think that the keys are generated by the AP Continent) consist of two parts:
- a private key is a key container that is obtained during generation;
- the public key is a certificate obtained from the treasury.
These parts are connected (again, with the help of Crypto Pro) only if they match. It is not difficult to conclude: if one of the parts is lost or damaged, then the entire EDS stops working. And it is impossible to fix this situation, except for the generation of a new EDS. There are ways to make a copy of an EDS, but I will not touch on this in this article.
So, back to "our rams". In Figure 5, be sure to click on the top line with the key container, and then click "OK". After all this has been done, you will receive the following window:

Well, here only "OK", there are no other ways ... Congratulations, the certificate is installed. It's time to test its performance. To do this, you need to do as the following picture tells us:

Right-click on the "shield", go to "Establish / break connection" -> "Establish connection Continent AP" and get into the following window:

Click where the red arrow shows (Fig. 8). If in the previous steps you followed this instruction, then you will get at least one certificate. You should choose exactly the one you just installed (see Figure 9):

After selecting it, check the box "always use this certificate when connecting. "In this case, your Continent AP will connect to the server using the specified certificate. Otherwise (if the checkbox is not checked), it will offer to select a certificate each time you connect. To find out if the certificate was selected correctly, you can use the" Properties ". It will show everything about the selected certificate. At the end, as always, the" OK "button. The process of connecting the AP Continent to the access server will begin. blue:

If you succeed the same as mine, then I am glad to congratulate you on the successful installation of the certificate for the AP continent. After you have connected to the access server, you can load the SUFMS and start working in it.
P.S. And one more thing: I think that I have explained everything here in sufficient detail. But still, some questions may arise. In this case, write them in the comments below. By the way, for registered users of my site, comments appear immediately, without moderation.
And finally ... If you liked this article and you learned something new from it for yourself, then you can always express your gratitude in monetary terms. The amount can be anything. This does not oblige you to anything, everything is voluntary. If you nevertheless decided to support my site, then click on the "Thanks" button, which you can see below. You will be redirected to the page of my website, where you can transfer any amount of money to my wallet. In this case, a gift awaits you. After a successful money transfer, you can download it.

New version of HandyCache released.
The changes made in this version are mainly related to fixing problems and errors.
In the archive of the previous version, I put the updated dll-libraries libeay32.dll and ssleay32.dll compiled by me. These libraries work when the SSL Handling option is enabled. As I found out, one of them, when loading, required the presence of the msvcp120.dll library. The absence of this library on the computer resulted in the message Port xxxx already in use when starting HandyCache with the SSL processing option enabled. This time I have compiled the specified dlls in such a way that additional dlls are no longer needed.
I am sometimes asked: which one Windows version requires HandyCache? If you do not use the SSL Handling option, you can use Windows 7 or 10. If SSL Handling is used, then it is better to use Windows 10. If you are using Windows 7 HandyCache, when accessing some sites, the SSL Handling option cannot work. There are far fewer such sites when using Windows 10. If HandyCache is unable to process SSL when working with a specific site, then it automatically disables this option for this site and in the Monitor in the Rules column the message Stop SSL decryption for this host + useragent is displayed.
WITH complete list changes can be found below.
To install version RC4 1.0.0.885, unpack the archive over the existing version and replace the existing files. New lists of rules will be created automatically when HandyCache starts only if there are no current lists (files * .lst, * .lso and * .lsb).
If HandyCache has not yet been installed on your computer, then just copy the contents of the archive into an empty folder and run the exe file.